Street Photography

Starting With Pentax ME Super 35mm SLR

The Pentax ME Super first made in 1979 and finished production in 1983. This is a wonderful full-frame SLR camera and we're going to break this down to see how we can start shooting with it.

The 28mm F2.8 lens is a wonderfully small, nimble little thing. It is a very compact lens and packs a punch. You will find the aperture and shutter controls on the lens itself. In the video, I demonstrate how you can adjust these controls.

Pentax is a very reliable brand, as such, it became trusted amongst professionals and hobbyists alike. Therefore, it should be relatively easy to pick up one on eBay. However, I would recommend popping into a local vintage camera store. You will be able to talk to someone about the camera and feel more confident with your purchase.

At the front of the camera you've got a timer. You can pull this down. Once you hit the shutter release, it'll start going and then it takes about 10 seconds for it to get to its point. So enough time for you to run to get into the shot. There you go. That's the front of the camera.

At the top of the camera you've got your bracketing exposure setting so if you want to change it, it's really quite simple. You just rotate the dial and then you're good to go. It is a little simpler and easier than the Nikon FA equivalent. Also at the top, you will find your shutter release which you can pop a cable release into.

With such a compact design it is even more handy to have a hot shoe available at the top. Just be really mindful that when you put on a trigger or a remote, when you're taking it off, do so slowly. You don't want to lose the metal contacts from the hot shoe! Considering that this is a very old camera it might be difficult for you to get some new ones on. Ultimately, it will be very pricey for you.

In comparison with the Nikon FA there are fewer modes to choose from. The three available are, manual mode, as well as the auto mode.

One of my favourite things about this camera is the traffic light system which you can see inside the viewfinder. This could be particularly useful for any new film photographer with no light meter. That way you're going to make sure that you've got your subject, your scene well exposed for. To make the light meter work, you will need two L1154 Cells. You can find these online from a good electrical retailer. It is straightforward to pop in and I would strongly recommend putting in a couple, especially if you don't have a light meter.

To release the film back all you need to do is lift the little dial at the top of the camera and then it will pop open. You can go ahead and pop your film in there. Pull it across to the other side. The spool on the right hand side of the camera is very unique. It's very easy to put the film tongue into this and then you can just go ahead and kind of rotate the film. It will catch on very quickly and easily. This was, I think, unique compared to other 35mm cameras from its time. Once you've got that done, you can go ahead and shut the back and make sure that you've got that shut down and go ahead and shoot to your heart's content.

In the video I show the similarities and differences between the 28mm and 50mm in terms of weight and size. Pentax lenses are excellent and think carefully about what type of images you enjoy taking before committing to a new set of lenses.

This Pentax ME Super has a faster, lighter full manual exposure control than the K1000 available. It also has a cable release function so you can pop in the cable release into the top here and use that as well. I think this is a wonderful street photography camera.

It's so easily held. It's light, it's portable, it's quite friendly in the way that it looks, and also when you're carrying it. For any beginner photographer I would strongly recommend getting one of these. Particularly for those of you who don't have light meters and want to use one that's already built in, this will be perfect for you. Just to make sure that you get those shots absolutely well exposed.

Considering the Pentax, they had so many of these cameras out there. If something does go wrong then you've got options to find ways of fixing it. However, even if the battery stops working the light meter stops working, as it is a fully mechanical camera, so it will carry on working without those functions!

I'd love to hear from you as well. What's the best way to shoot with this? Doesn't really matter whether you're shooting colour, slide film, black and white film, everything's going to work here. Just make sure that you expose it well. Let me know in the comments below. I would love to hear from you!

Starting With Nikon FA 35mm SLR

The Nikon FA SLR camera which first came out in 1983, and finished production in 1987. It was revolutionary in many ways and a lot of our digital photography today has been influenced by something that resides right at the top here.

I'm going to break down all the different components of this camera, and where you can go away and start shooting with it, so let's dive in.

Understanding Nikon FA Lenses

Let's start off by looking at the lens. To remove the lens, you just need to press this silver button here and then rotate. This is a 35mm lens perfect for street photography, and it's the original one that came with the body itself.

The brilliant thing about Nikon is that you can use modern lenses with an F Mount. Therefore you can go ahead and shoot with a 50 mm or a 70-200 mm that you bought for your DSLR.

To change the aperture, you rotate the dials on the lens itself. So this particular lens goes from F2 all the way through to F22. Changing the focus is pretty simple and straightforward, you just need to rotate on this grip on the lens and then you're good to go.

What is the Close Loop Exposure System

The Close Loop Exposure System was revolutionary when the Nikon FA was first released. Once you have focused your shot and pressed the shutter, the exposure will be adjusted electronically in the camera itself. It actually exposes one stop down to compensate for how the light is going into the diaphragm of the lens itself, which is incredible, because every single time you'll get that shot spot on.

Back in 1983 there were a lot of photographers who didn't like that. They were kind of averse to anything new coming out, they wanted to stick with what they knew, and what worked for them. As such Nikon added this little button to the bottom left side of the lens.

By pressing and rotating it, it takes it back to the original exposure system that existed prior to the system that was developed in this camera. Therefore if you want to stick to the old school settings, all you have to do is use that function there.

I’m not sure if the close loop exposure system works with modern F Mount Lenses but if you do let me know!

Adjusting the Shutter and Aperture Settings

Let's have a look at the dials at the top of the camera itself, on the left hand side of the camera here, you've got your ISO settings, and you can just plug in what speed ISO film you'll be using, so for example, in this case we'll be using some Ilford HP5, you just lift this up a little bit and then rotate the red mark until you hit ISO 400.

If you wanted to bracket your images, that's pretty simple to do, depress and rotate the little silver button at the top.

At the top also on the right hand side of the camera, you will find the shutter speeds. The Nikon FA goes from bulb mode all the way to 1/4000th of a second. Ideally you should be using a dedicated light meter when finding the ‘correct’ settings for your image.

Nikon FA Matrix Metering System

The camera does have its own matrix metering system which was revolutionary at the time. It has continued to be used in digital cameras up till today. I'm not so familiar with whether that's the case with the mirrorless cameras but certainly with DSLRs has been used across all different brands from Canon to Sony.

For the first time, you also had ‘Program Mode’, ‘Shutter Priority Mode’, ‘Aperture Mode’, and complete ‘Manual Mode’ too. For anyone who has picked up a modern DSLR will know and often be scared off by these dials! My preference is to gravitate to manual mode. However most amateur photographers prefer to be in program mode.

Managing your Hot Shoe

At the top, you've got the shutter release as well as the hot shoe. Remember always to, regardless of a camera you've got, look after your hot shoe. Don't just rip off any remote that you might have plugged in at the top. Gently take it out cause you want to look after the metal bits and particularly with all the cameras. You don’t know if you'll be able to source parts for it, so bear that in mind.

Film Loading Basics

Once you've loaded up your film, to the first frame all you have to do is pull on the shuttlecock. Press the shutter and repeat until you get to the first frame. If you're careful and for example, if you load your film in a dark bag, you can actually start firing and get probably one or two extra frames on your roll film.

My advice would be to pull off the side of the box the the cover, and then slide it into the holder on the back of the camera. When you finish your 36 frames or maybe 37 or 38, press the silver button found at the bottom of the camera. Then once that's been depressed inside so you can't feel it on the outside, you can go ahead and roll your film and so just rotate it and then keep going until you hear a little click at the end. Once you've done that, all you have to do is open up and pull out your canister. Close the back and then send off for development!

There are some wonderful other little functions. There's a self timer, which is found at the front of the camera. Pull the lever with a dot on down and then once you depress the shutter, it will release, and at 10 seconds the picture will be taken. That's something for you to use if you want to do a selfie. You have also got a cable release option at the top and the left hand side here, there's two different versions, one which goes directly into here and also a cable release at the top here, which you can screen at at the top.

At the bottom of the camera, you may have noticed that there are some different things going on here. If you're going to be using the light meter embedded within the camera at the top, then you're going to need to have a functioning battery. Using a coin twist, open the silver tab. You will need two A76 batteries.

I would recommend investing in the A76 batteries, because there is a traffic light system on display when you look through the viewfinder. Red obviously means you are not advised to shoot the frame, amber it's exposed ok, and green obviously is good to go.

You'll notice on the far left hand side of this camera, there are these golden bits, which is where you can add a speed grip to your camera. The grip itself requires eight AA batteries to function and consequently adds more weight. I find that it comes in handy if you're doing a fashion shoot or you are doing some portraits perhaps in a studio, as such, I strongly recommend it.

When to Shoot with the Nikon FA

Use an appropriate lens for the conditions that you are working in. If you're doing some street photography, then I recommend using a 35 mm. If you are working with a singular person or a couple of people, then I would go for the 85 mm. Alternatively a 50 mm is perfect if you're not sure about whether you're going to be shooting some landscapes or portraits.

A 70-200 mm, especially if you're going to be shooting from some distance, would become highly recommended. You can use the newer DSLR F Mount VRII 70-200mm, obviously the auto focus is not going to work on this but the manual will, and you'll get some beautiful images for sure especially with that new glass that you might have.

The fact that you can use F-Mount DSLR lenses can be for most photographers a game changer. The ability to be able to use modern and older lenses easily on analogue and digital bodies saves you considerable amounts of money.

The Nikon FA is hardly ever talked about, you're going to find this camera online, at a very modest price compared to say the Nikon FM2, which is a very, very popular Nikon camera. In fact, I would strongly recommend investing in one if you are a Nikon shooter already.

You'll save a lot of money too. Generally these older cameras are really super well kept. It is a little bit trickier to find the black bodied ones with the silver bodied ones being a lot easier to find.

Finally, this is a super light camera to carry, once you've taken the handheld grip off, easy to use. Iif you've used the Nikon before, you know exactly how to use it straight away, It would just be seamless. It's lightweight, easy to carry, perfect, I would strongly recommend it if you're looking to do street photography, very easy to throw into your bag, and take with you anywhere that you go.

Starting With Holga 120 WPC Medium Format Landscape Camera

The Holga 120 WPC is plastic-bodied pinhole camera. It does 6x12 frames as well as 6x9 with a mount. It is the most simplest camera you will find out there, especially if you want to shoot medium-format wide landscapes in particular.

The way that you use this camera is pretty simple. I'm going to take you through the basics of it so that you can get shooting straight away.

How to start shooting with the Holga 120WPC

The way that you release the pinhole is by pushing this button inside. It's on the side. Then it will release the f135 aperture with a 0.3-millimeter radius, pretty small pinhole. You'll get your frame on 6x12. In total, you're going to get six shots on a 120 roll. You've got to carefully think about what you want to shoot as well as how you want to frame it before you start shooting it.

At the top of the camera, you have a very simple outlay. This is where you wind your film. You can hear the little click. The little dots at the top are guide on how to compose your image. You will need to look down the middle and line your shot either side. Thankfully, you have a little spirit bubble at the top here, so be sure to align your bubble in the middle to get some balanced images.

Before you start shooting with this camera, make sure that you have this arrow at the back that's on the downward one. It should point at ’12’ instead of pointing at ’16’. As such, you will get 6 frames when shooting 6x12.

I have created a little label and stuck it of my Holga 120WPC. It outlines what I need to do when shooting 6x12. IIn summary, once you've got frame number one lined up in the window , then you need to skip once you've taken the shot to number three, then to frame five, then to seven, then to nine, and finally 11. If you don't do that, you're going to get double exposures happening along the frames themselves. It can also create a great deal of confusion when cutting your negatives after they have been developed! In summary, remember the frame count is always in odd numbers.

If you are unsure about other guidelines, www.mrpinhole.com is a great website for the finer details on pinhole photography. At the back of the Holga, there is some exposure guide information. If you're shooting fine weather, hold the shutter for seven to nine seconds. Overcast hold for 10 to 12 seconds and morning or dusk, hold for 13 seconds. Ignore this! I've tried several times with these recommendation and not had much good luck. Instead, invest in a light meter such as a Sekonic L308x or use a light meter off your own mobile phone. Even if you are shooting for fun, you want your images to be well exposed, as such, don’t cut corners with this.

How do you load the film on a Holga? Pull the silver latches on either side and gently lift them off to remove the film back. You'll need to make sure that you have a spare spool so that you can load your film on. Just try not to move this foam bit in the middle because otherwise the film would not sit properly and also make sure you don't remove the foam from the other side either.

Now pop the film in and then draw it across. Once you've got the film in place and you put the tongue in on the right hand side of the camera. A word of caution, just make sure that you can actually feel the film going on. So you might need to give it some help here cause for some reason there's no not another latch down here to attach the film on. You might find that it won't catch in which case you're going to have to keep on just trying. A way to get around that would be to put some sellotape.

Then align your film arrows as you're loading it on until it's in the middle so I don't lose any frames. Make sure that you tighten the roll on so you can feel the firmness on the right hand side of the camera. Once you have the arrow in the middle, all you need to do is pop back on the film back make sure that it's the right way up, and then just gently hover over and it should definitely go in.

Then on the either sides of the camera just make sure that the film back sits flush and pull down the latches to firmly put in to place. There won't be anything in the red viewing window so you need to keep rolling the film until you see a bar. Then you keep going until you see some sundials. It is very easy to skip the first frame. Therefore just be really slow and gentle with it when you are first starting off. Keep going until the sundials get larger and larger. At this point slow down further until you get to frame number one.

You can shoot handheld or with a cable release by depressing the button located next to the lens of the camera. Just remember, when you have shot the first frame skip to number three, then five, then seven, nine and then finally 11. Once you have your six frames make sure you do some extra winding of the film at the end just to make sure that it's all securely rolled up. Take off the film back off by depressing the silver latches and you've got your film.

Top Tips on Using the Holga 120WPC

That is the full breakdown of the Holga WPC 120 pinhole camera. Firstly, I strongly recommend that you shoot this camera on a tripod because any little shake on this camera will have an major impact on your film.

Secondly make sure that you have a cable release. Get a strong sturdy cable that will last you a long time. It gives you that further control when you're shooting. Particularly when you're shooting on a tripod.

Remember the images are not going to come out tack sharp. If you are one person who can do that I would love to know how you do it in comments section of my video. On each frame expect that you're going to get heavy vignetting occurring.

Get out there, play with lots of different films, just get an understanding of how light works, how you need to compose your images. This is perfect for that. It's very inexpensive. I think this costs about £50. You can use this pretty much forever. It's completely mechanical, nothing electronic about it in any way, shape or form. Finally, don't use the exposure guides given on the back of this camera!

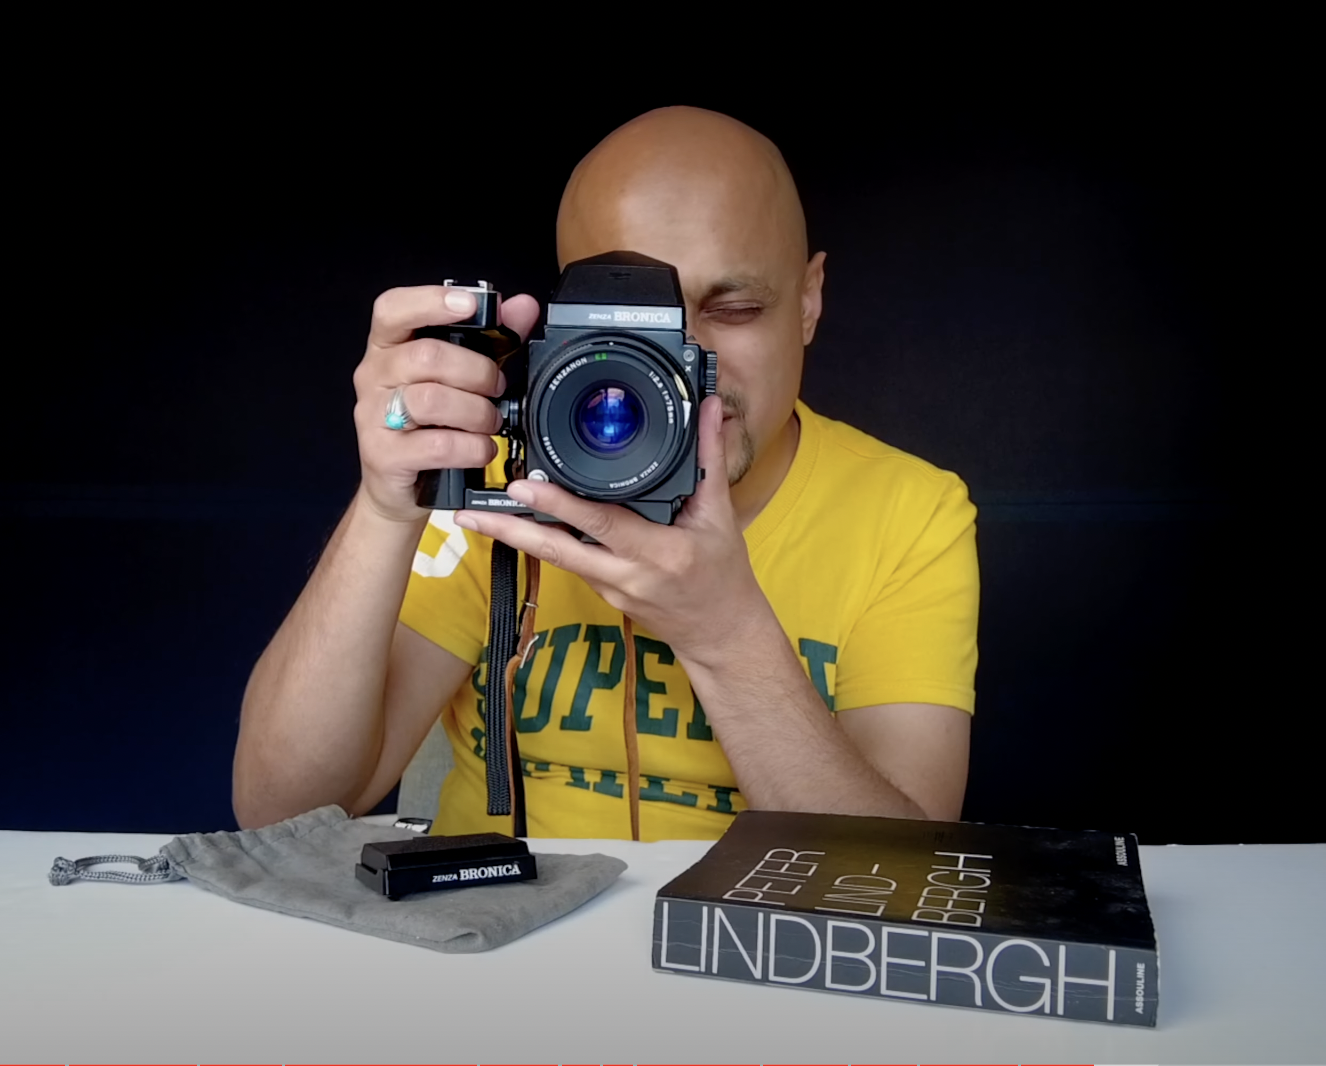
Starting With Bronica Zenza ETRS 645 Medium Format Camera

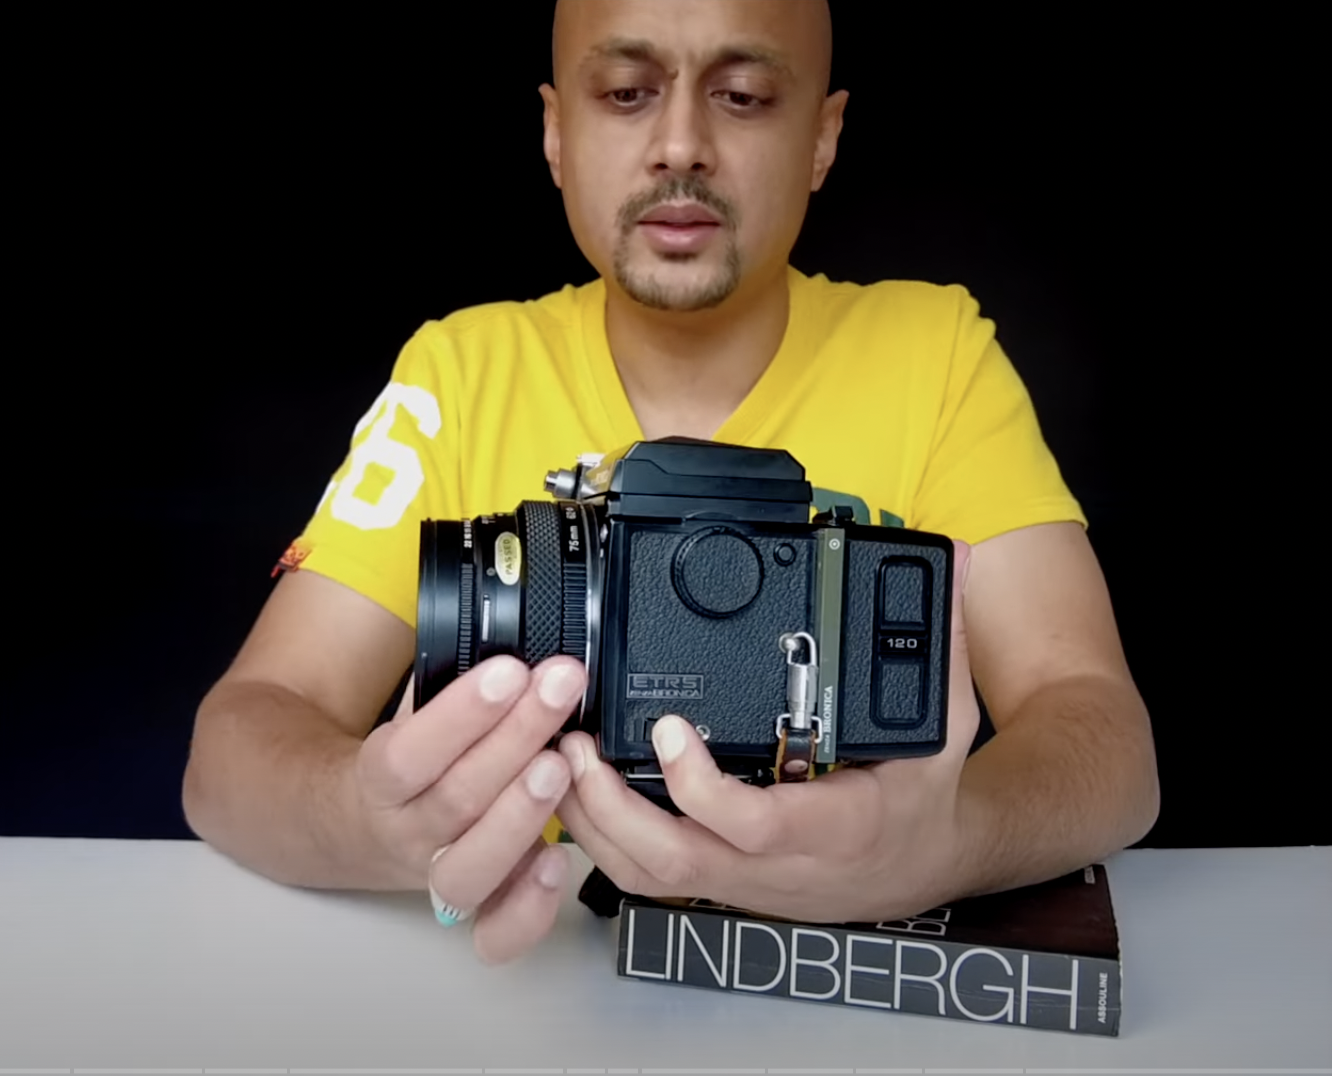
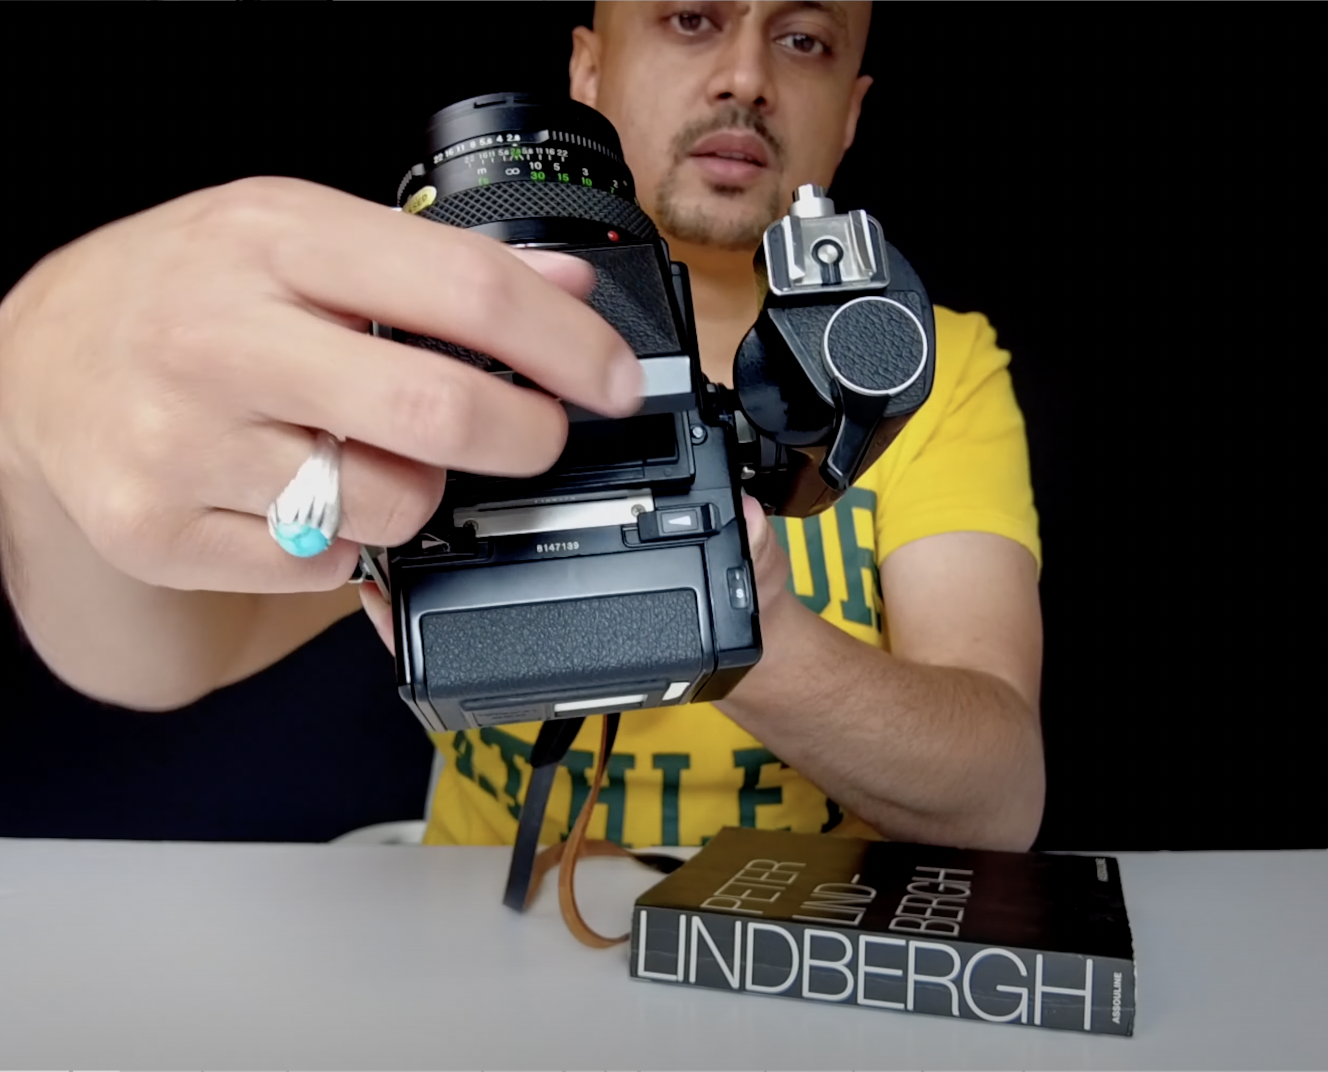
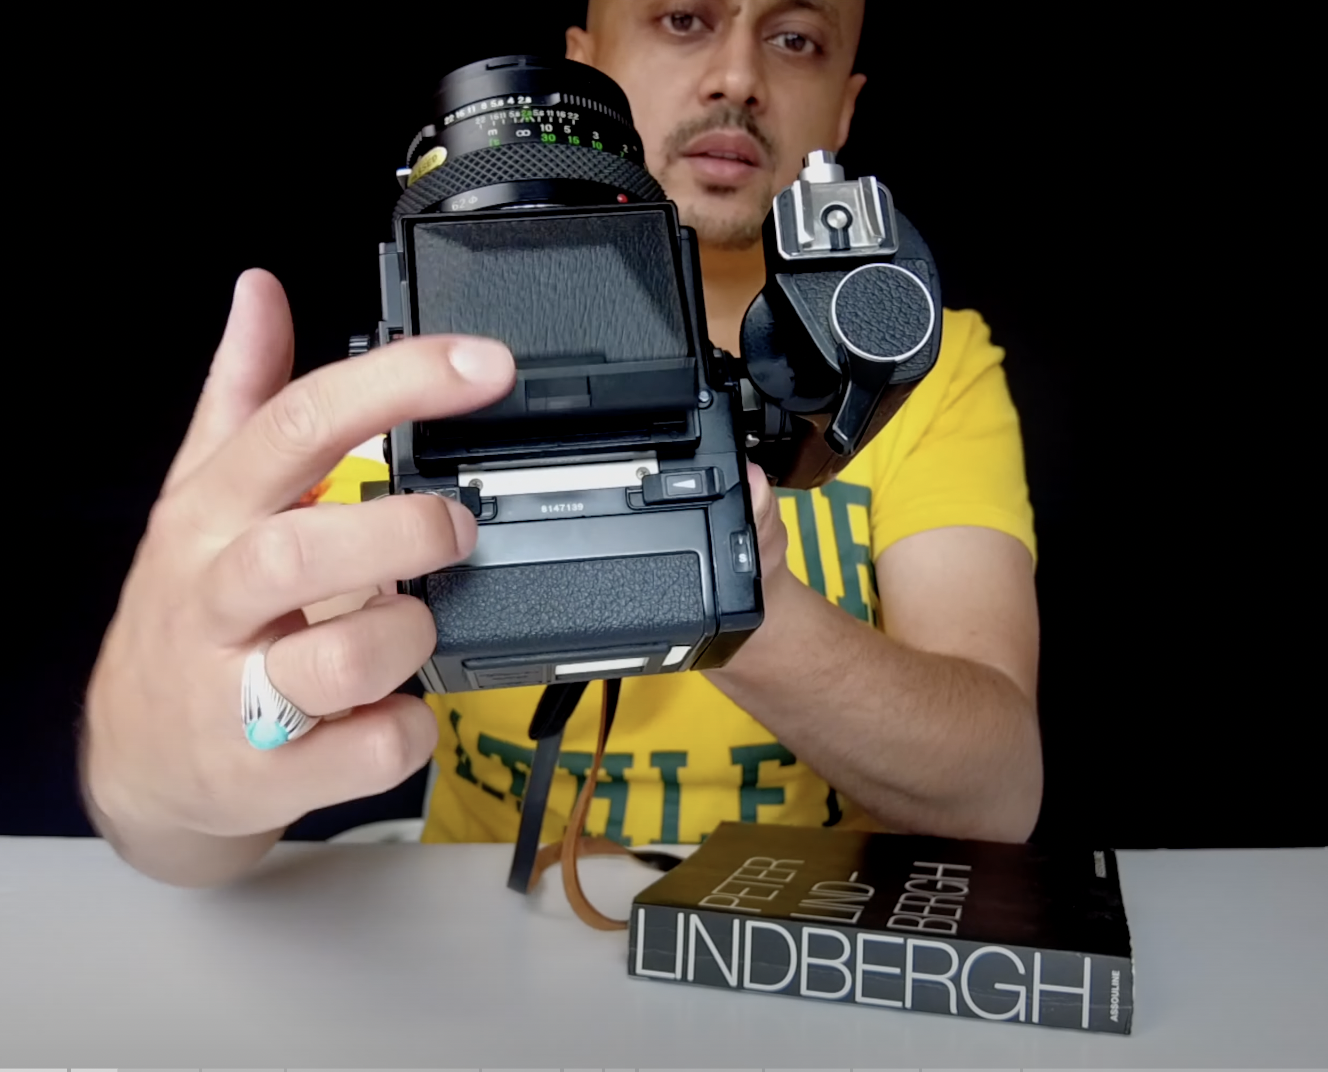
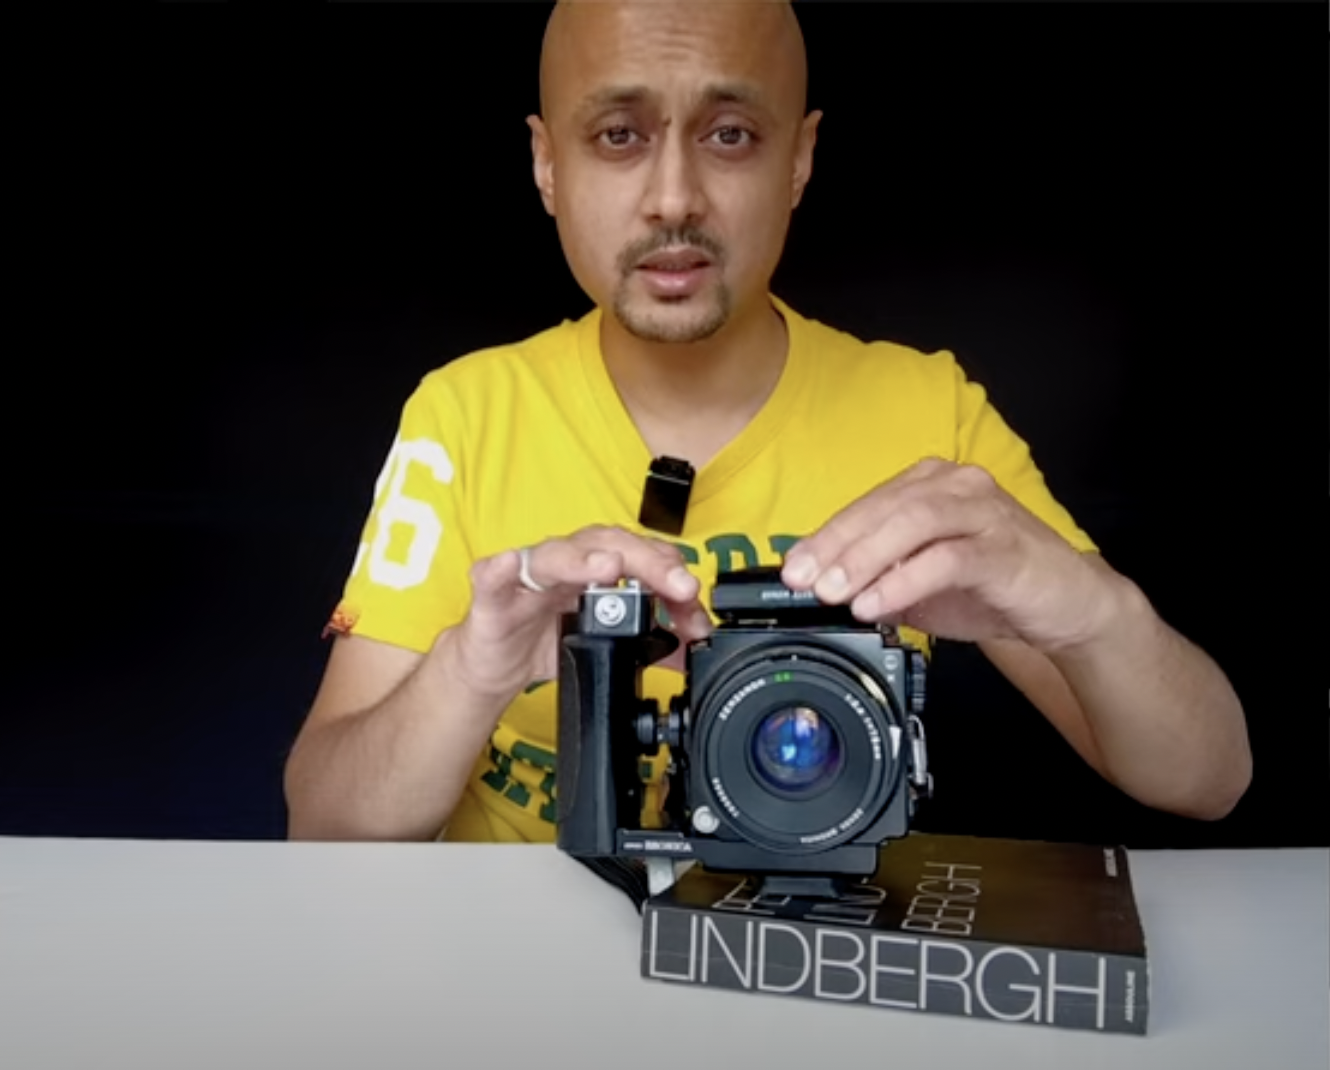
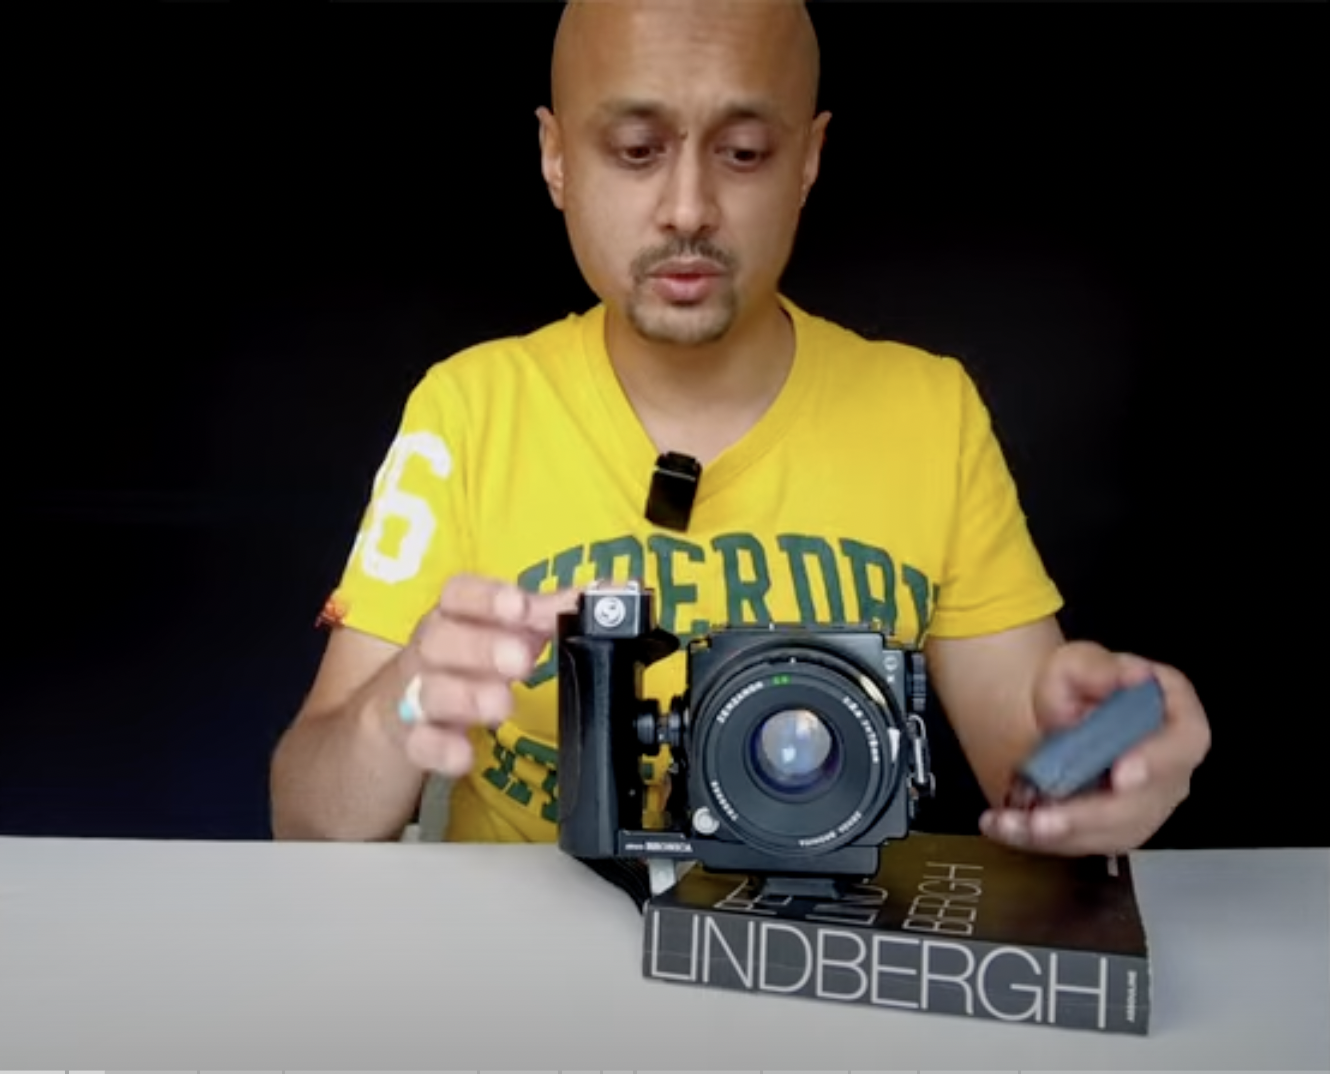
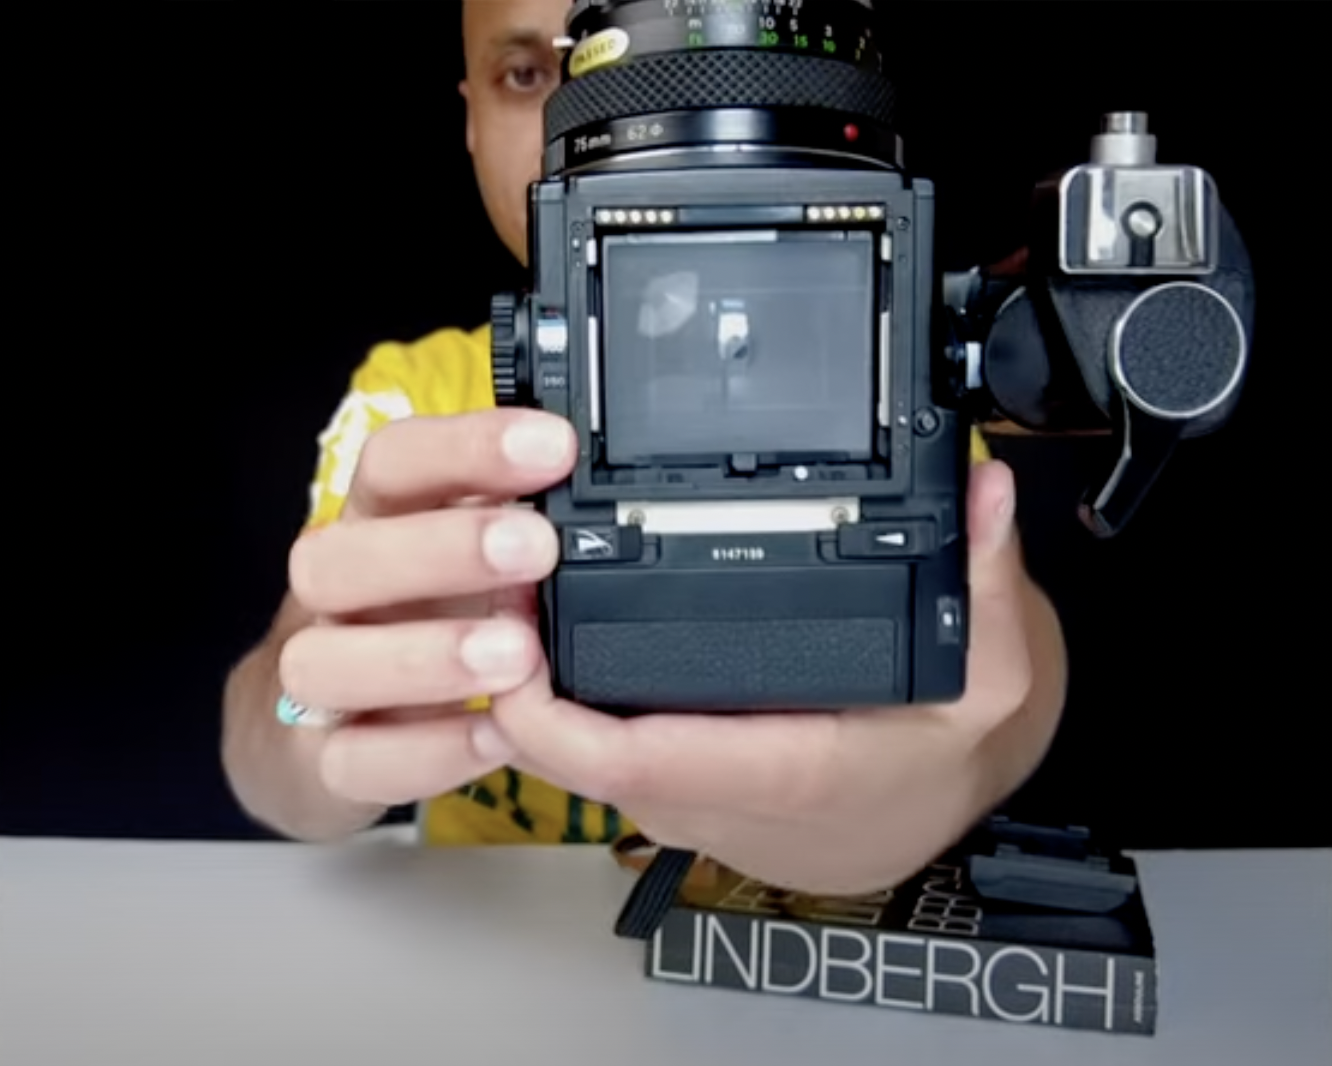
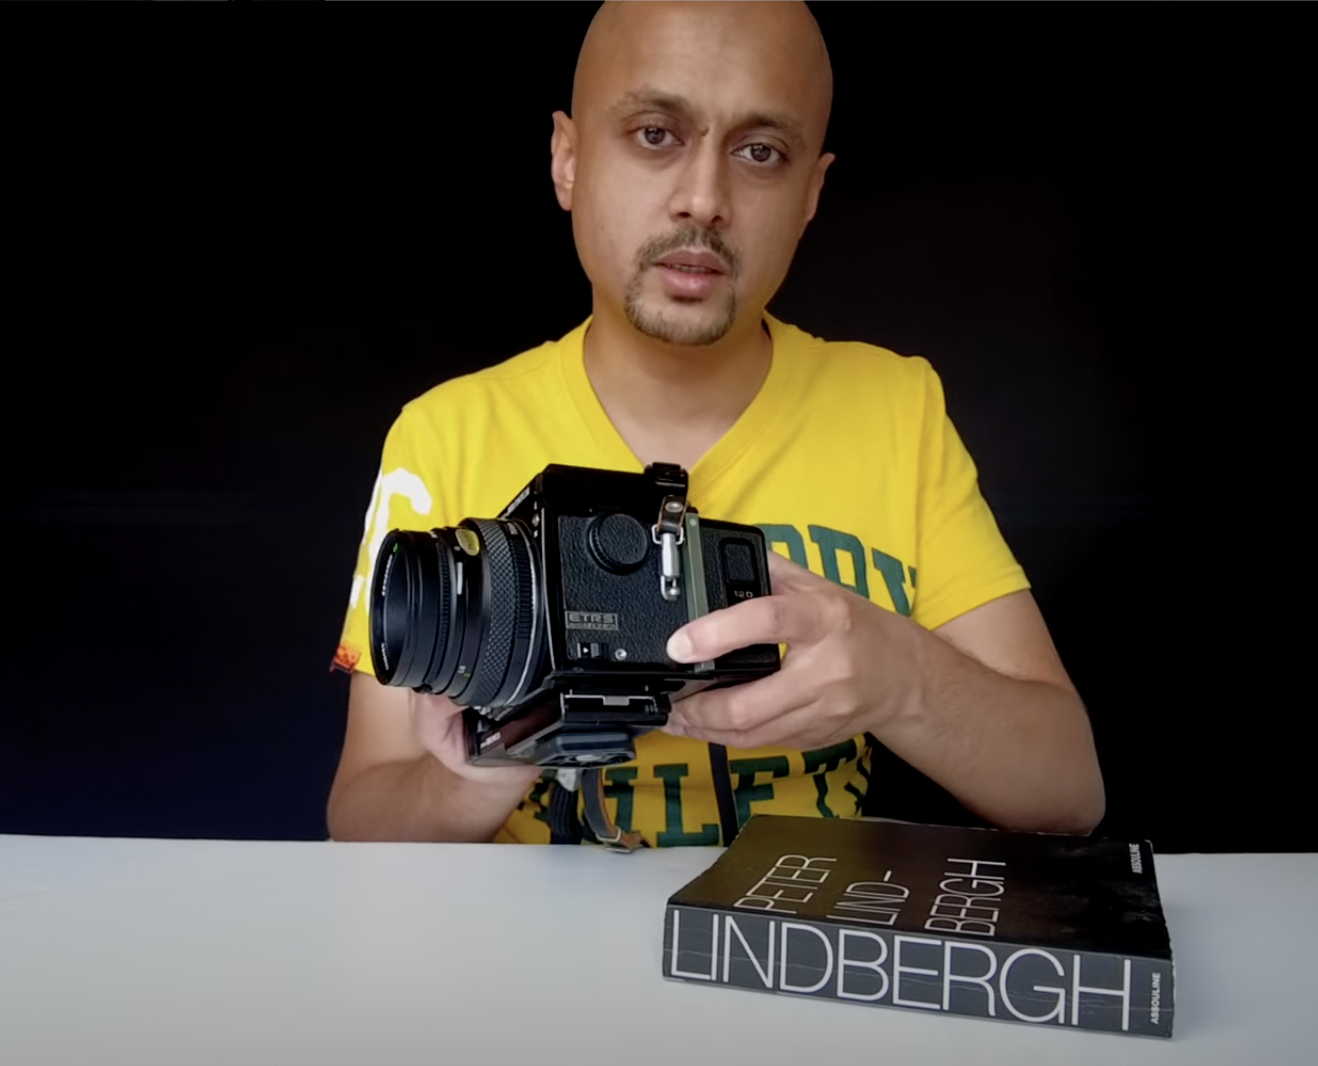
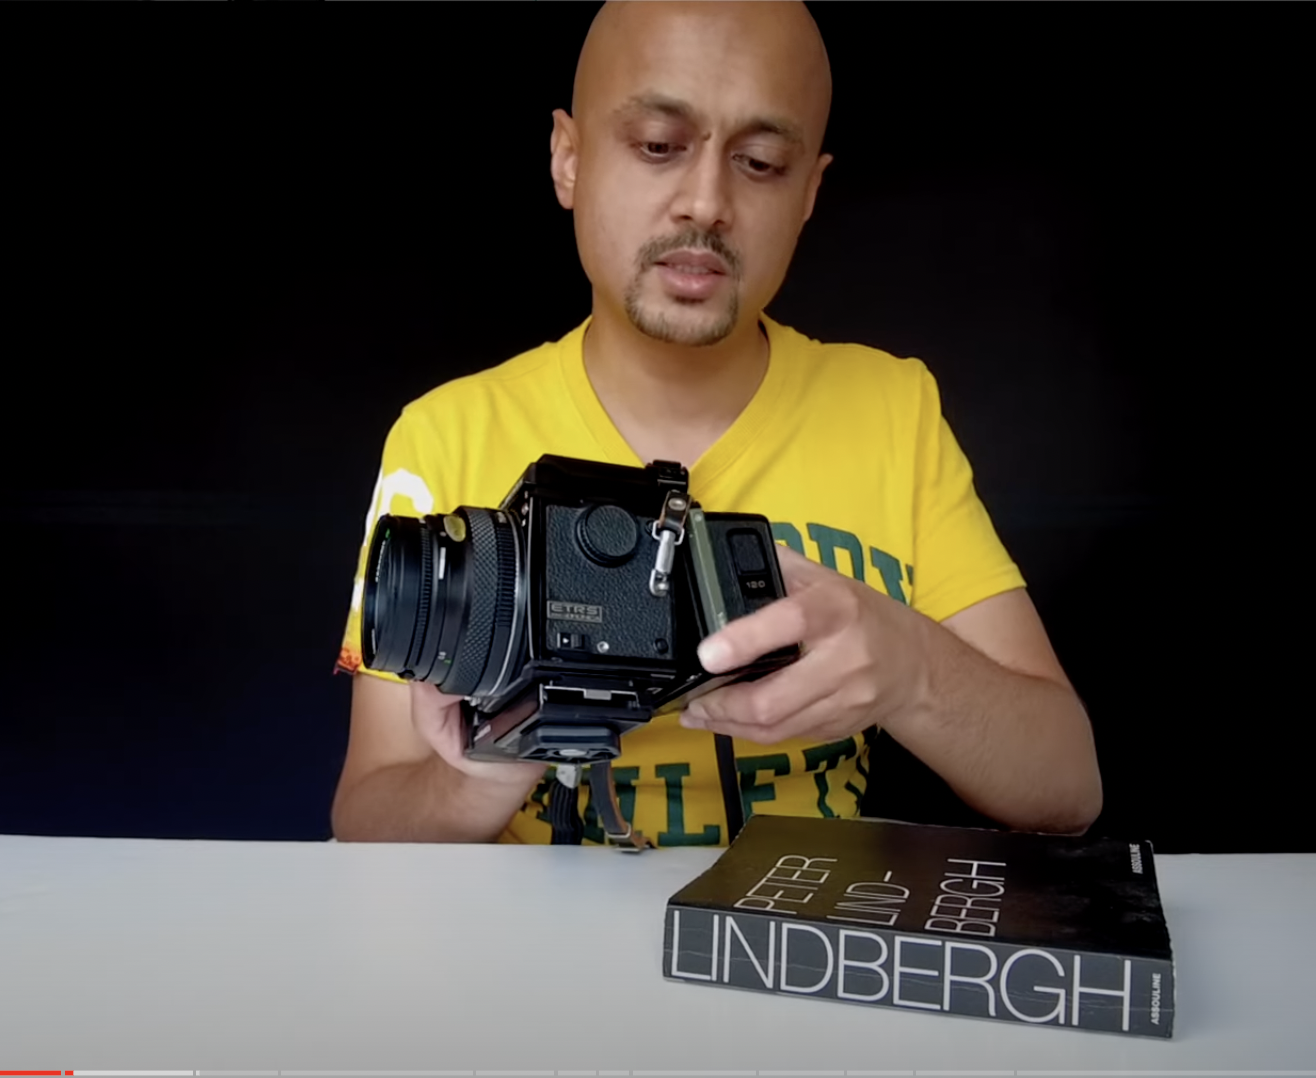
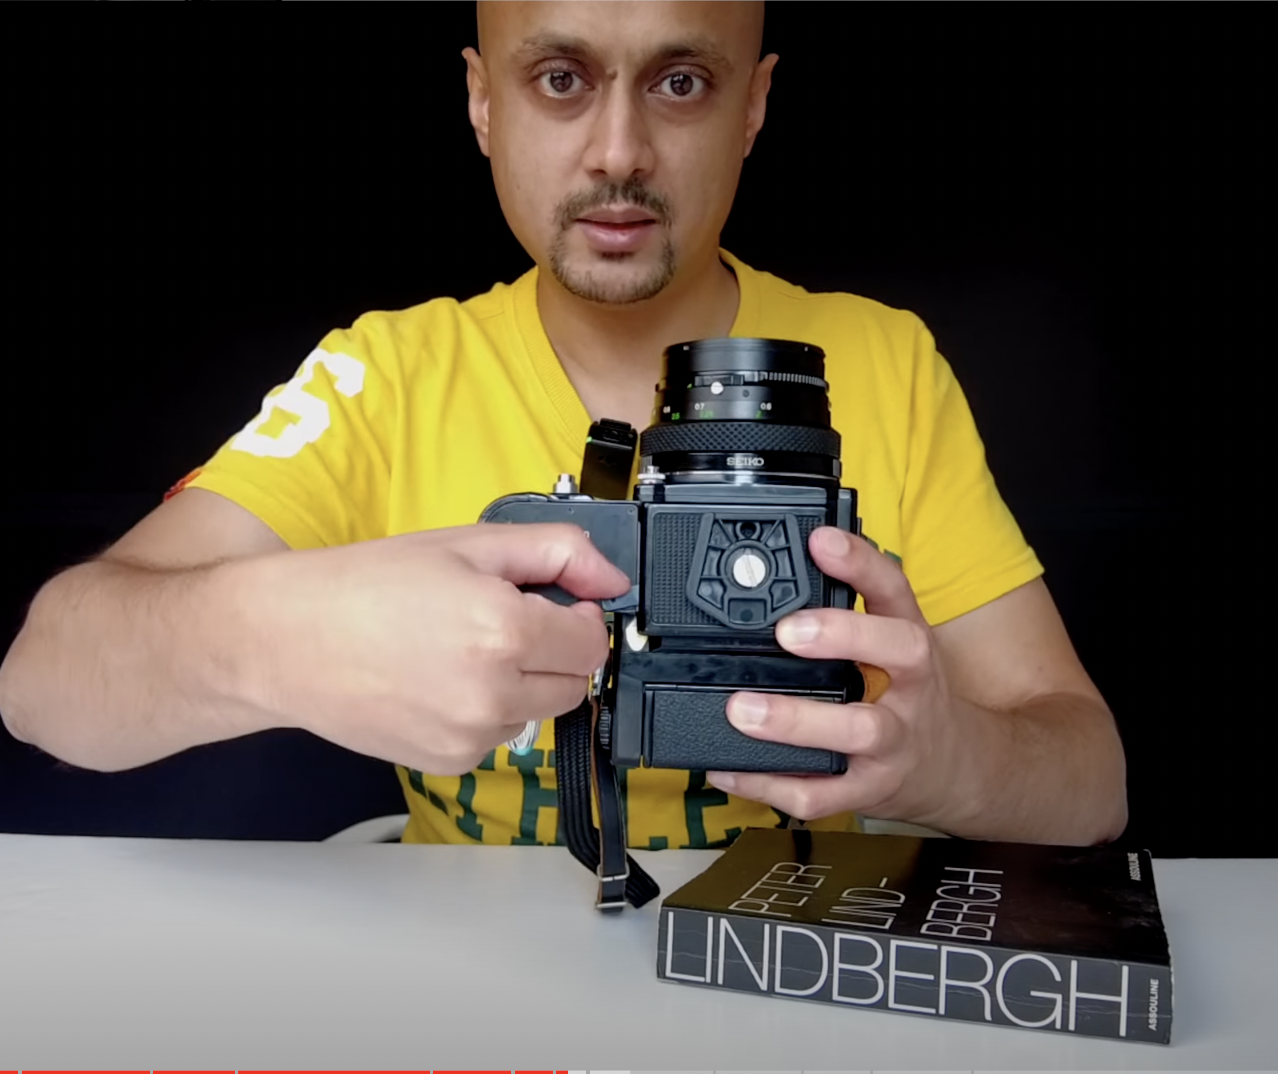
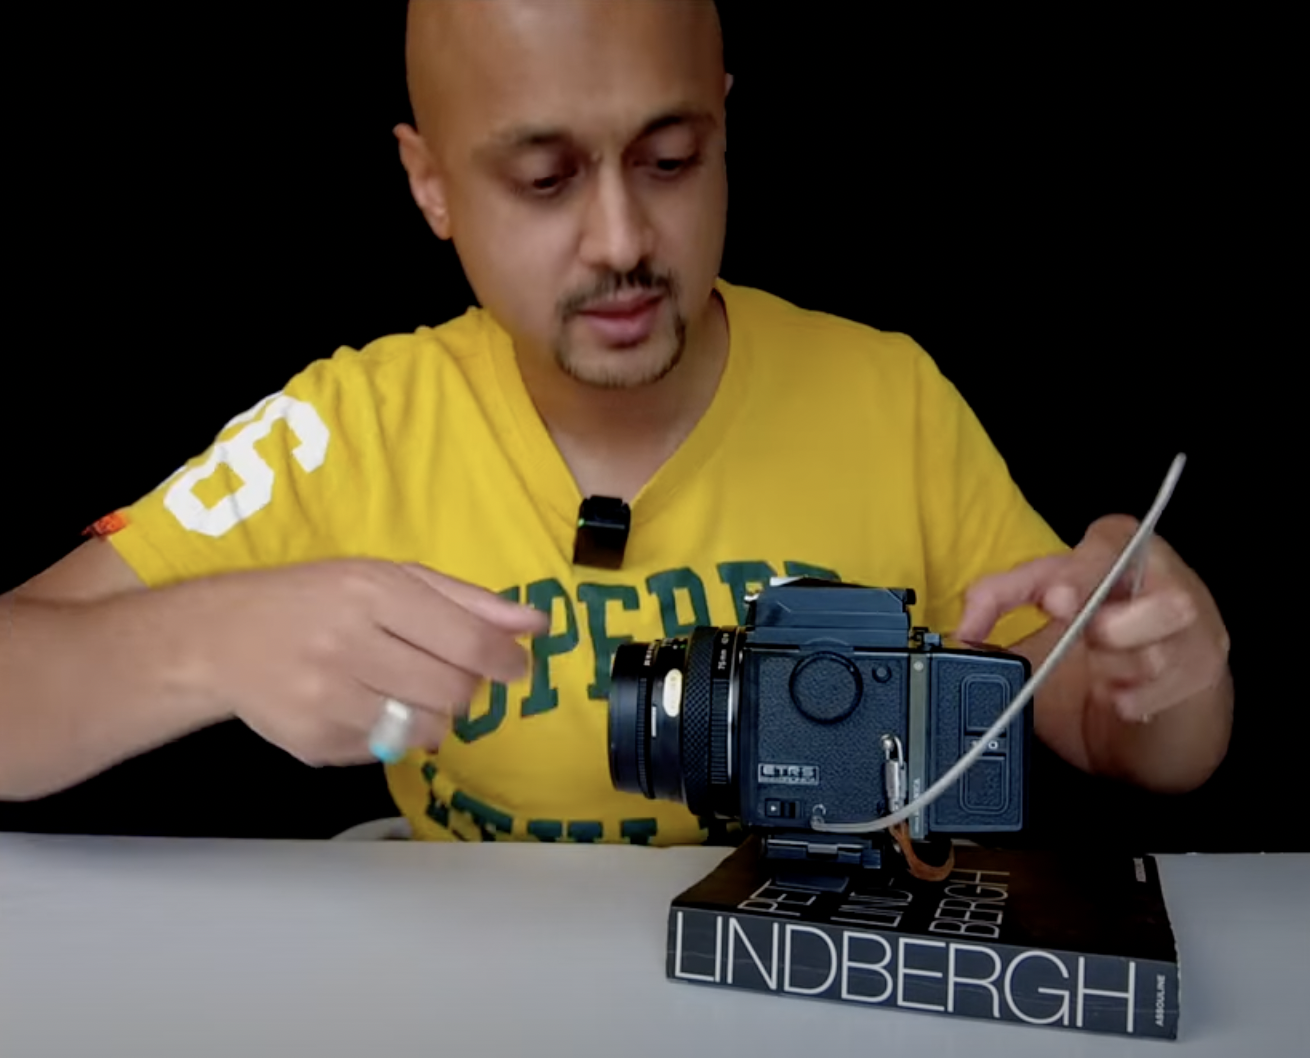
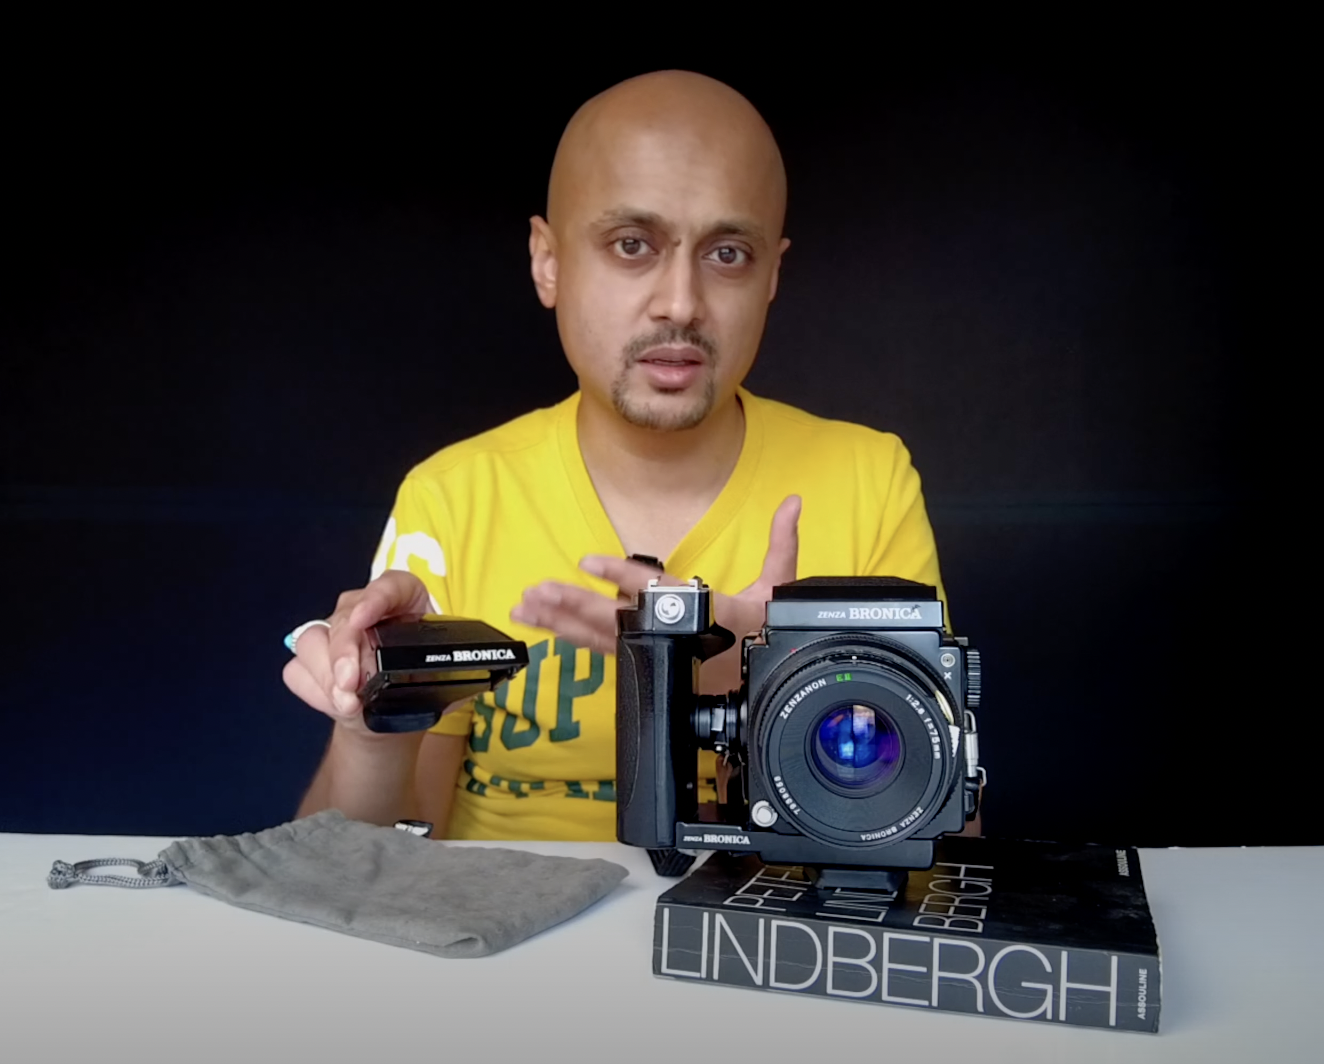
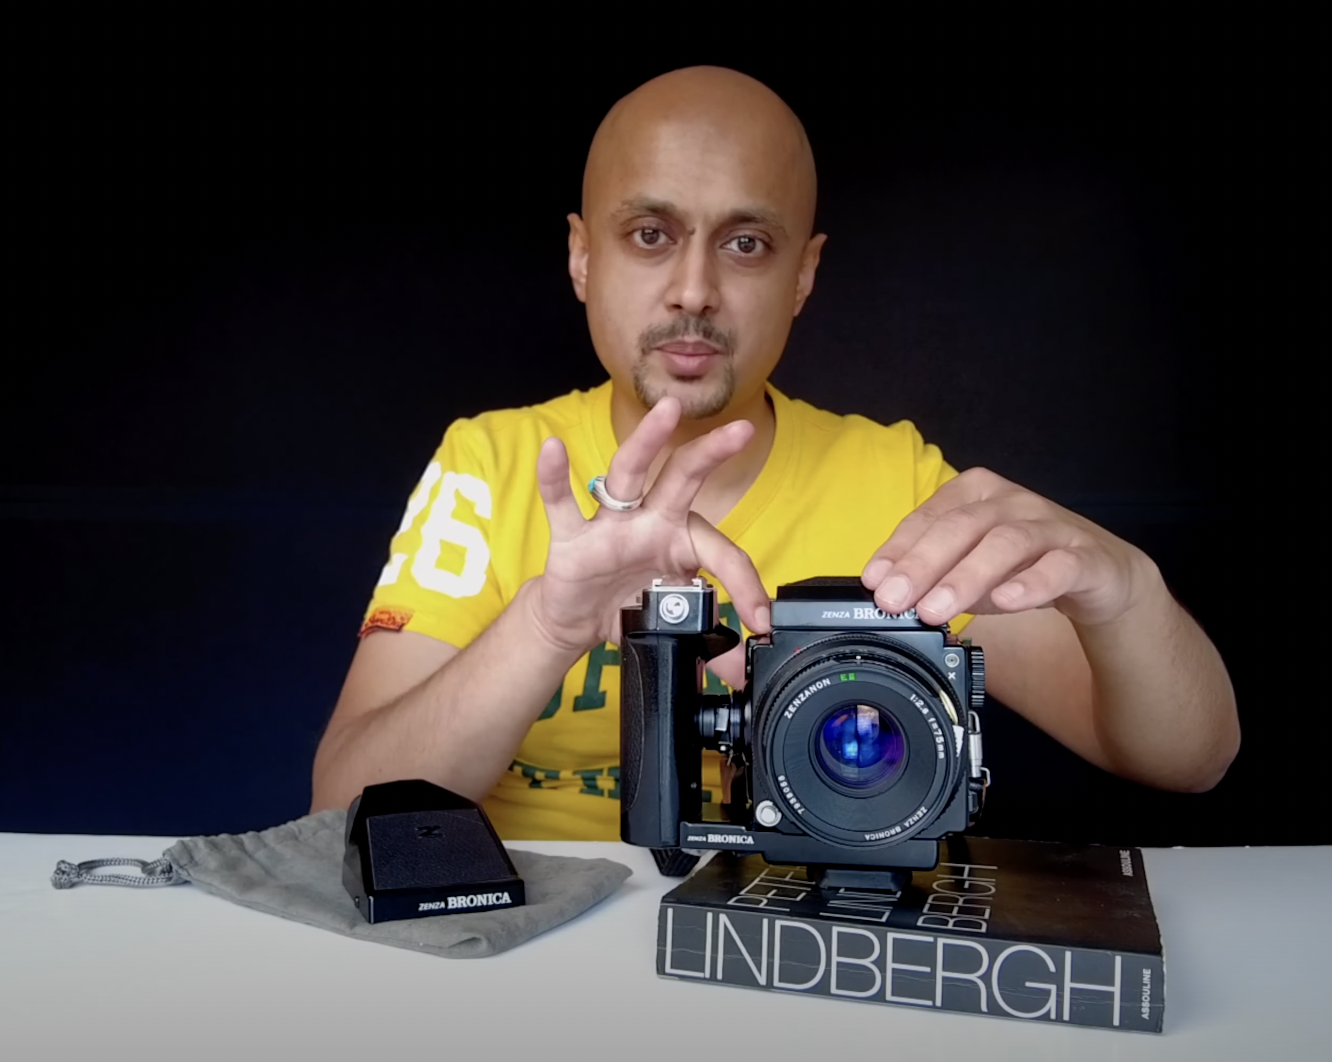
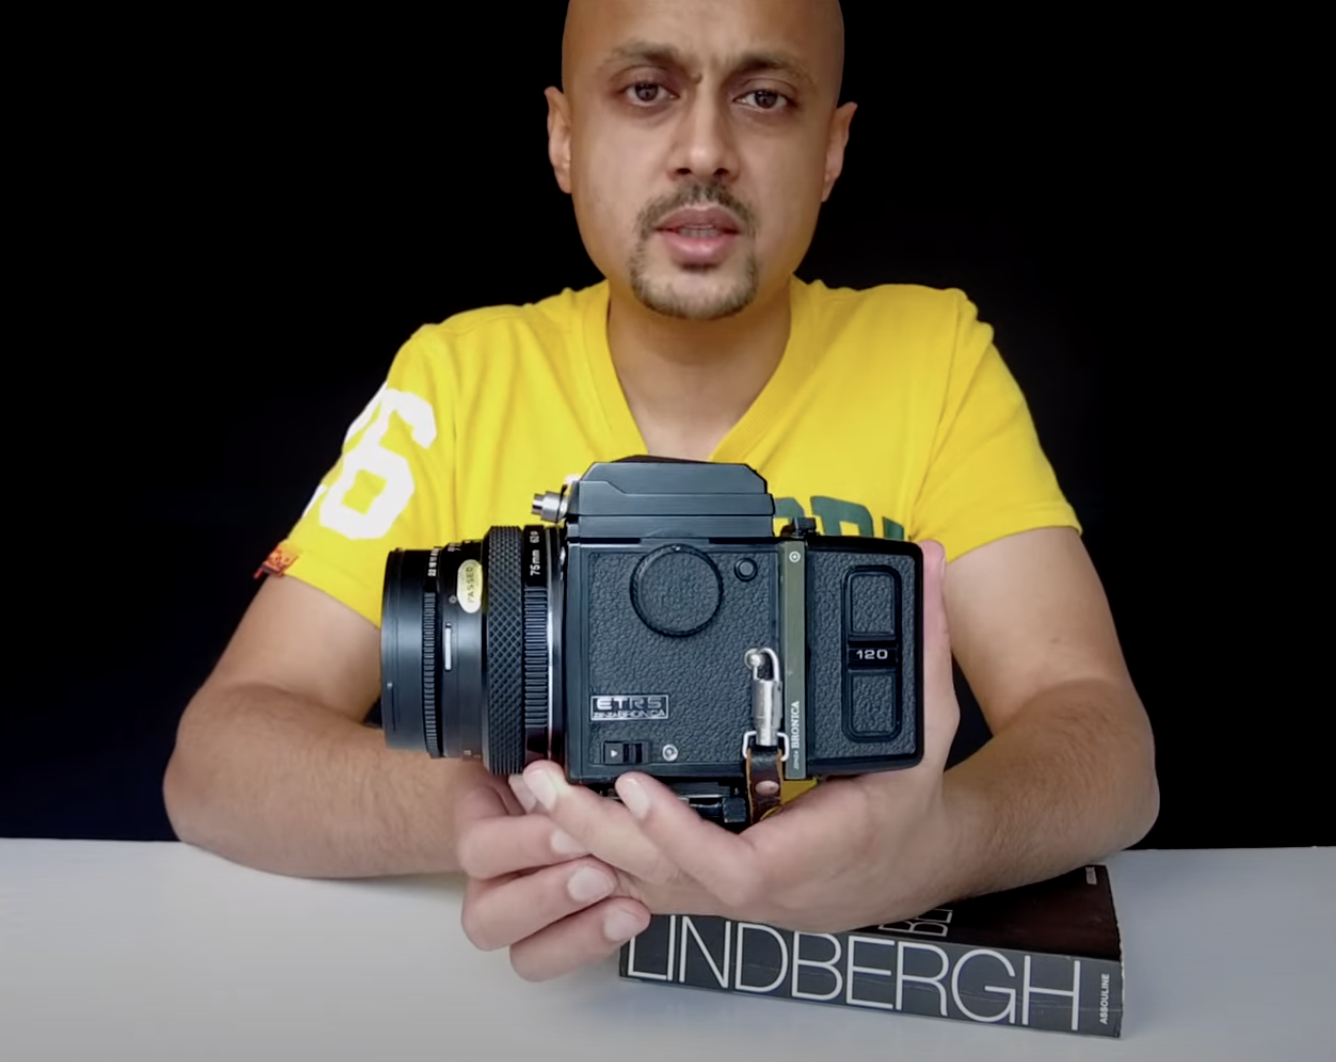
I'm going to show you how to use the Bronica Zenza ETRS medium format camera, which first came out in 1978 and was discontinued about 10, 12 years later.

I'm going to take you through all the different components; the lens through to the view-finders and the film backs. If you are not sure about how to get started with this camera, by the end of this blog or video you will be well on your way!

How to Change Bronica Lenses

This is a 75mm lens, which is equivalent to 45 mm on a 35 mm camera. It is a little bit wider than a 50mm, although not as narrow as an 85mm. It could be a perfect lens entry, particularly if you enjoy shooting landscapes as well as portraits.

Bronica lenses are detachable therefore you can take this off and replace it with another one. Alternative lenses include the 150mm f/3.5 and 250mm f/5.6.

To change this lens, you have to just pull on this lever here on the side of the camera and then twist your lens and then it should be able to come off with ease.

It's a pretty straightforward, easy way to kind of take off the lens. And to keep things to look forward in your lens, it's making sure that everything is clear before you buy it and everything is looking good.

A good lens will take you a long way. The Zenza Bronica lenses are excellent for all sorts of photography. It's a straightforward and easy camera to detach. The 75mm lens opens up to f/2.8 and goes all the way down to f/22

To change the aperture on this lens you just twist this lever here and it will rotate easily. To focus, it's simply pulling on this dial and you're good to go. It's a smooth dial, particularly with this lens. I reckon this has been kept well, therefore make sure that before you decide to buy your own one that it is not too stiff and it can smoothly rotate.

To detach this lens, if you want to fix a new lens, maybe a different one, then you can just pull on this layer here and then you can twist your lens. And then your lens will be detached. These are very heavy-duty lenses. They're fantastic, well kept, good glass.

This will last you for a very, very long time. To pop it back on, simply align the red dot with the red line and then just pull until it clicks shut.

To change the shutter speed on your camera you simply have to rotate this dial on the left-hand side of the camera and then this will adjust from all the way down to eighth of a second all the way up to 500th of a second.

The Viewfinder

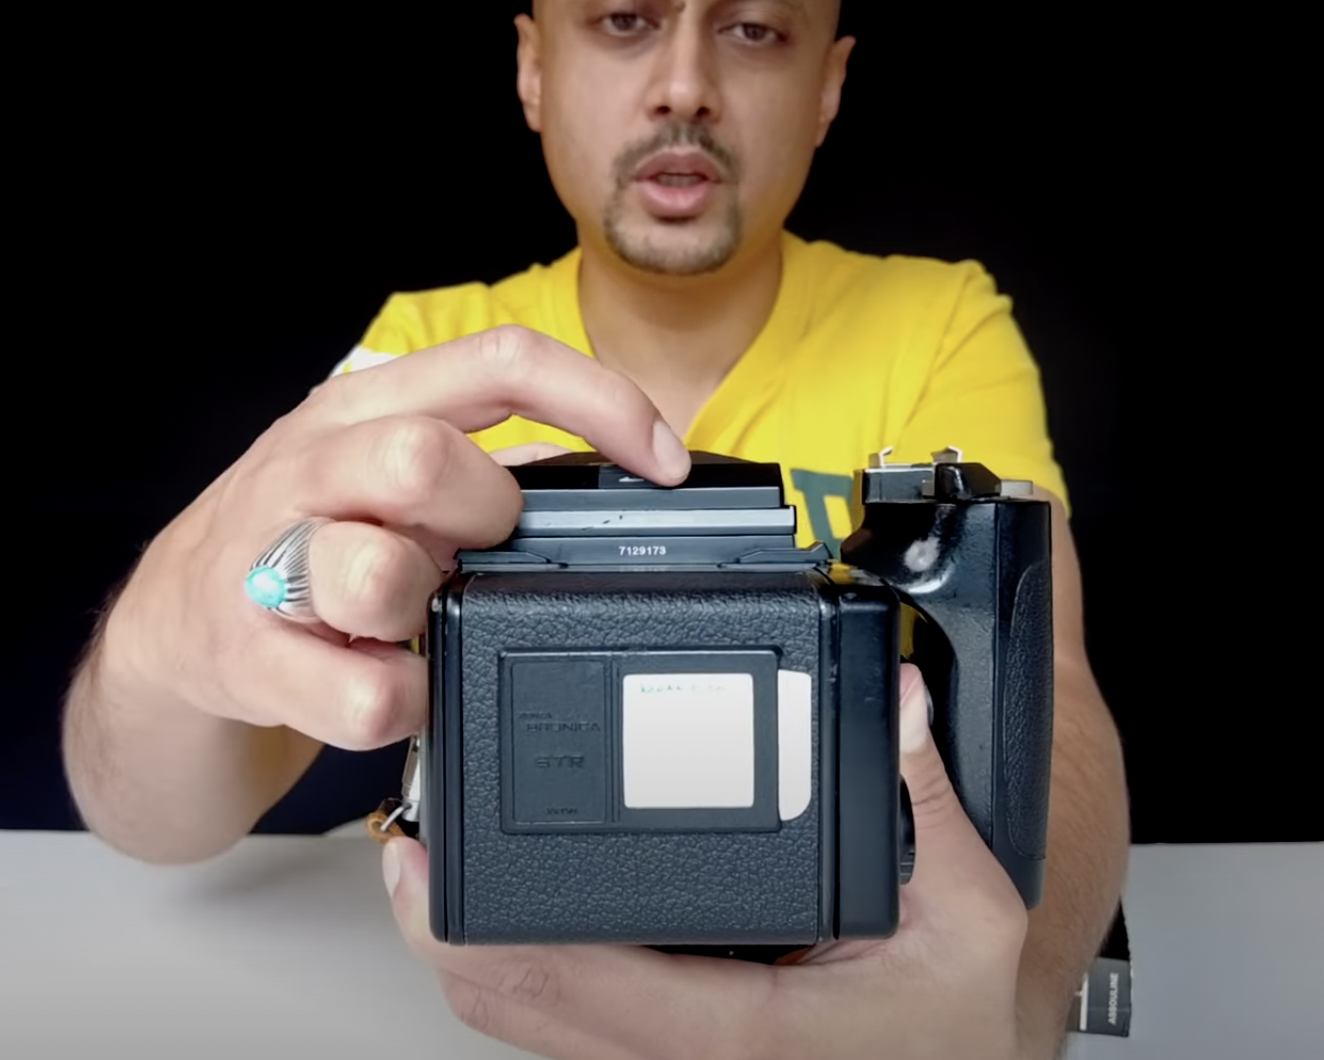
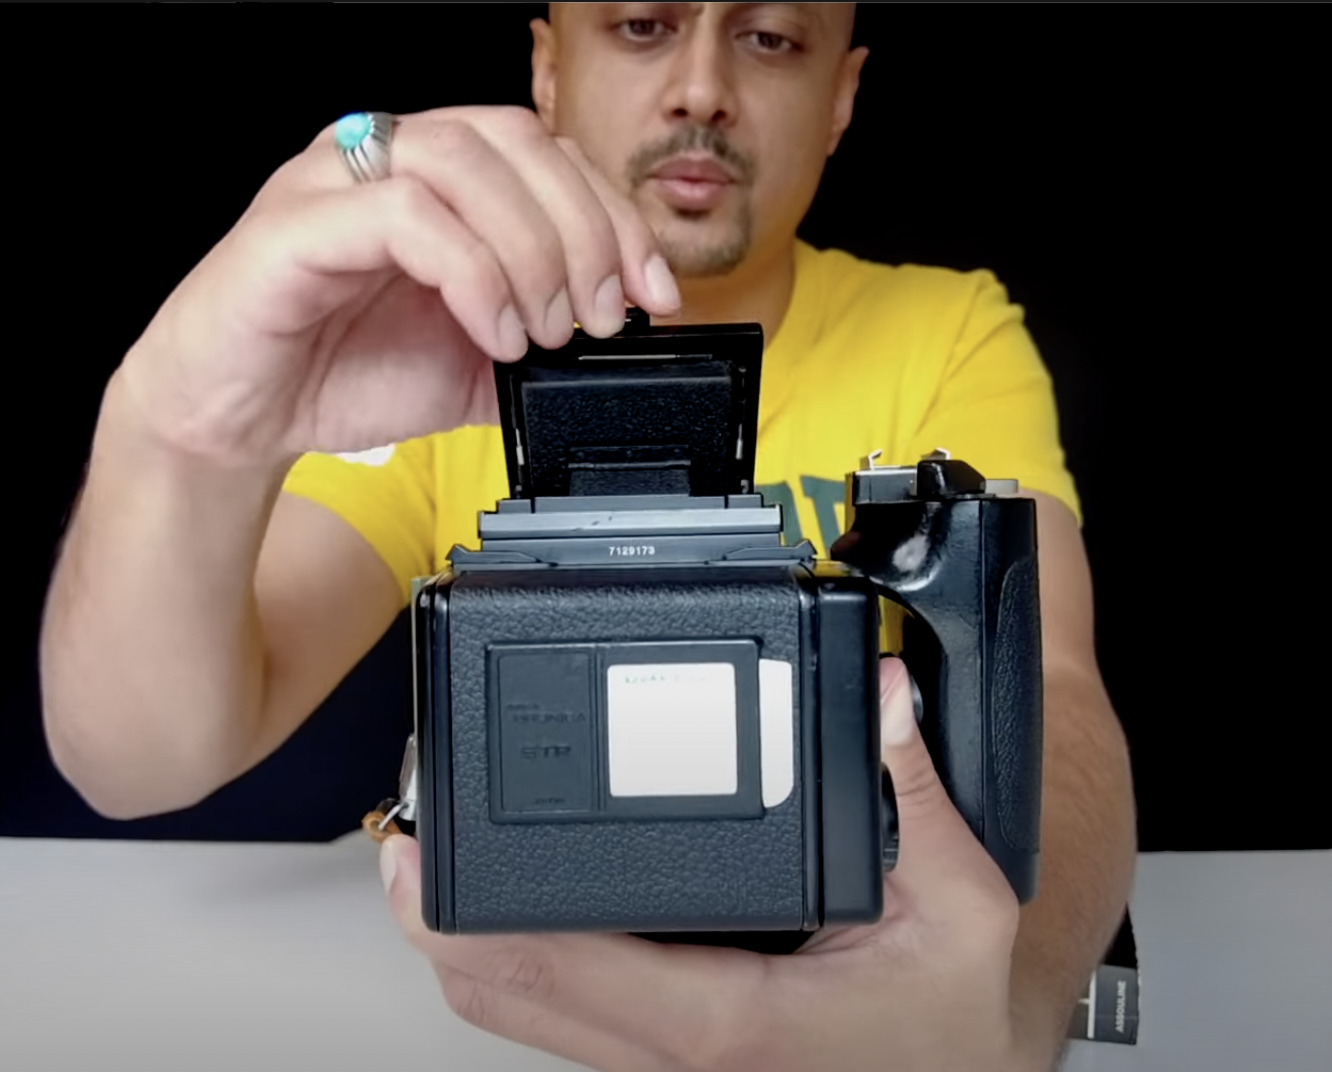
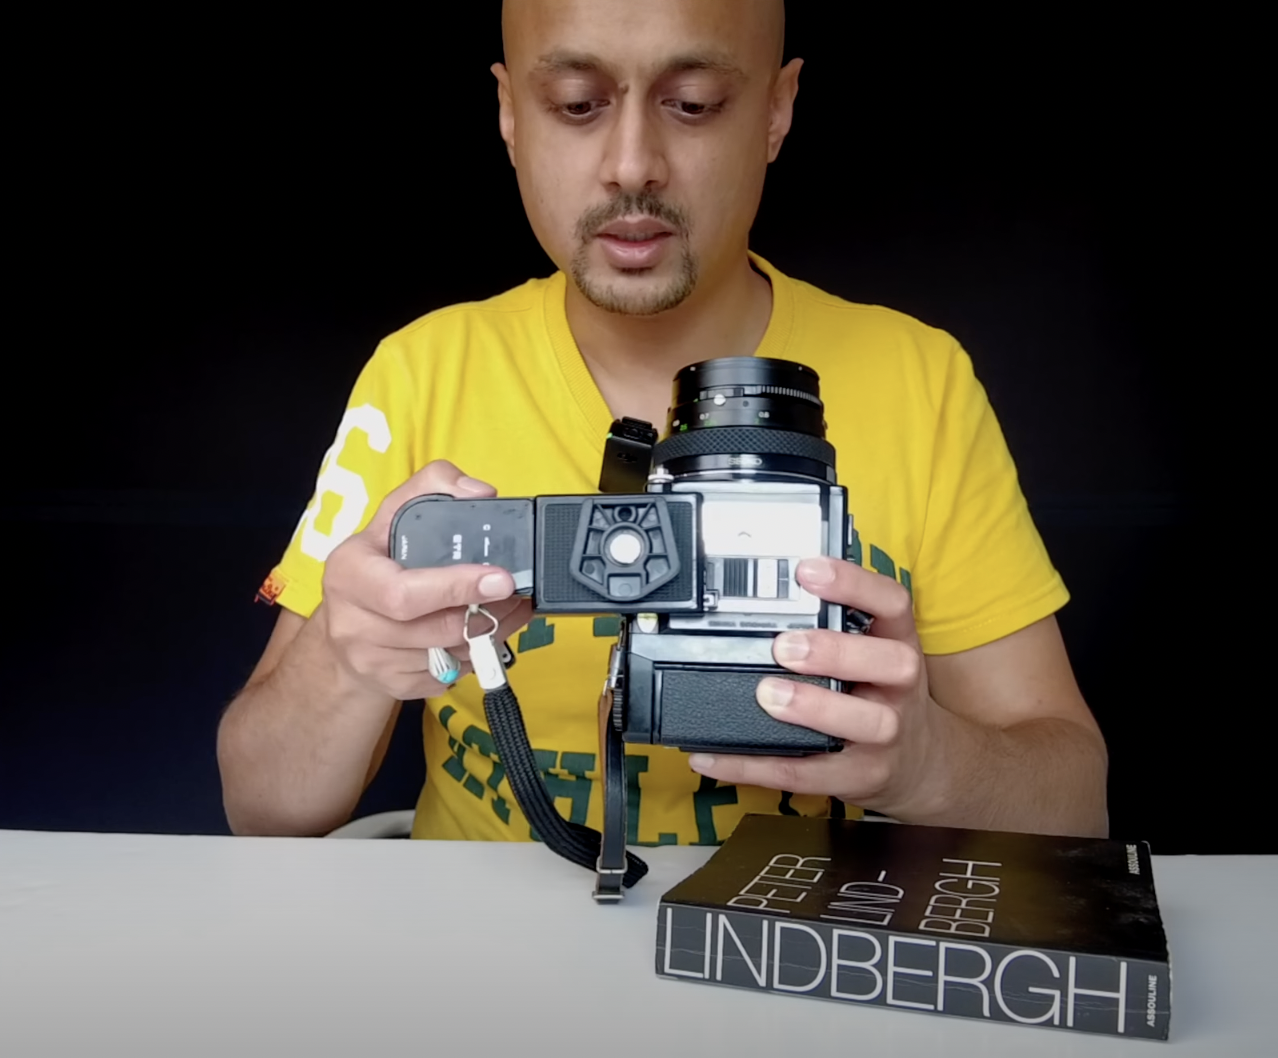
The view-finder is simple to open up. You will find a waist level finder with this little button here. You just pull it along or pop in your view-finder. Inside push the tab to pop up the magnifying glass. You can rotate this for your own focused viewing.

By pressing the magnifying glass you will have the full-on view of the focus screen. To close it, you simply pull this on either side and then it just closes down.

If you're not a fan of view-finders then you can also remove the view-finder for your own pleasure. There is a button just here on the top of the camera. You just depress the button and then you can pull this off completely, right?

Then you can have your entire view-finder as is, which is a good way to look at your scene. If you're outside, maybe in a park or in an open landscape then it might be worth using this function. It just gives you a nice look and feel about the camera itself. Recommend doing that!

Focus Screen

One more thing to add about the view-finder is you can remove the focus screen and replace it with different ones.

In total, there are about seven different screens that you can put in here and they all serve a different purpose and function.

You can get some which have all the grids on therefore you can try to focus with everything in mind. You also have ones which are specifically designed for 35 millimeter shooting as well as ones where you have a multi-point focus point in the center of the view-finder itself.

Depending on which option is best for you if you're going to be shooting 35 mm or if you're going to be shooting medium format you might want to think about which glass or focus screen that you put in here.

Releasing the film back

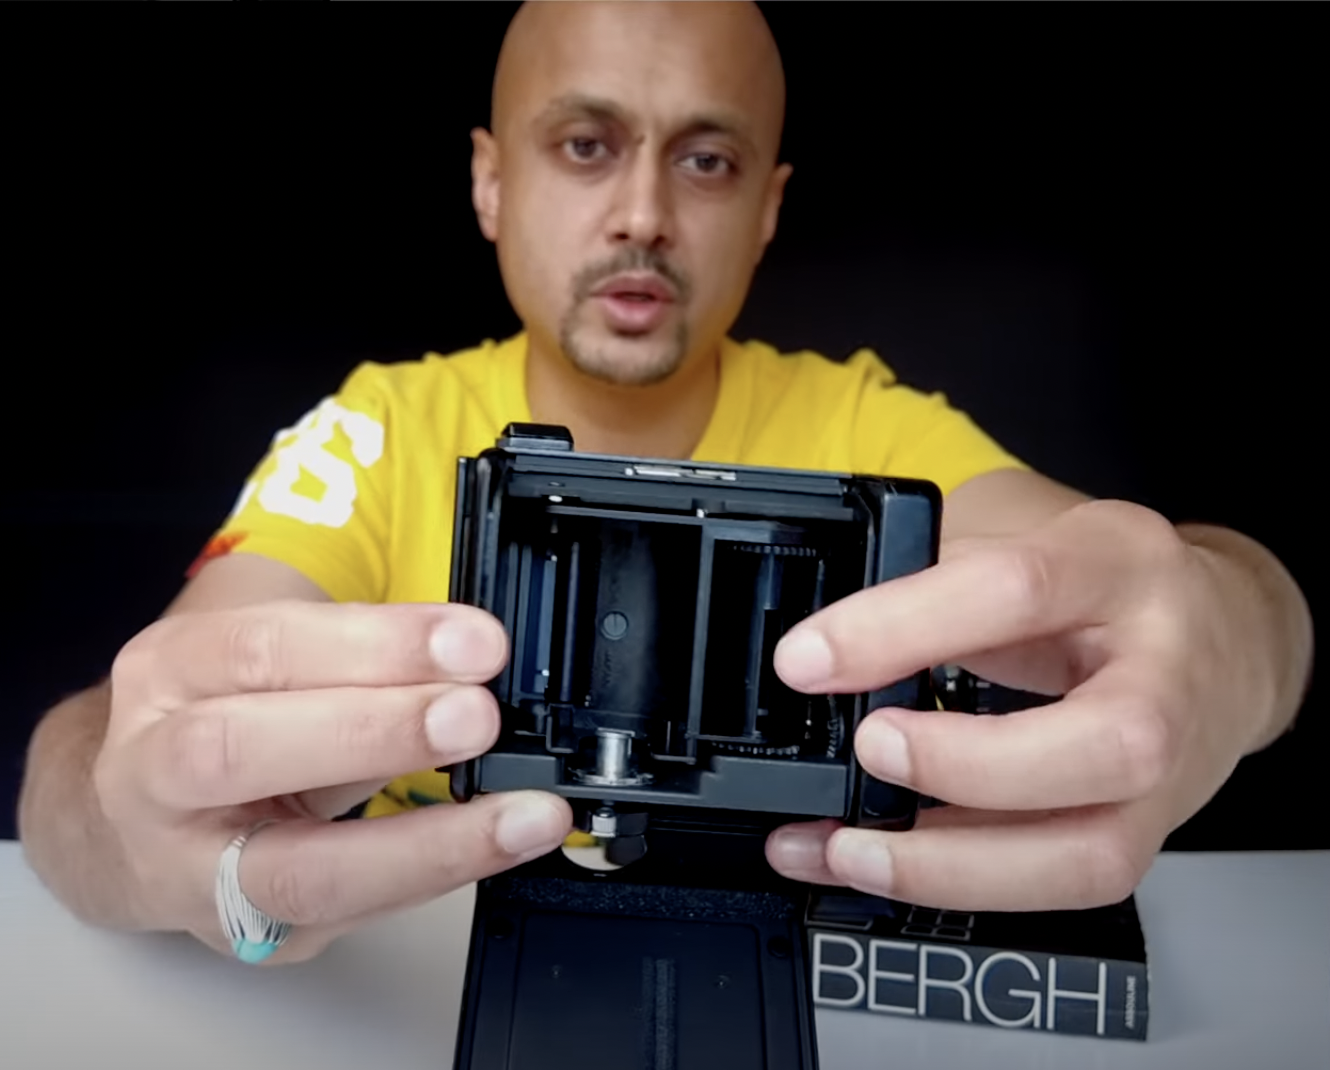
To release the film back all you have to do is press this button here which will then generally release your film back. To use the film back, you will have to unload it and then it opens up and you'll hopefully have a space ball that will go at the bottom and your film will go on top.

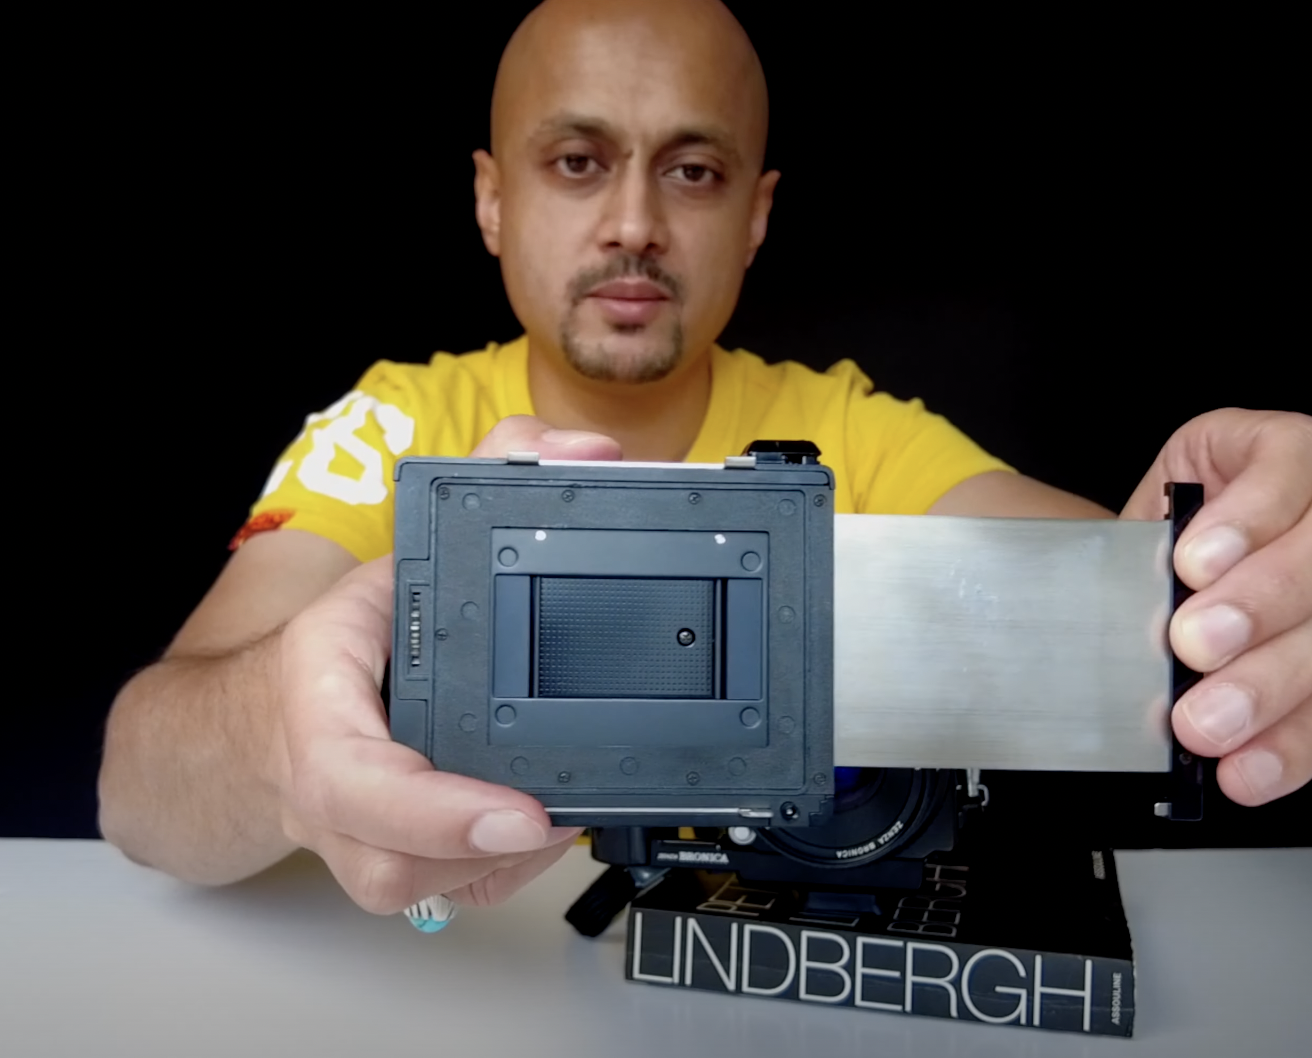
Once the the film holder is taken out it's very easy to use, pop it back into the main area. You can shut it close from above. Make sure it's firmly shut otherwise it will not work. You have also got a dark slide here.

This pulls out to reveal the frame. This is a 6 x 4.5 camera and the film back obviously matches that. The dark slide comes with this little plastic bit at the end got a very nice professional feel to it as well.

To pop it back on all you have to do is take the edge and line the two silver hooks and then pop it in. You'll hear the sound and you'll be good to go. As a rule of thumb it's always good to have a spare film back and there are lots and lots available for Bronica online.

This is actually an older film back than the ETRS one that I have here on my camera at the minute. And you'll notice that there is a slightly different function to open it.

I find that this one button open film back is a little bit more finicky to open but is certainly very sturdy still. Be mindful that if you are looking for a film back on Bronica that you find one which is straightforward and easy to use.

The best ones I've found have been the ones with two arrows at the top here and here because you can just pull these and then the cassette opens very, very easily.

How to use 35mm Film Backs

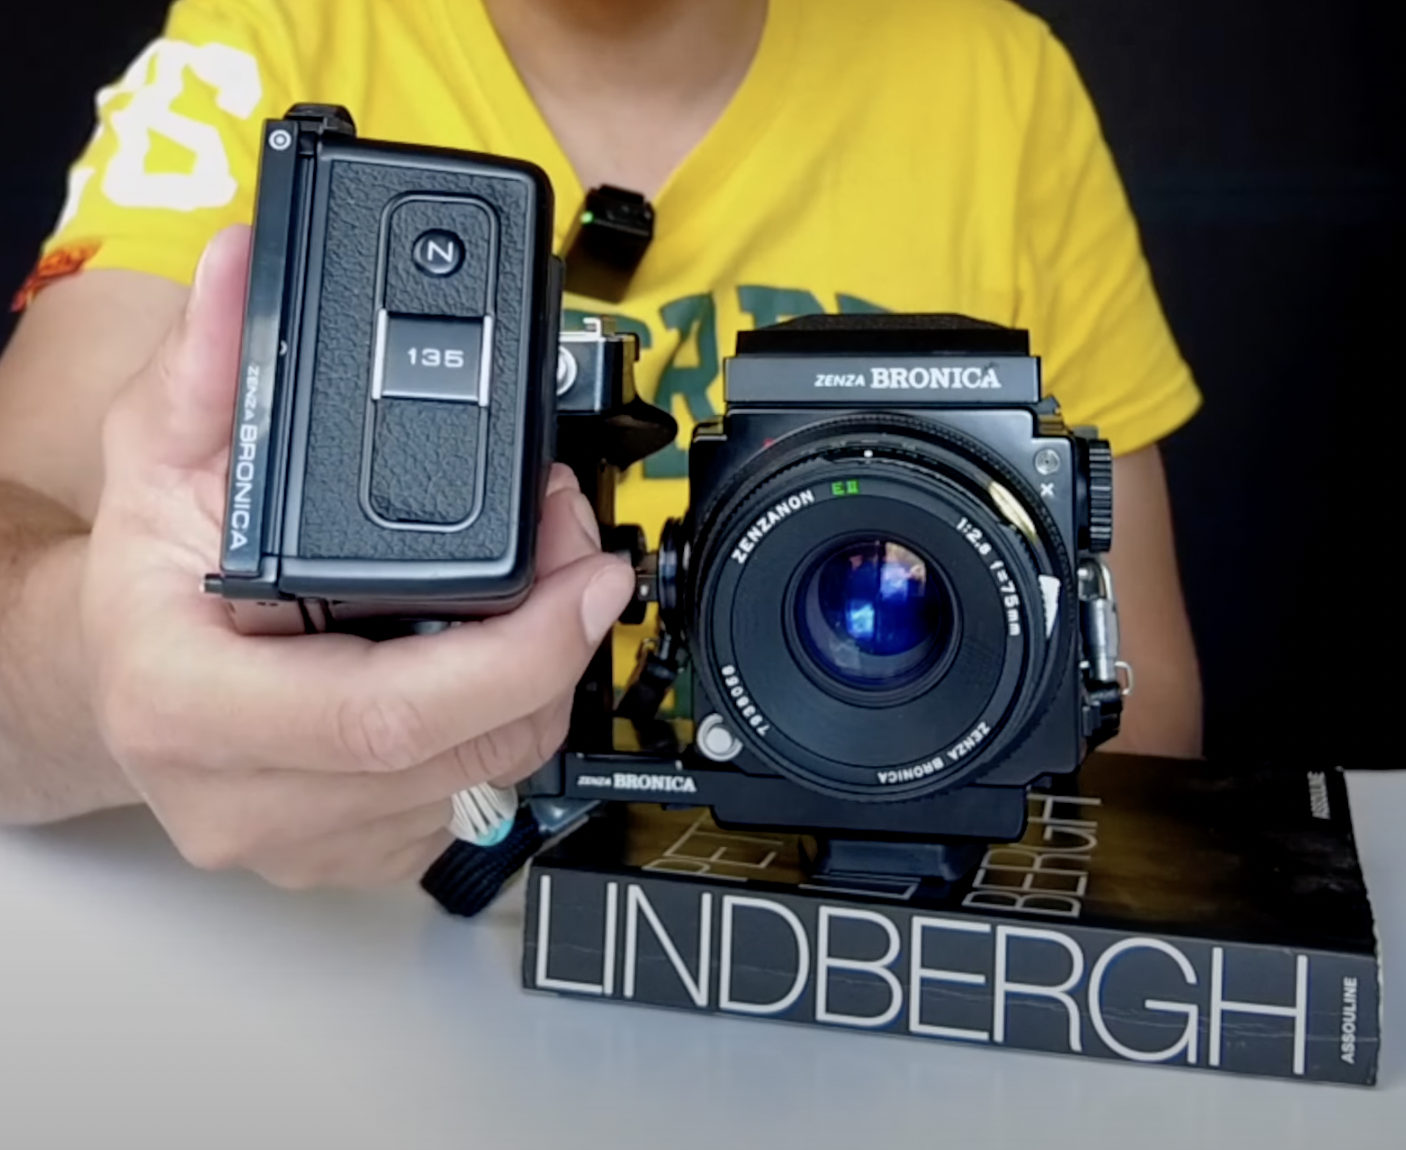
You can also get 35 millimeter backs for the Zenza Bronica and here's one that I've got. This is a 135N. There's also 135W. And they have different aspect ratios. The 135N has normal 35 millimeter dimensions and it opens up and you'll notice here in the back the film will go in here.

On the right-hand side over here pull the film across and then you can wind it on using this device here on the right-hand side. To close it, you just need to simply pull here and close shut. And once you finish your film you can unwind it by rotating this the other way around.

You'll notice that the dark light when I remove it is what you'll get with a normal 35 mm dimension. If you want to have that flexibility to shoot with 35mm as well as Medium Format, then this is going to be a good option for you to consider while moving up.

My recommendation however is that if you are going to shoot 35mm think about which film back you want to get. The 135N film backs are relatively cheap online. However, to find the 135W film backs, there's a noticeable markup on the price.

For a 135W you are looking at probably around £700-800. This wide film back is not as wide as a Hasselblad XPan in terms of its aspect ratio. Before you fork out this amount, think about the dimensions carefully first. If you enjoy that wide landscape view on 35 mm, then this could be an option for you.

Once your film is loaded, you're going to have to make sure it's fully put onto the spool. All you have to do is just twist this here until you get to the first frame, which you'll see up here.

The alternative way of doing it is if you've got a handle grip you can just rotate this in the same way you would with a normal 35 mm camera.

Once you've got your first frame and you're ready to shoot, you can line up and you can depress this shutter button here to shoot. The alternative option is if you don't have the handle grip then you can shoot by depressing this shutter button right here.

Understanding the Modular System

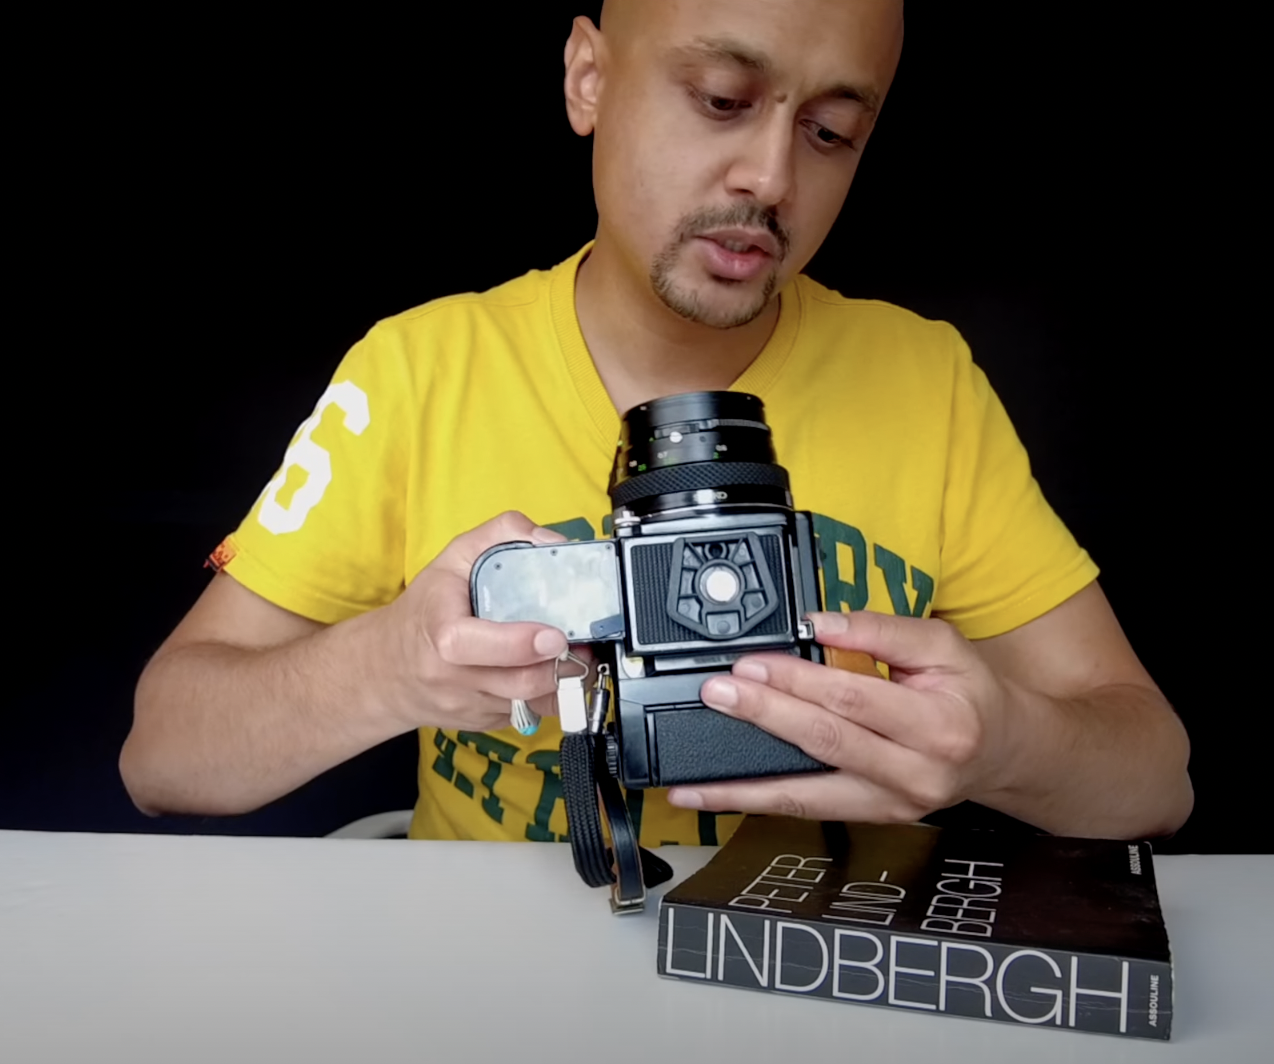
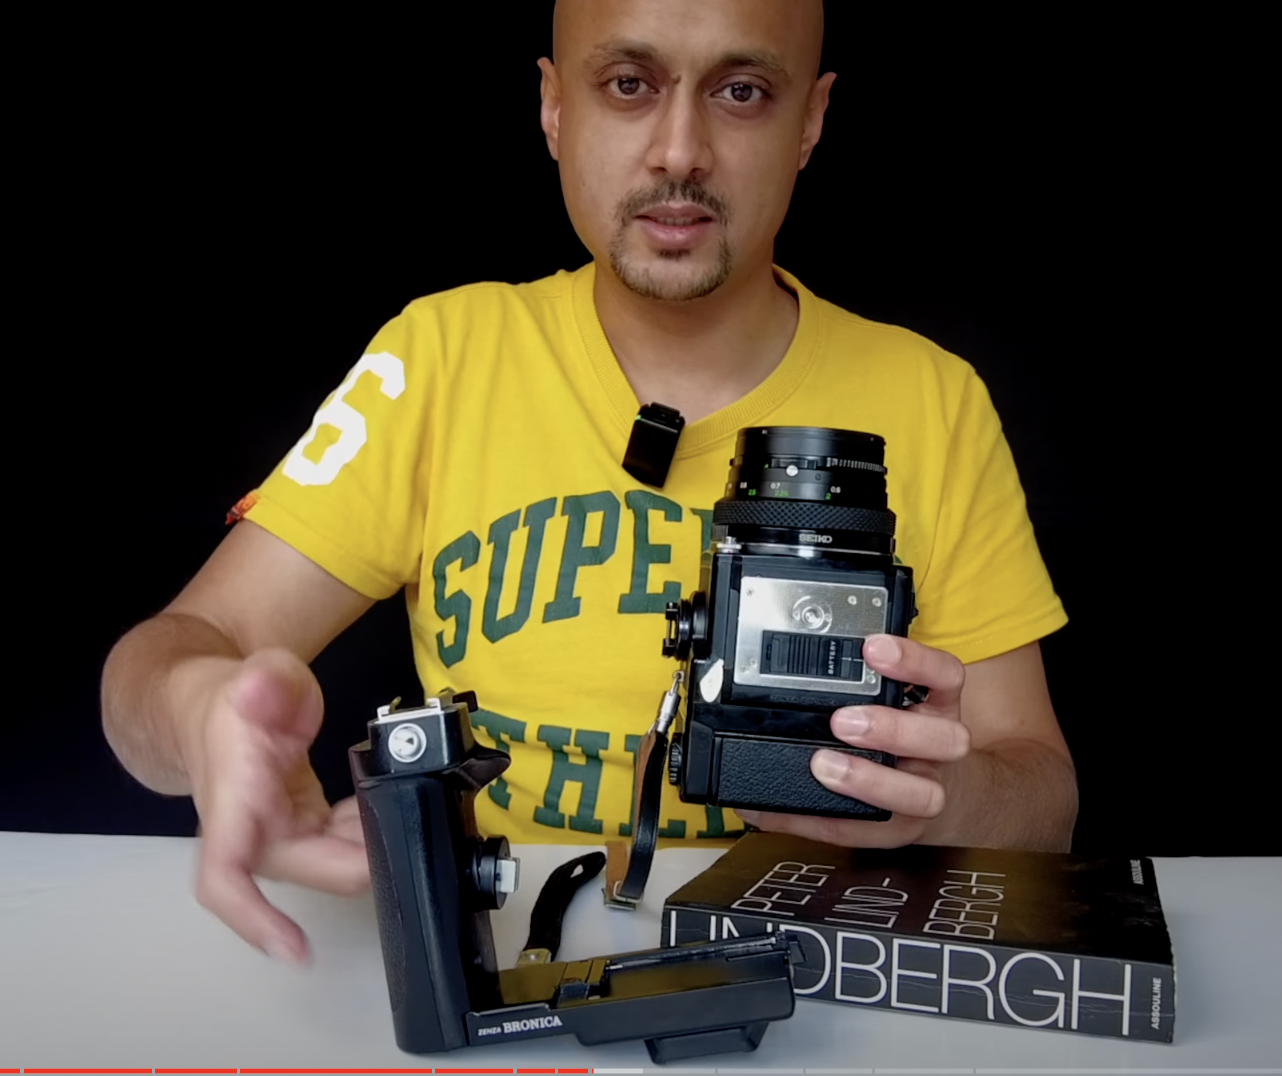
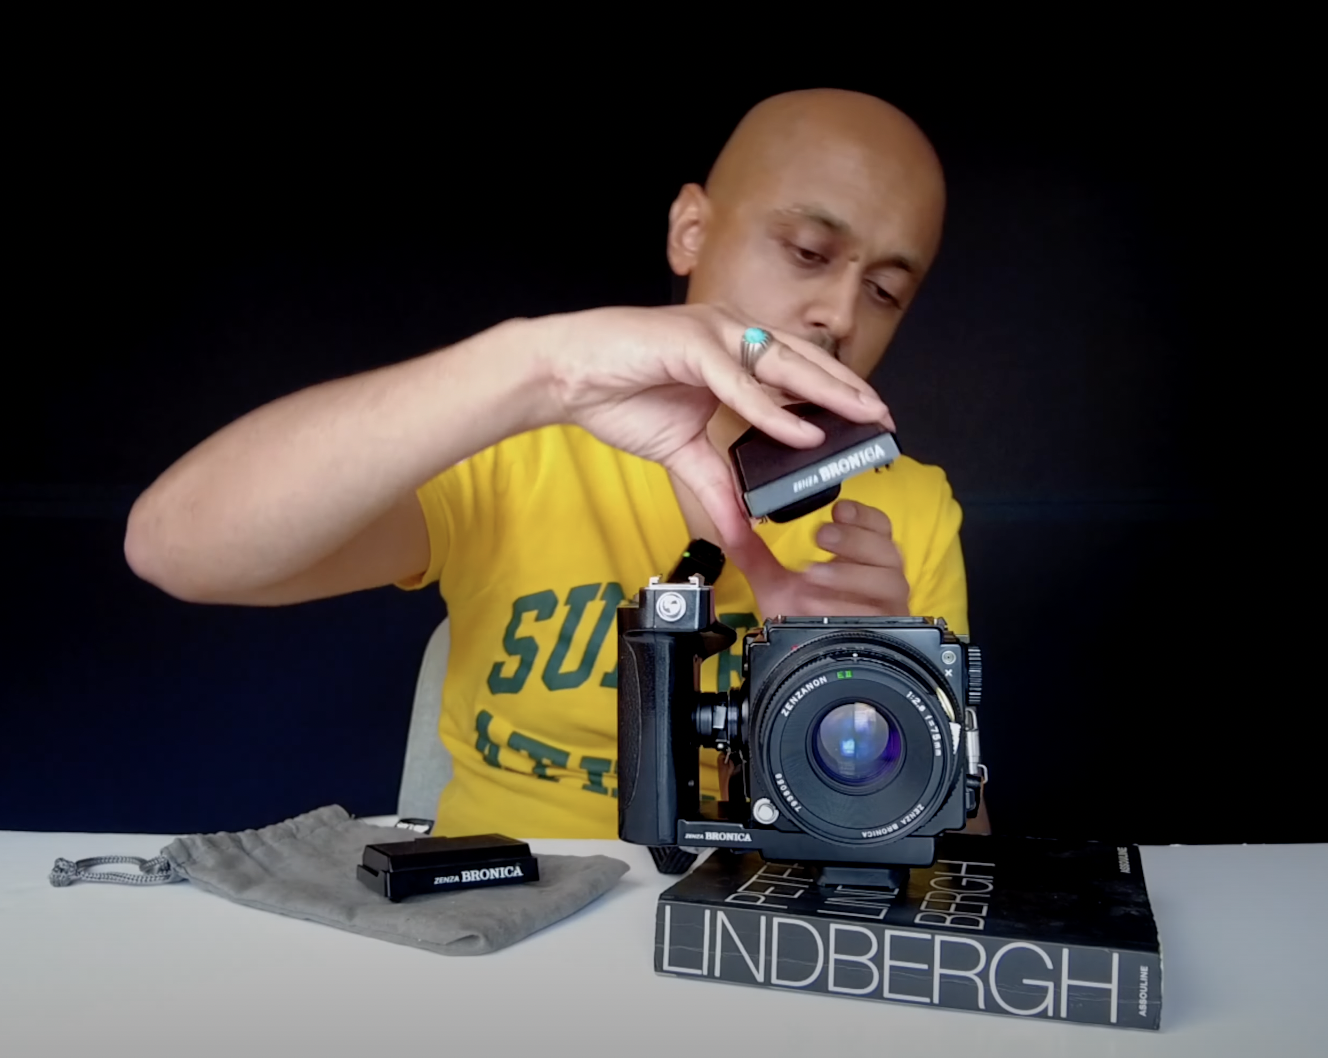
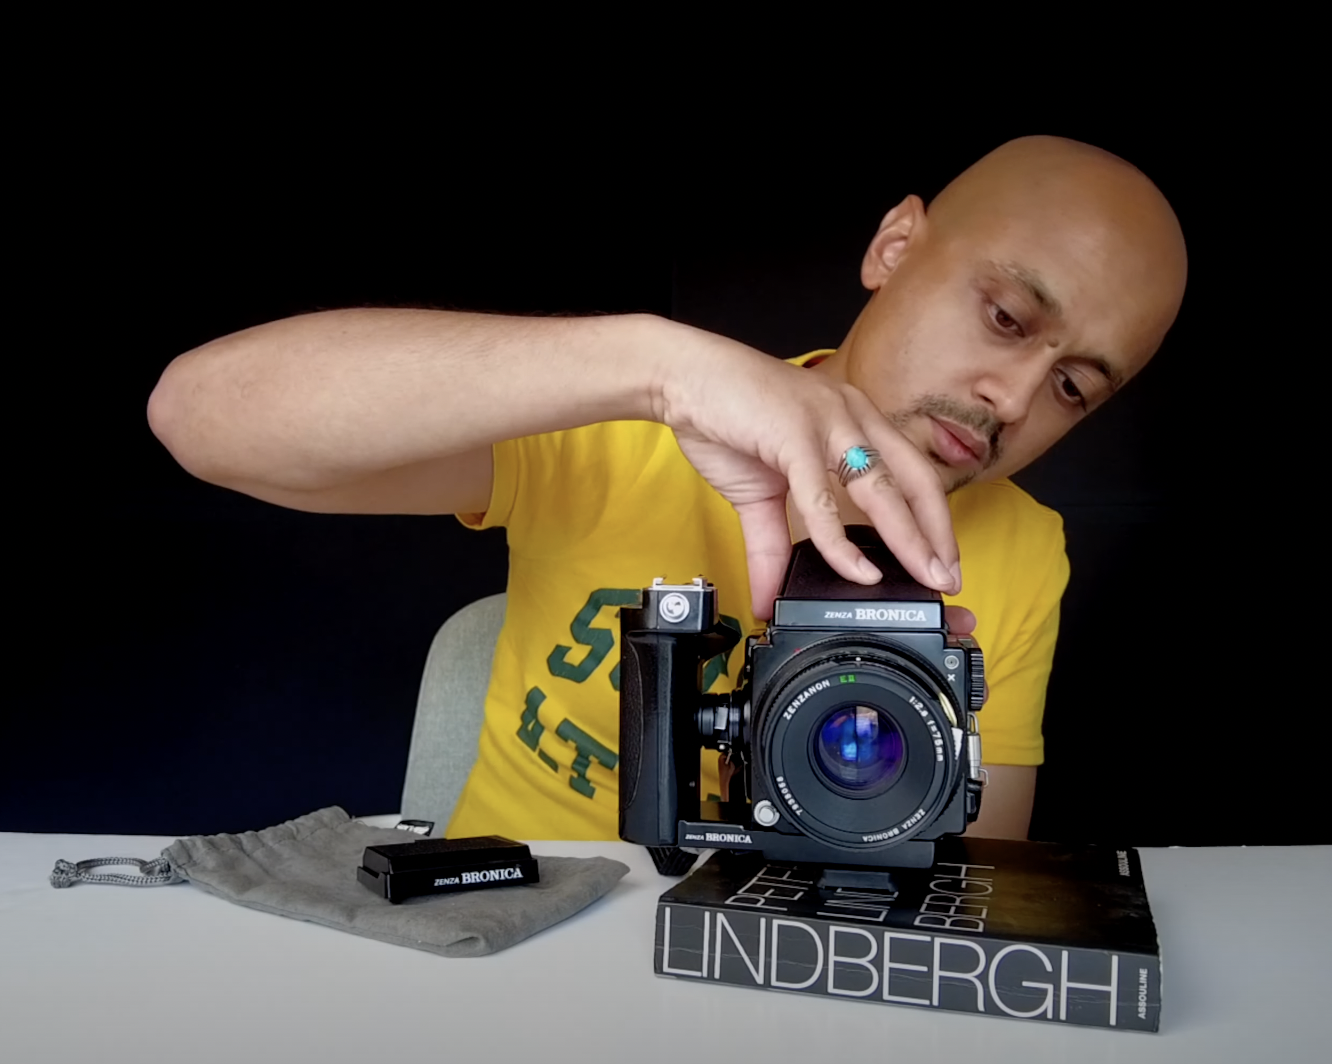
The great thing about the Zenza Bronica is it's a modular system as such you can change the lens, you can have a speed grip if you wish to do or if you don't you can leave it out. You can change between 35mm and Medium Format film backs. The options are varied. You can also change your view-finder too. Therefore if you wanted a prism view-finder at the top you can pop that on there as well.

Adding a Speed Grip and Changing the Battery

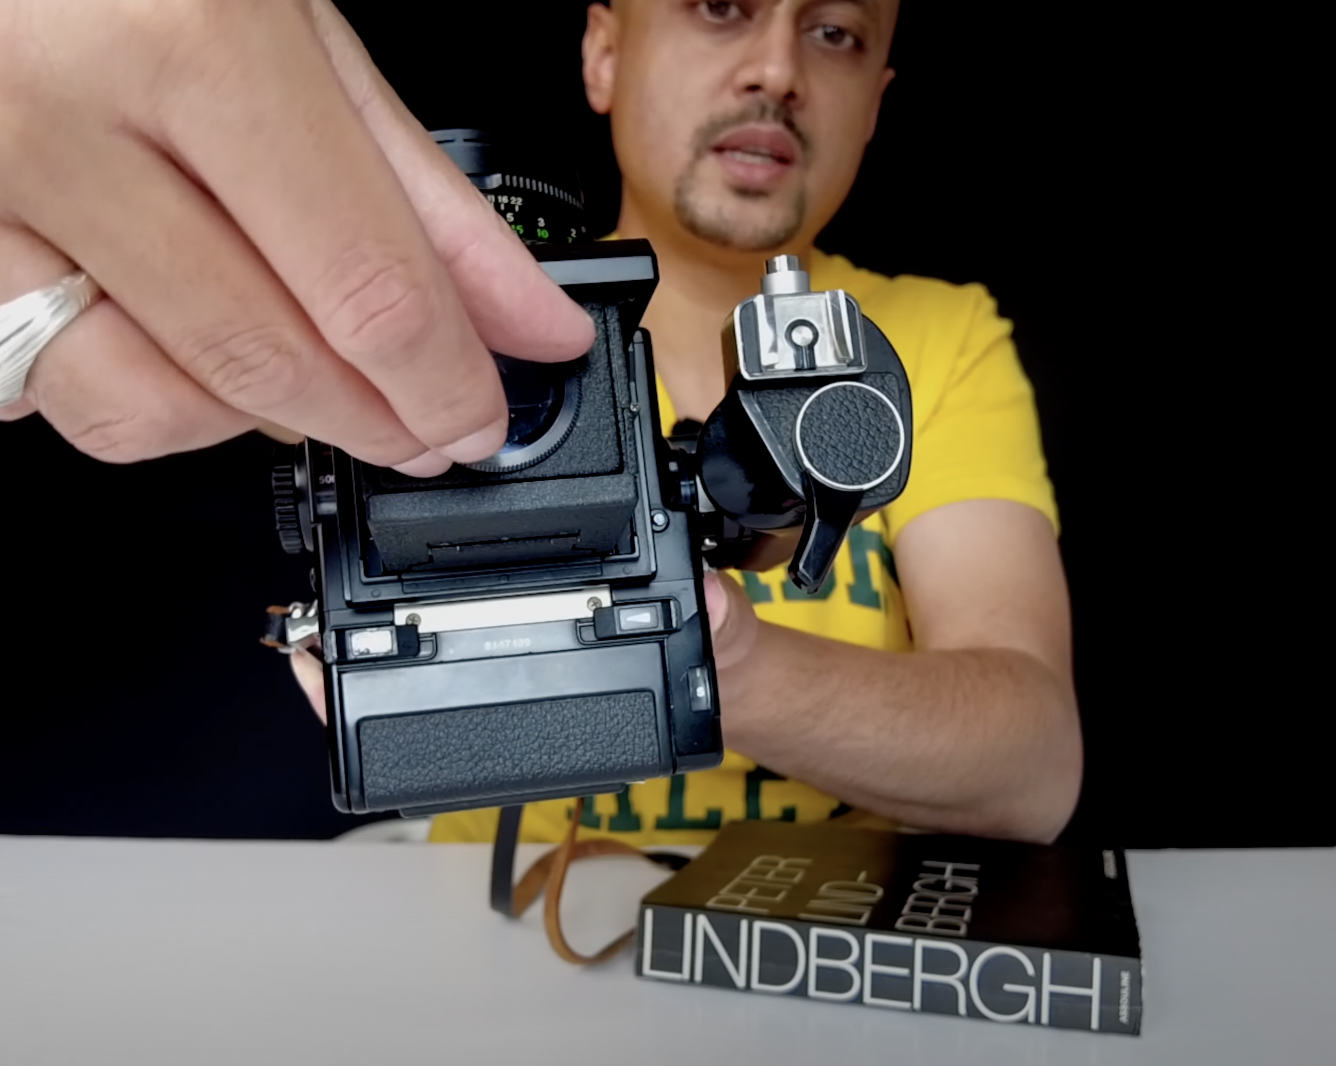
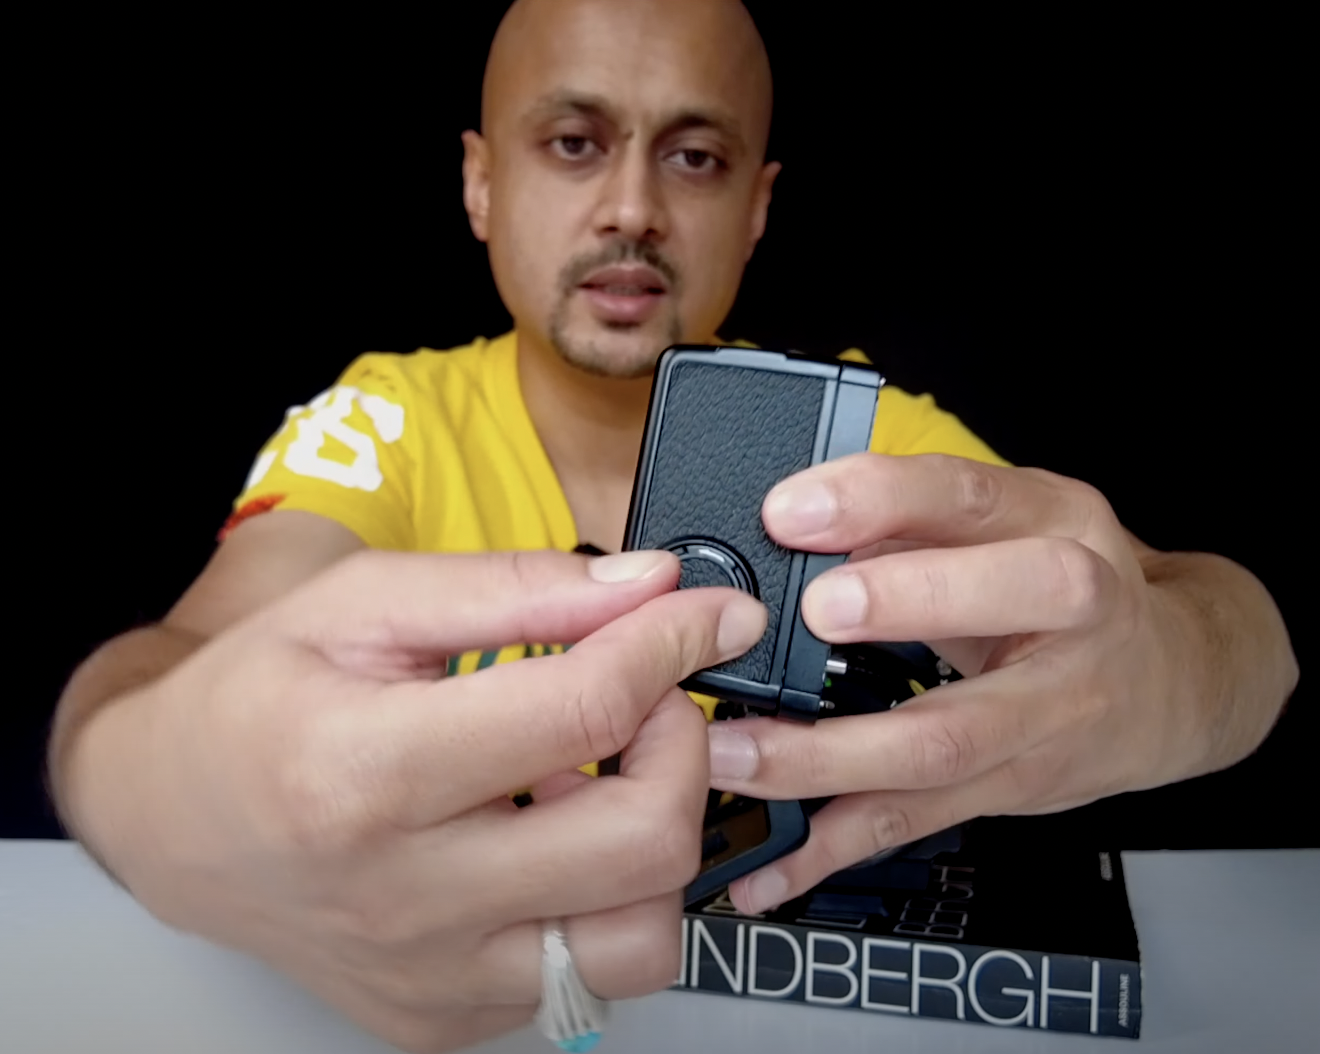
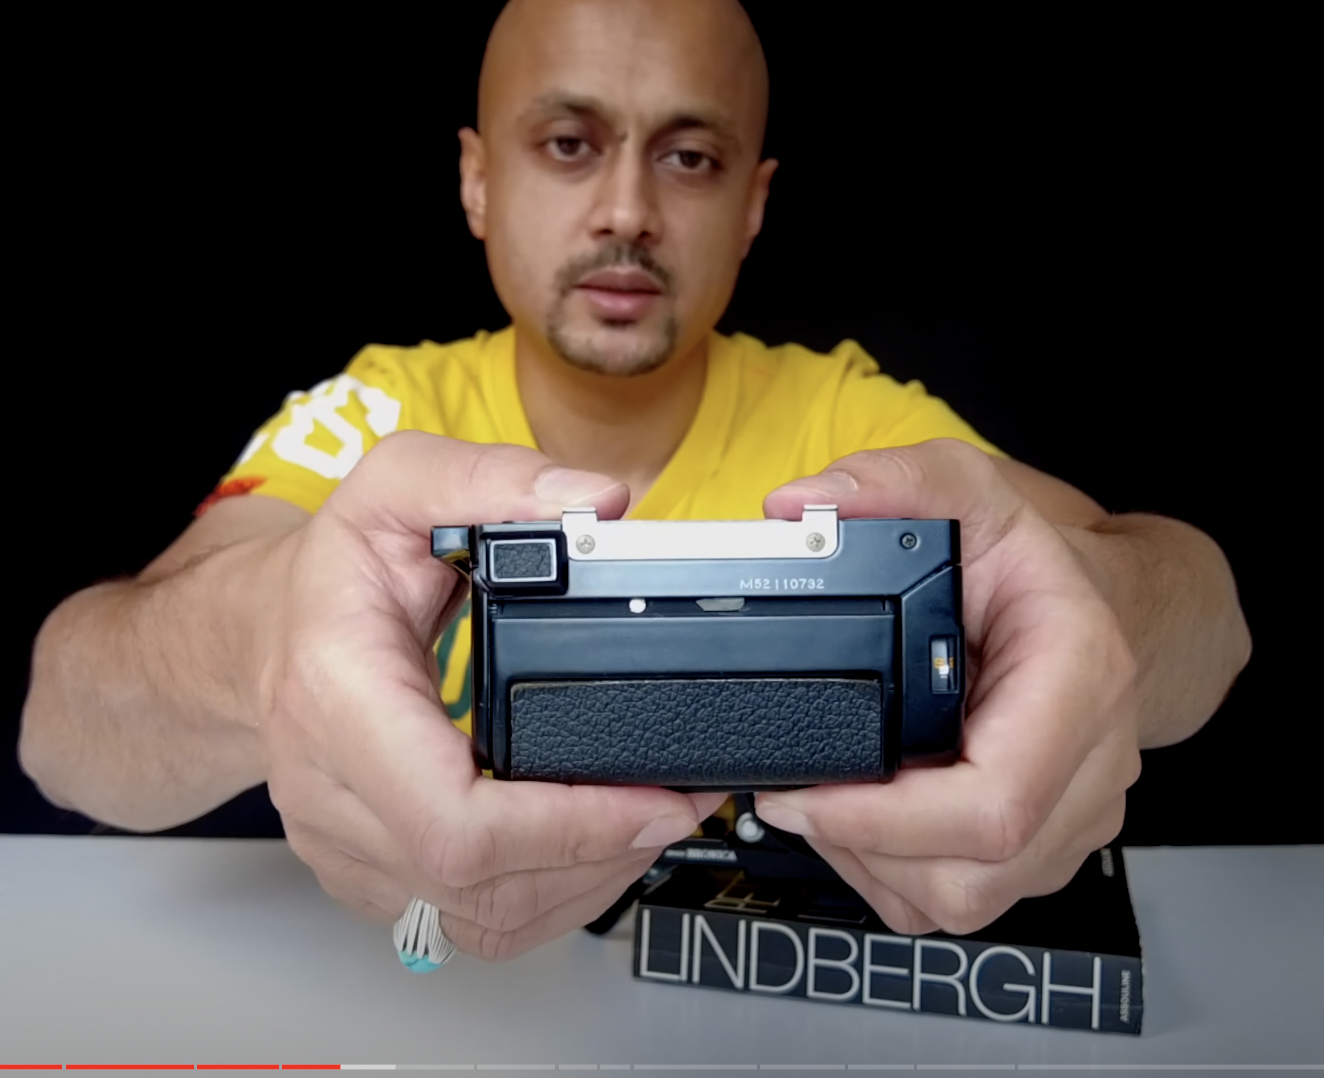
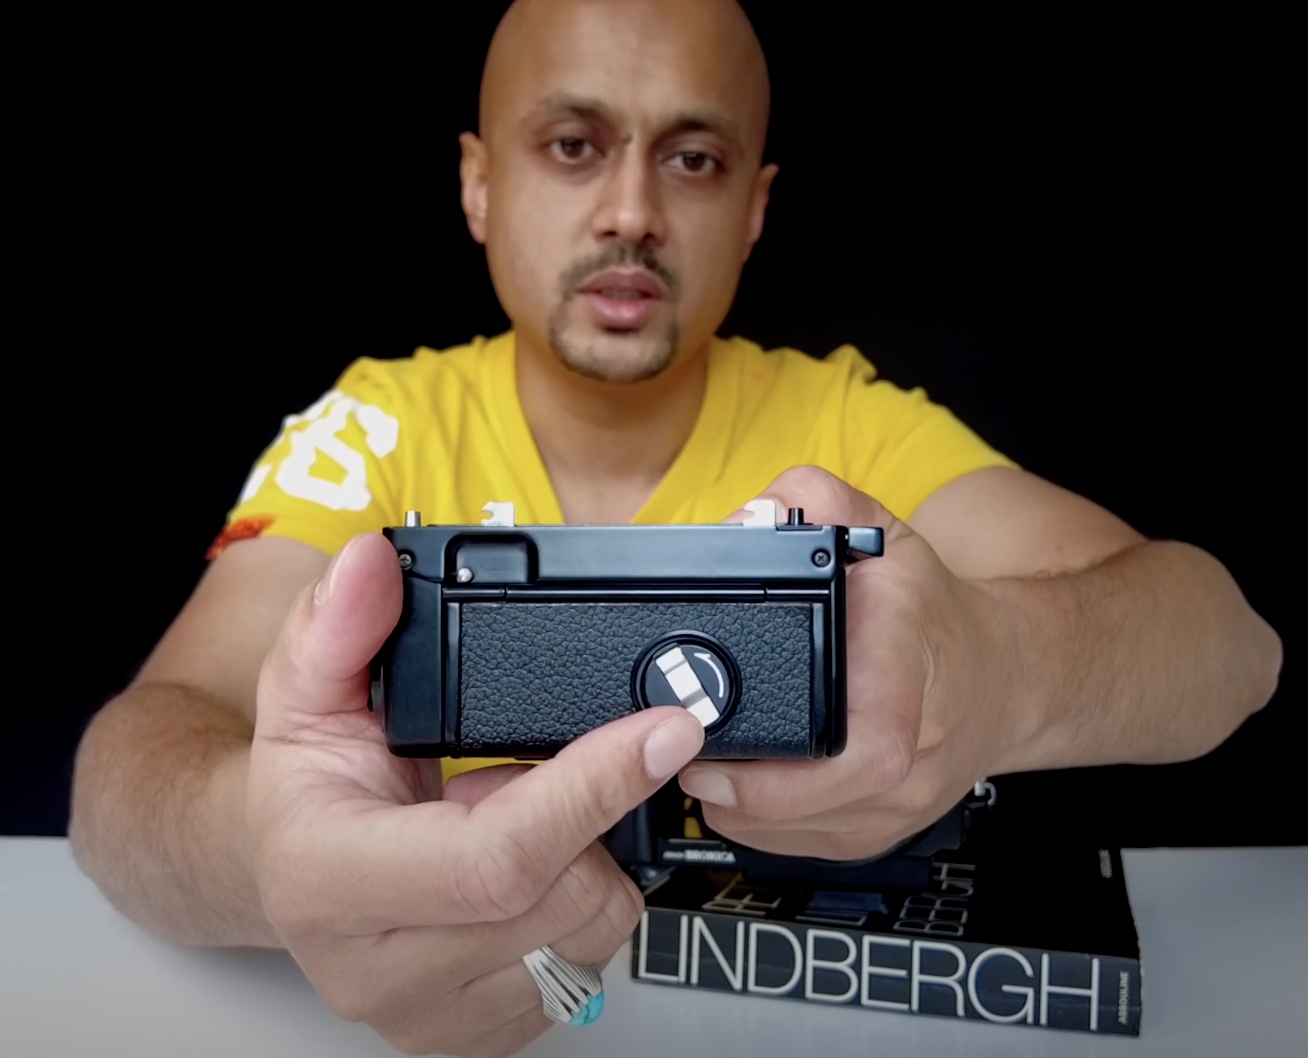
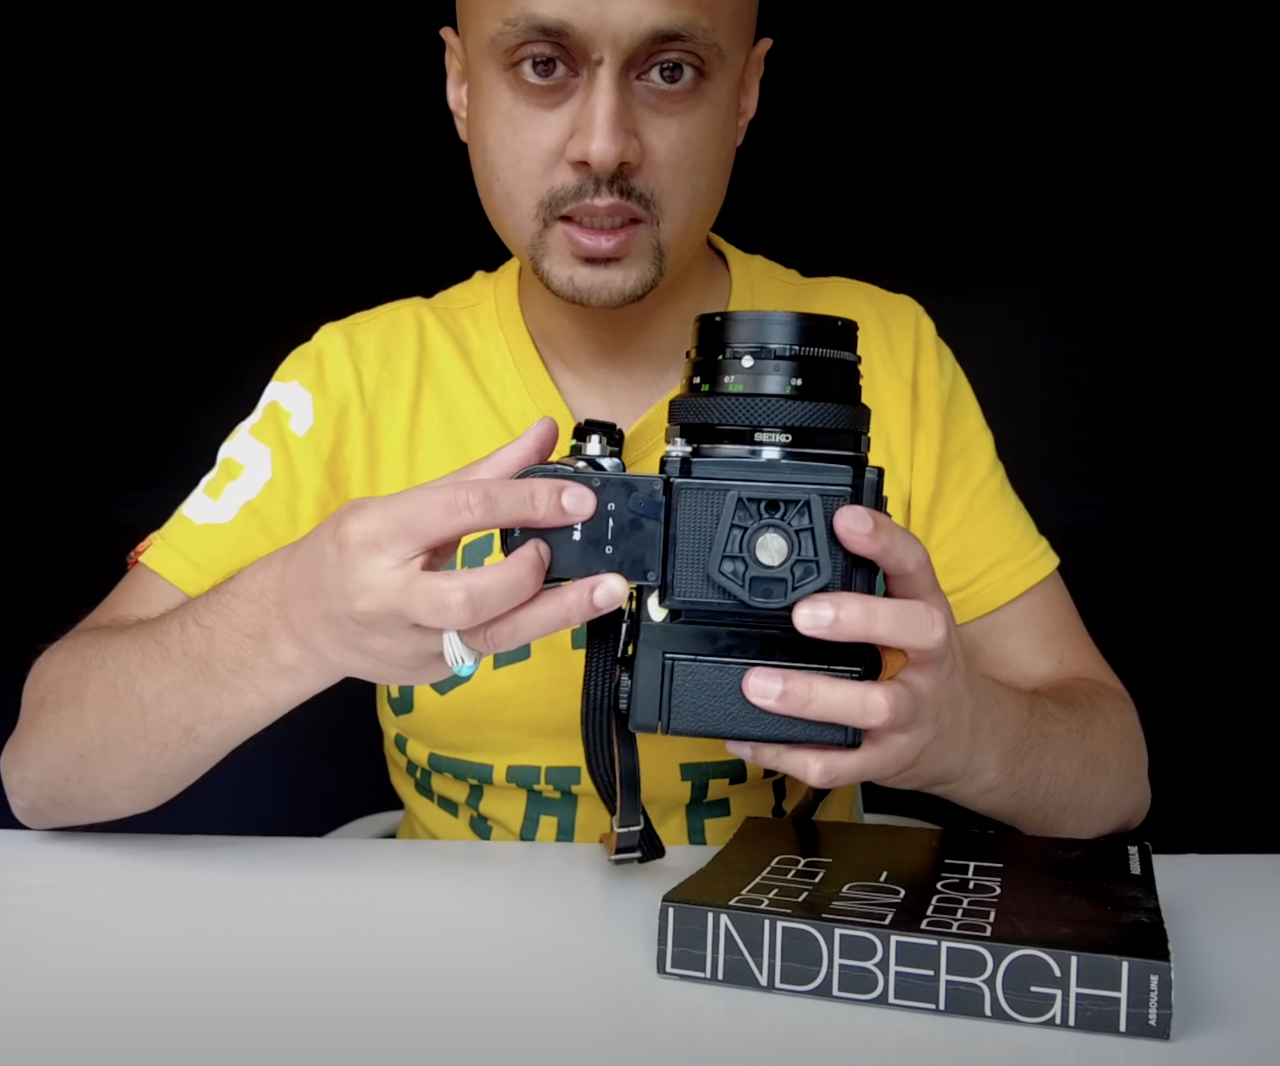
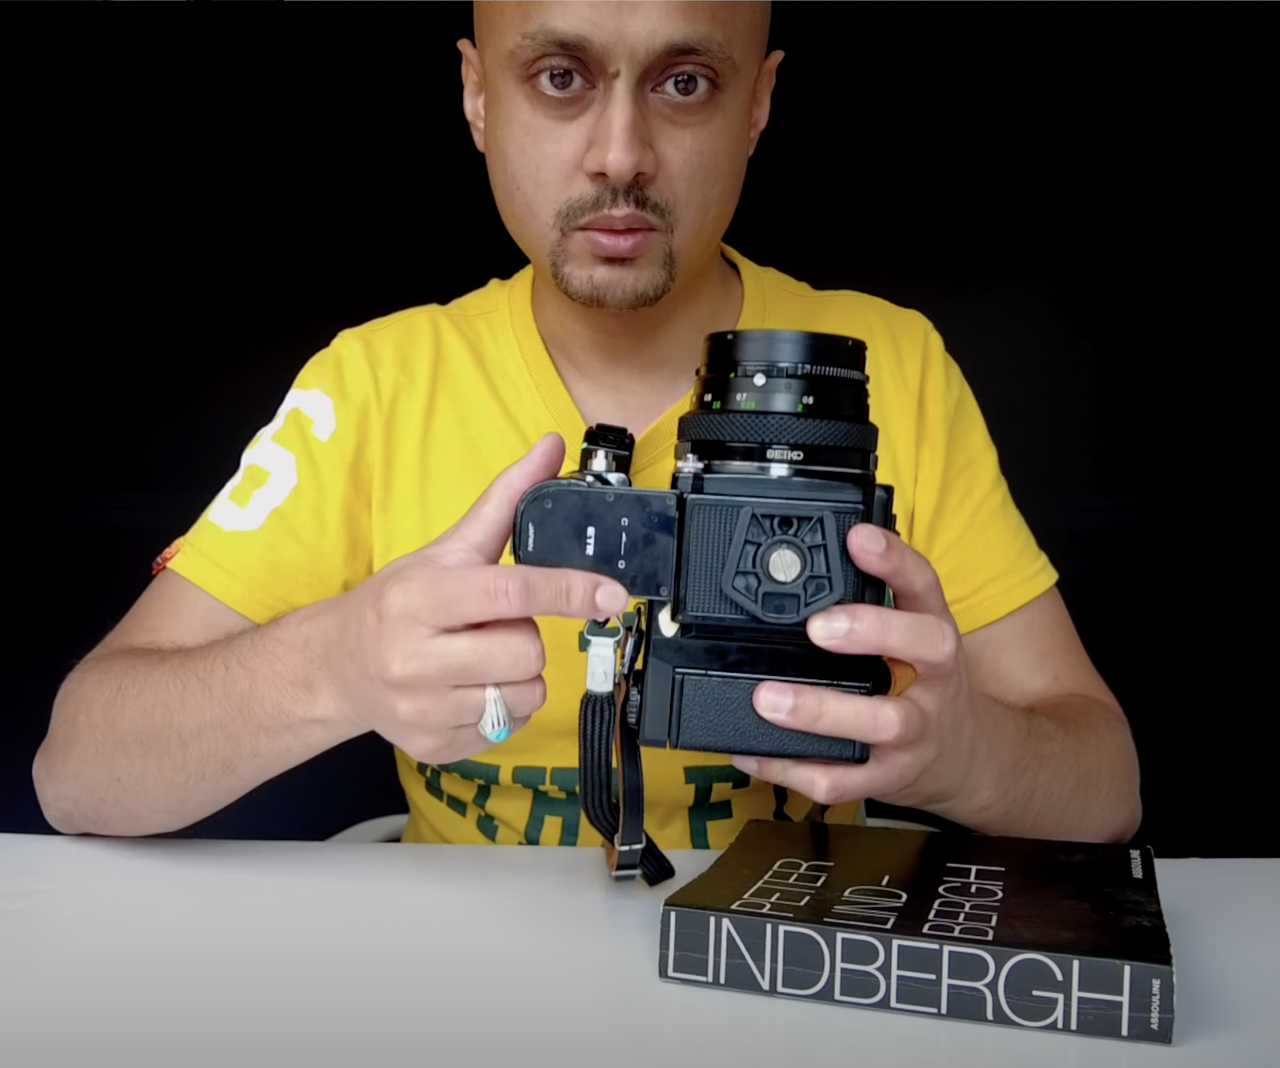
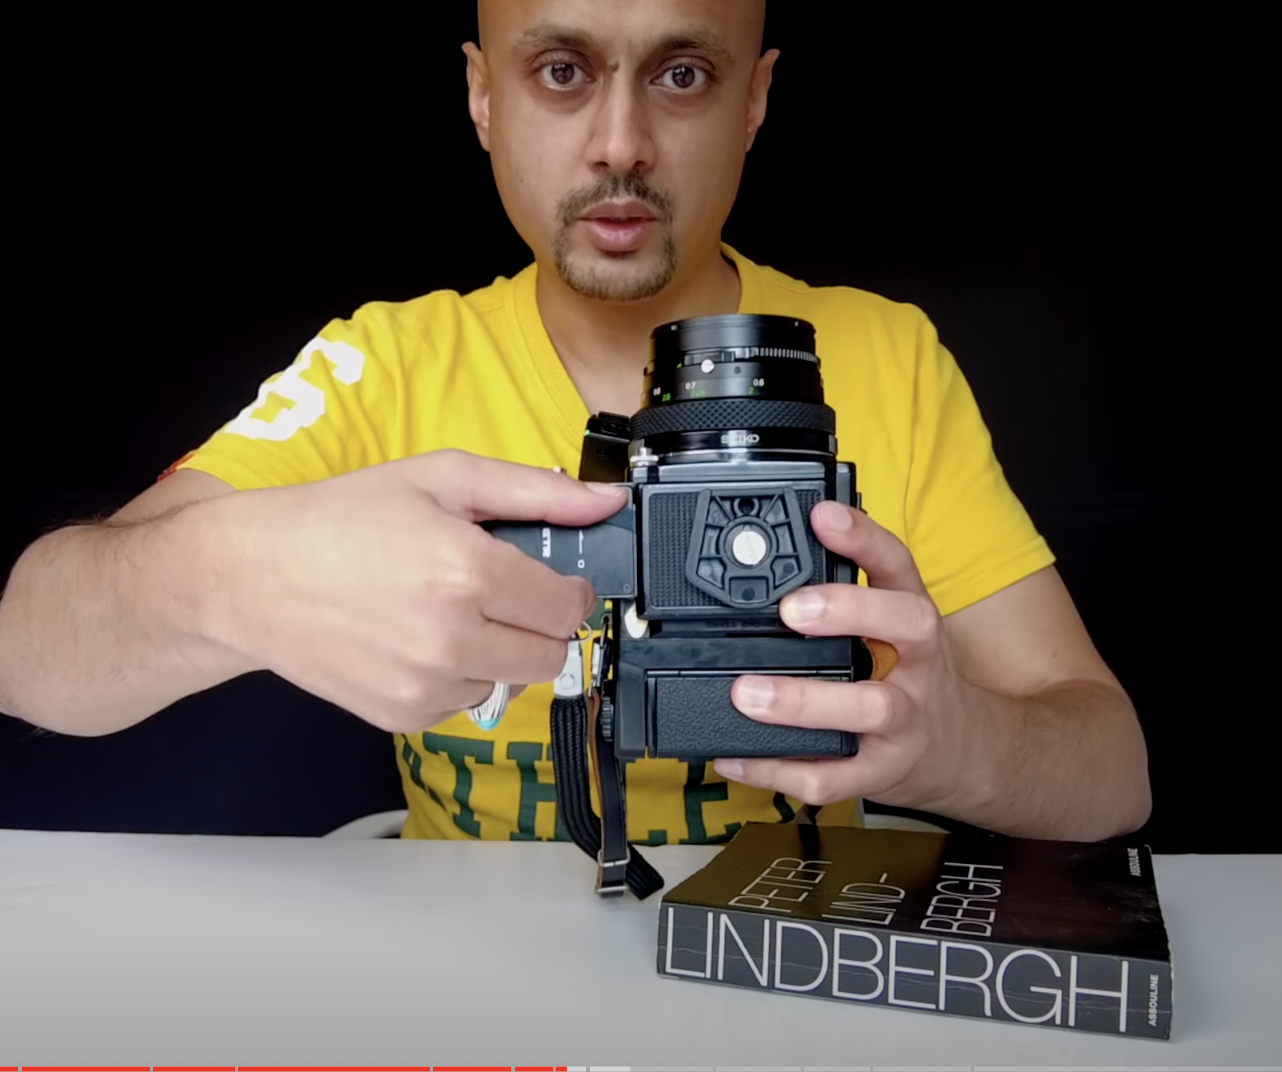
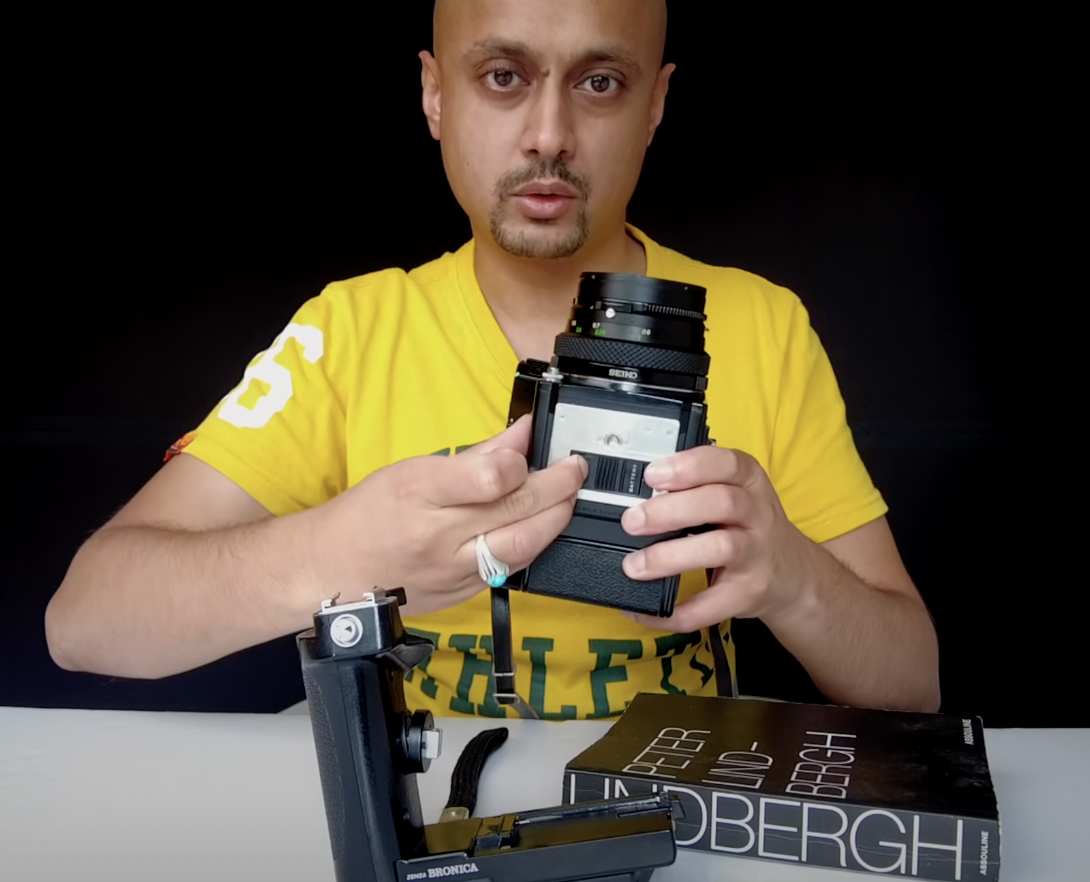
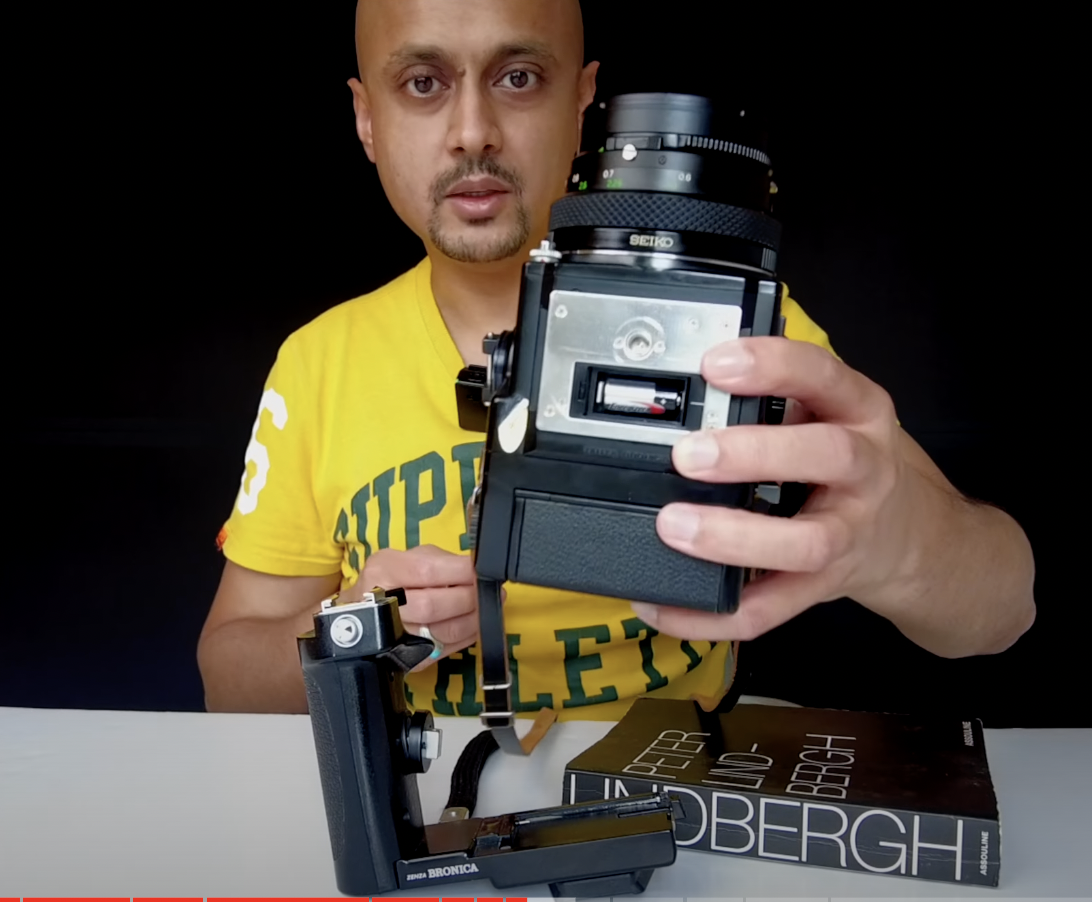
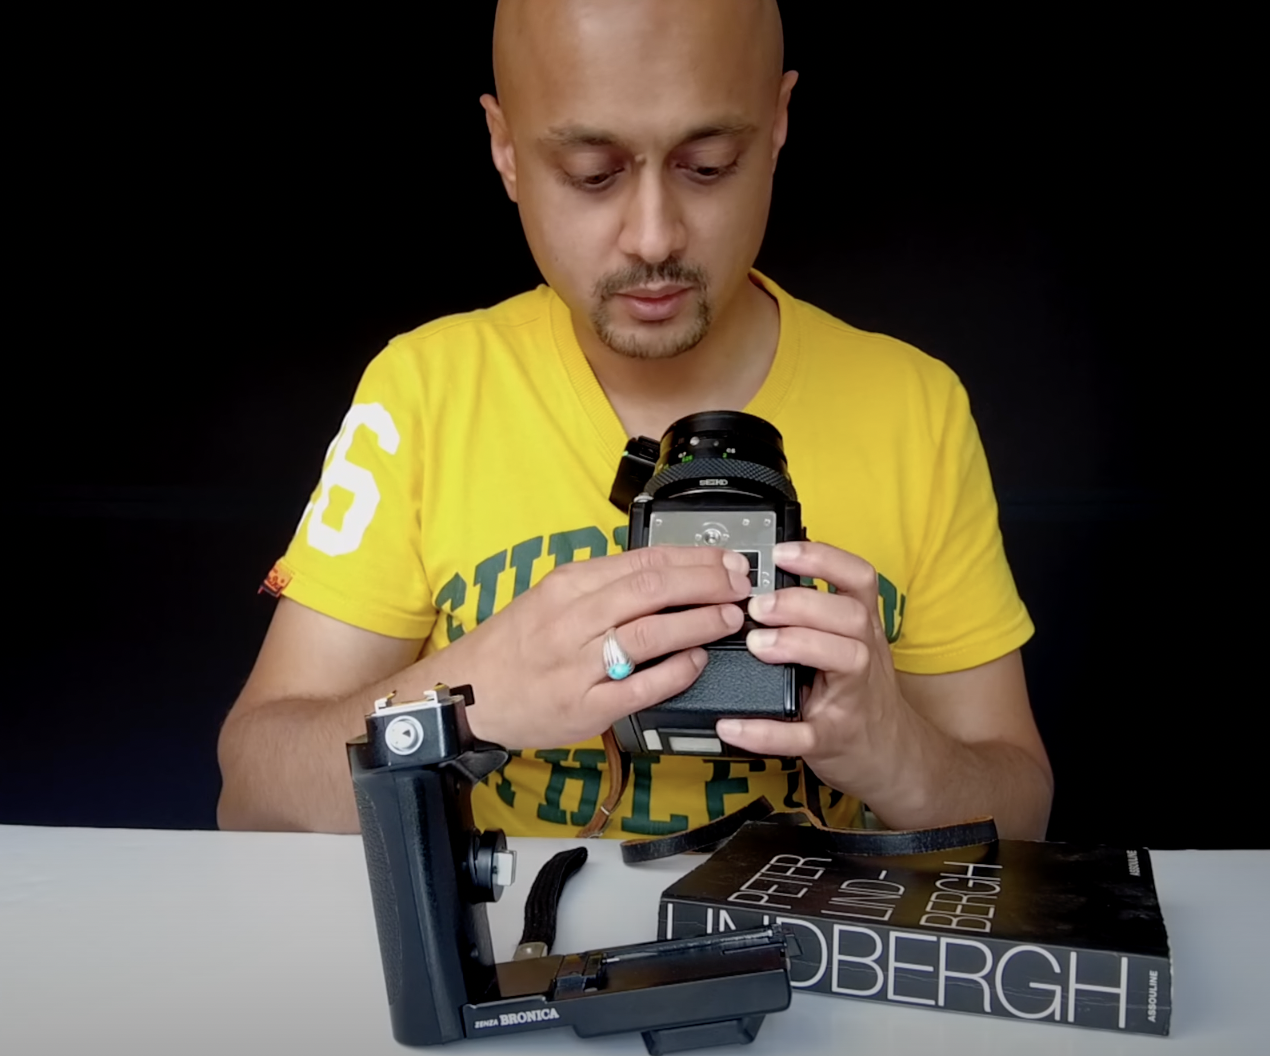
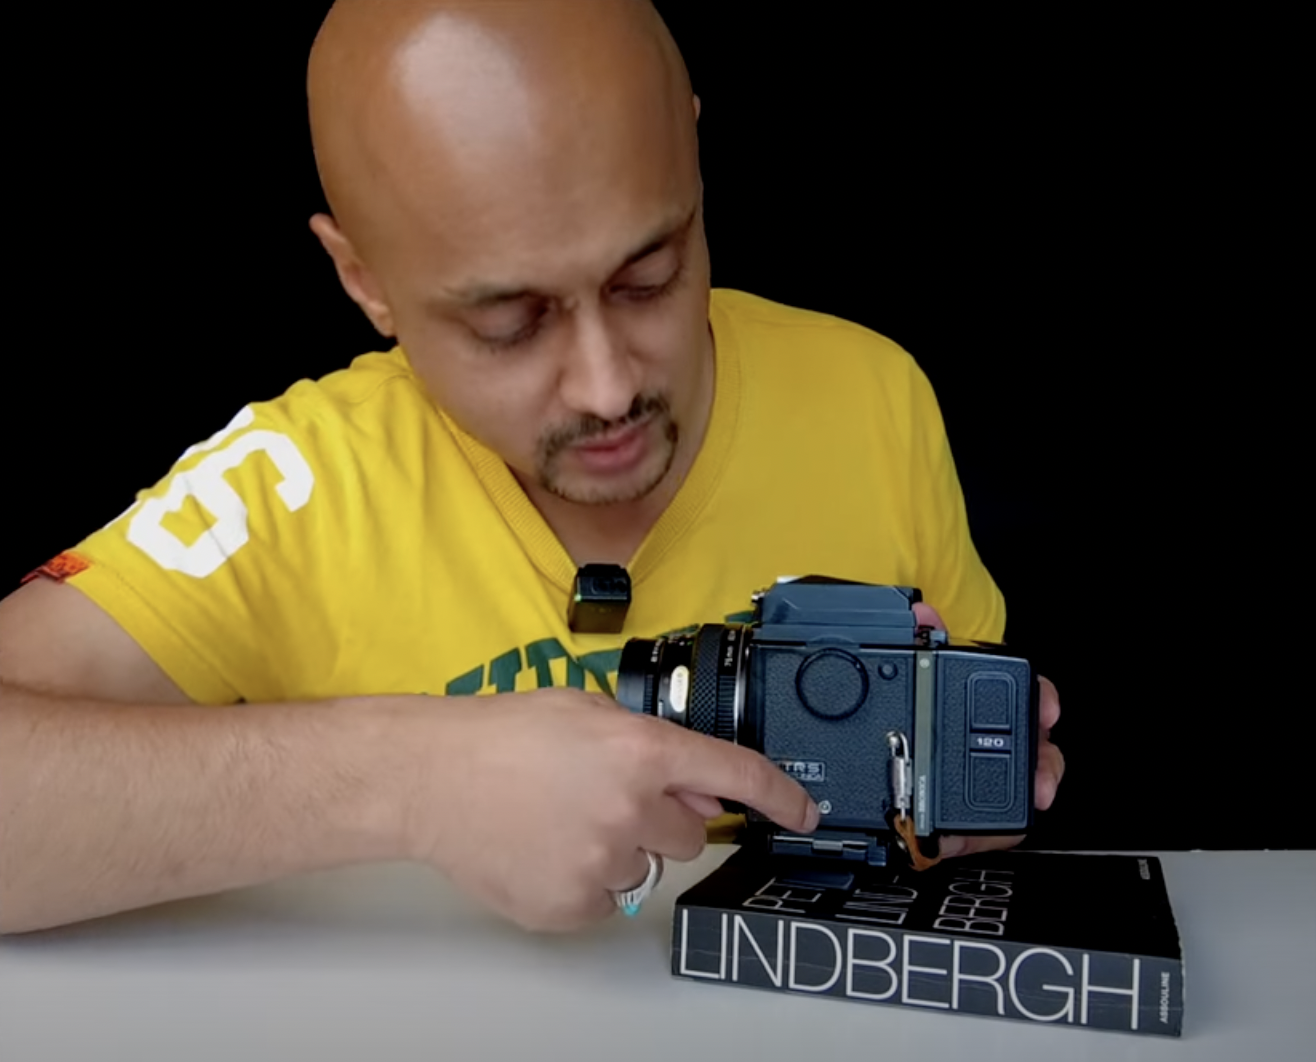
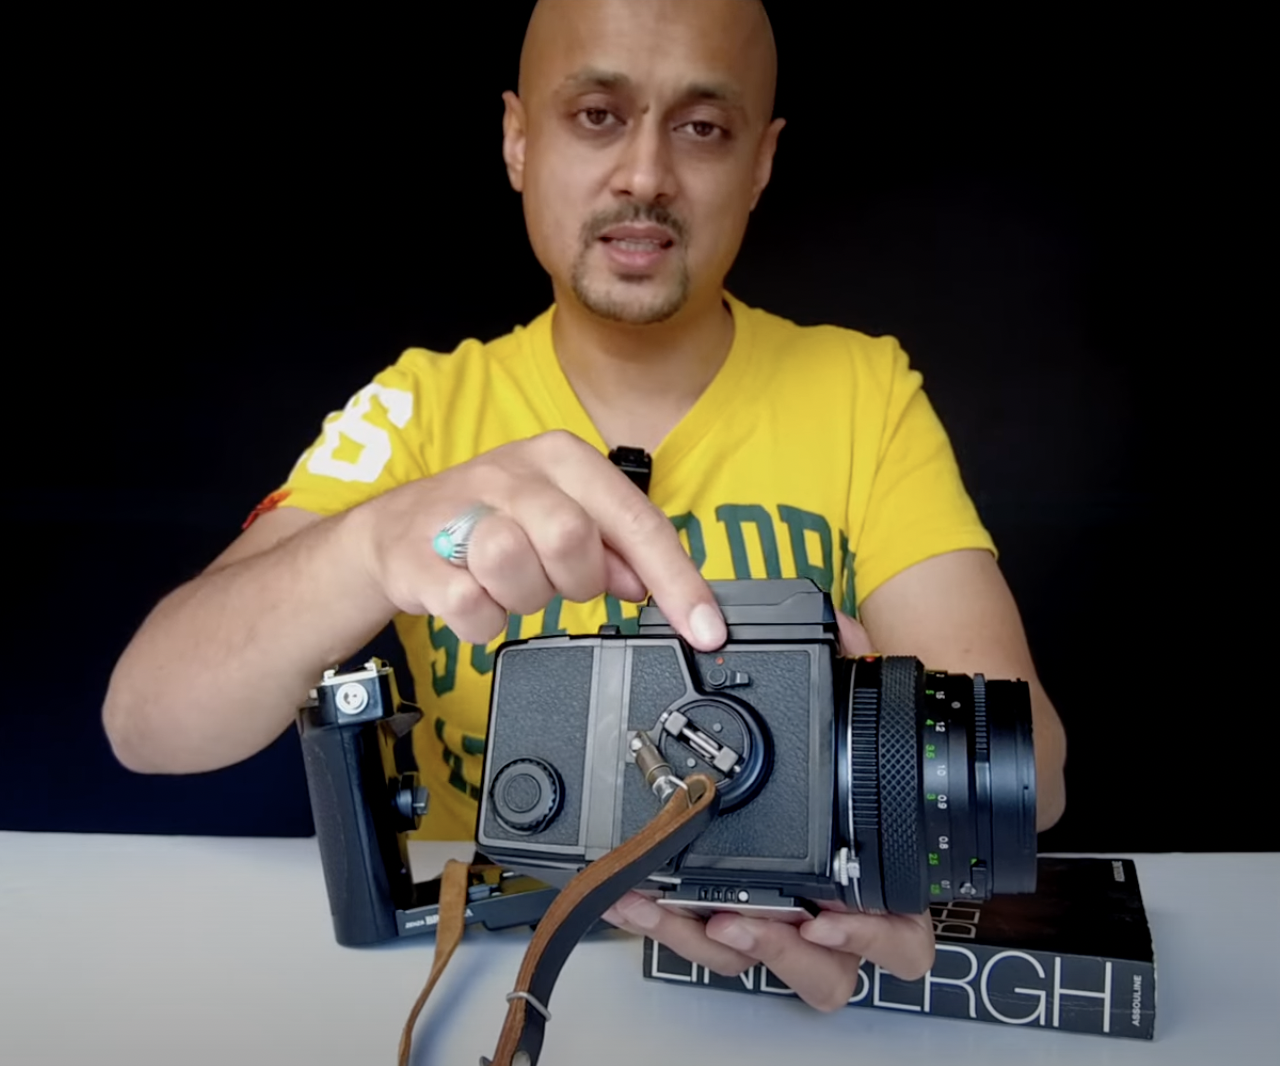
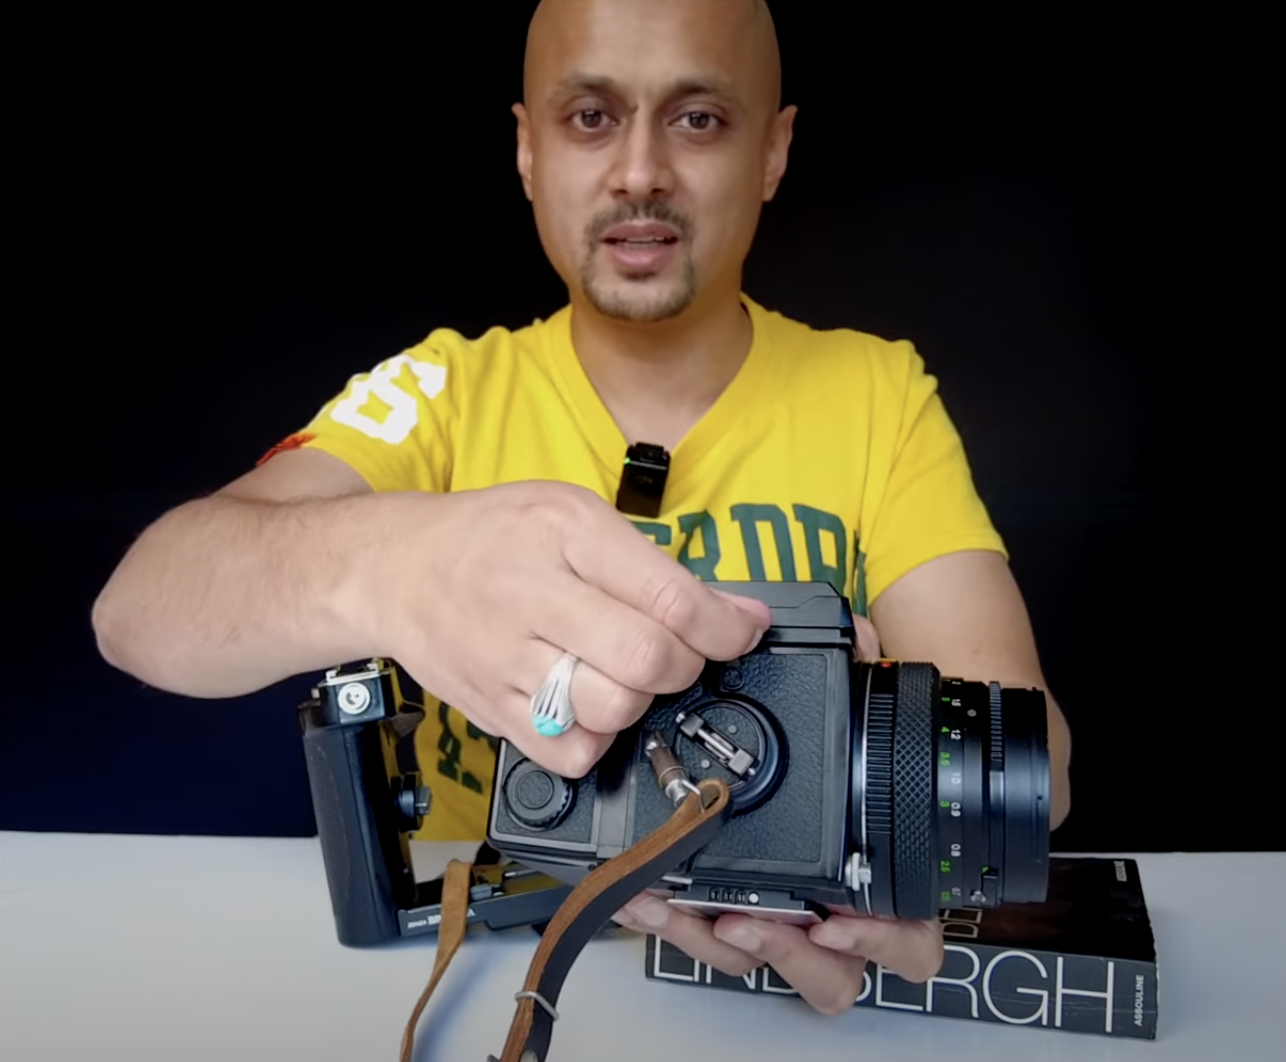
If you want to remove the handle grip all you have to do is rotate from C to O on the back, and then just simply gently lift this out from the right-hand side. There's a little tab just there and then pull this across and then you will have your speed grip separated.

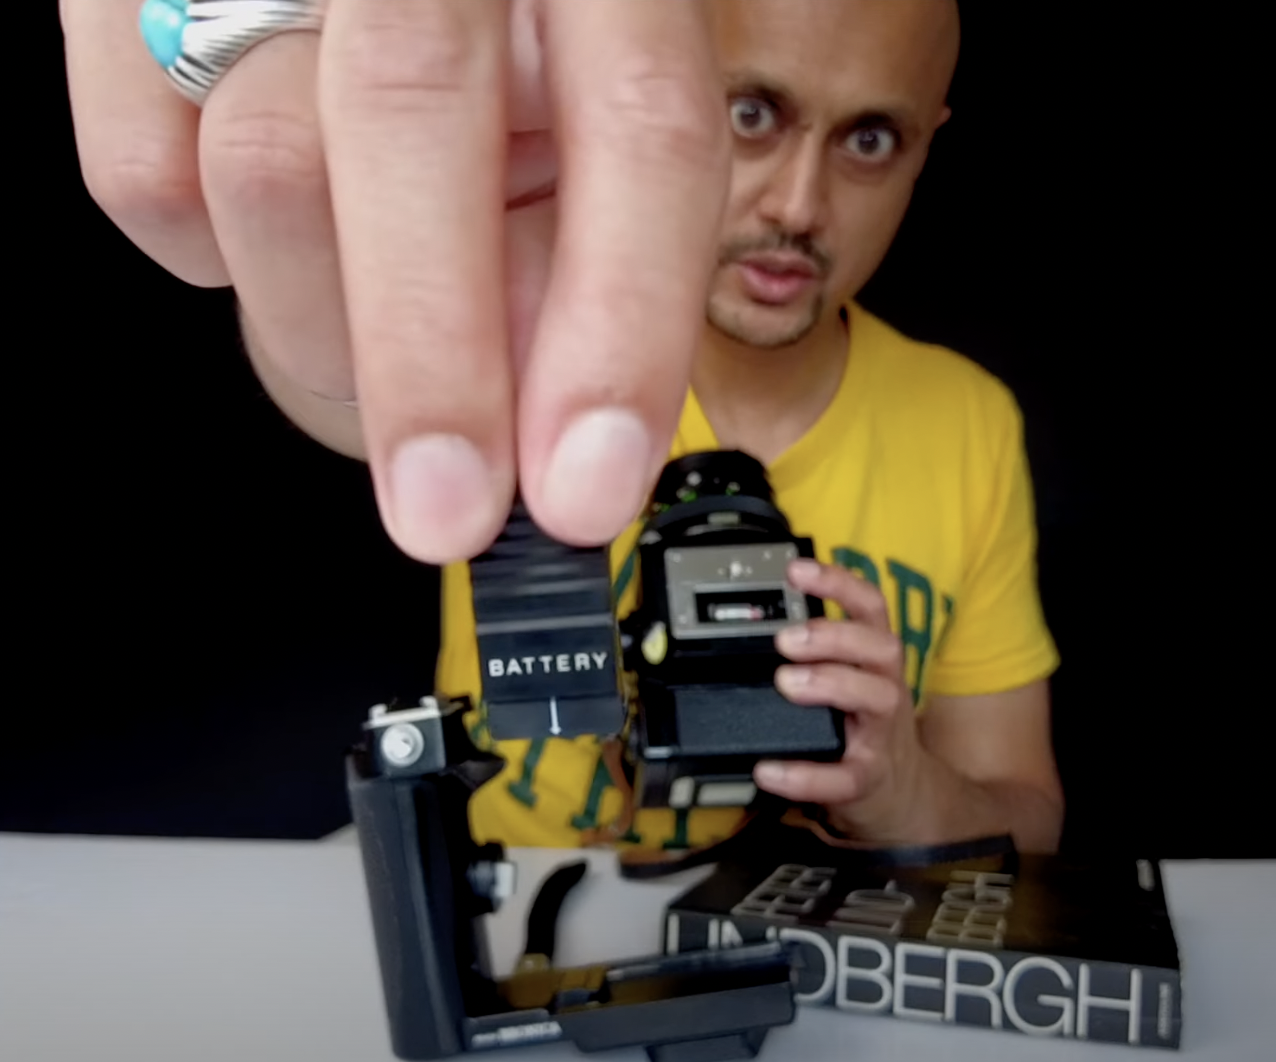
Of course at the bottom you also have the option of adding in a battery for the exposure. All you have to do here is pull the lever, push it down, pull it across and then it should open up. And then you have a little battery that you can pop in there. This is an A544 battery. This one's Energizer battery and it's still available online.

Go to Amazon or any other good electrical store. You should be able to find one. You can pop that back into your camera. Take your battery cover and it'll give you a little arrow as you can see at the top in, and then close the grip.

You'll know whether the battery is working or not because at the top of your camera there's a button you can press and when you press it, the red light in the middle will go on to tell you whether it is functional. That is something that you can add to it.

Do you need to have the battery in the Bronica Zenza ETRS for the camera to work? The answer is absolutely not!

The camera will function just as well without that in place. Make sure that you lock everything back in and then you'll be good to go to shoot your next frame.

How to do Long Exposures

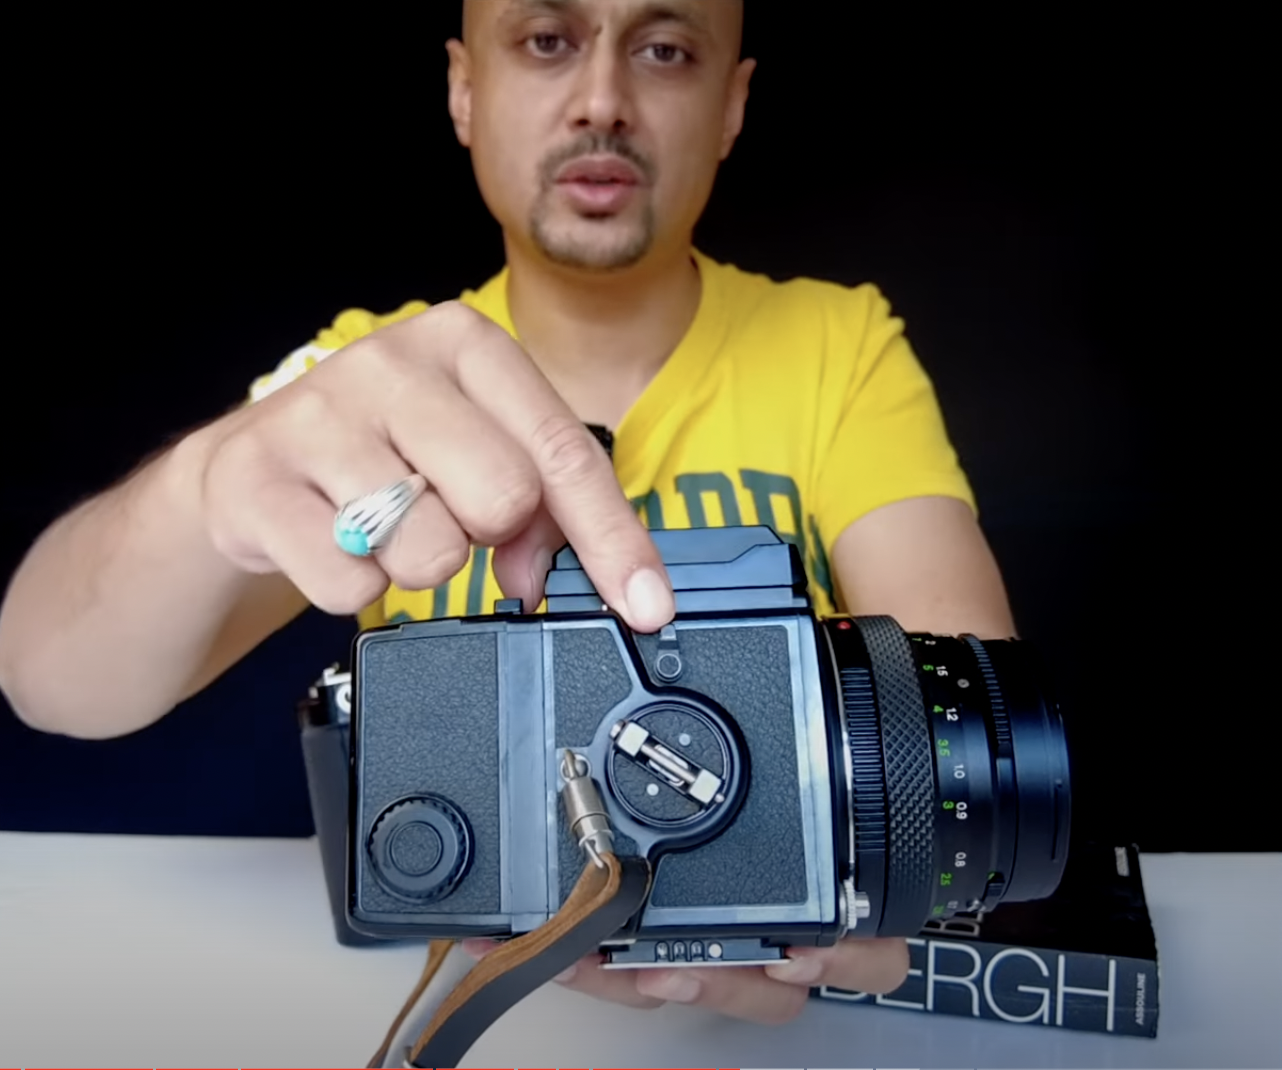
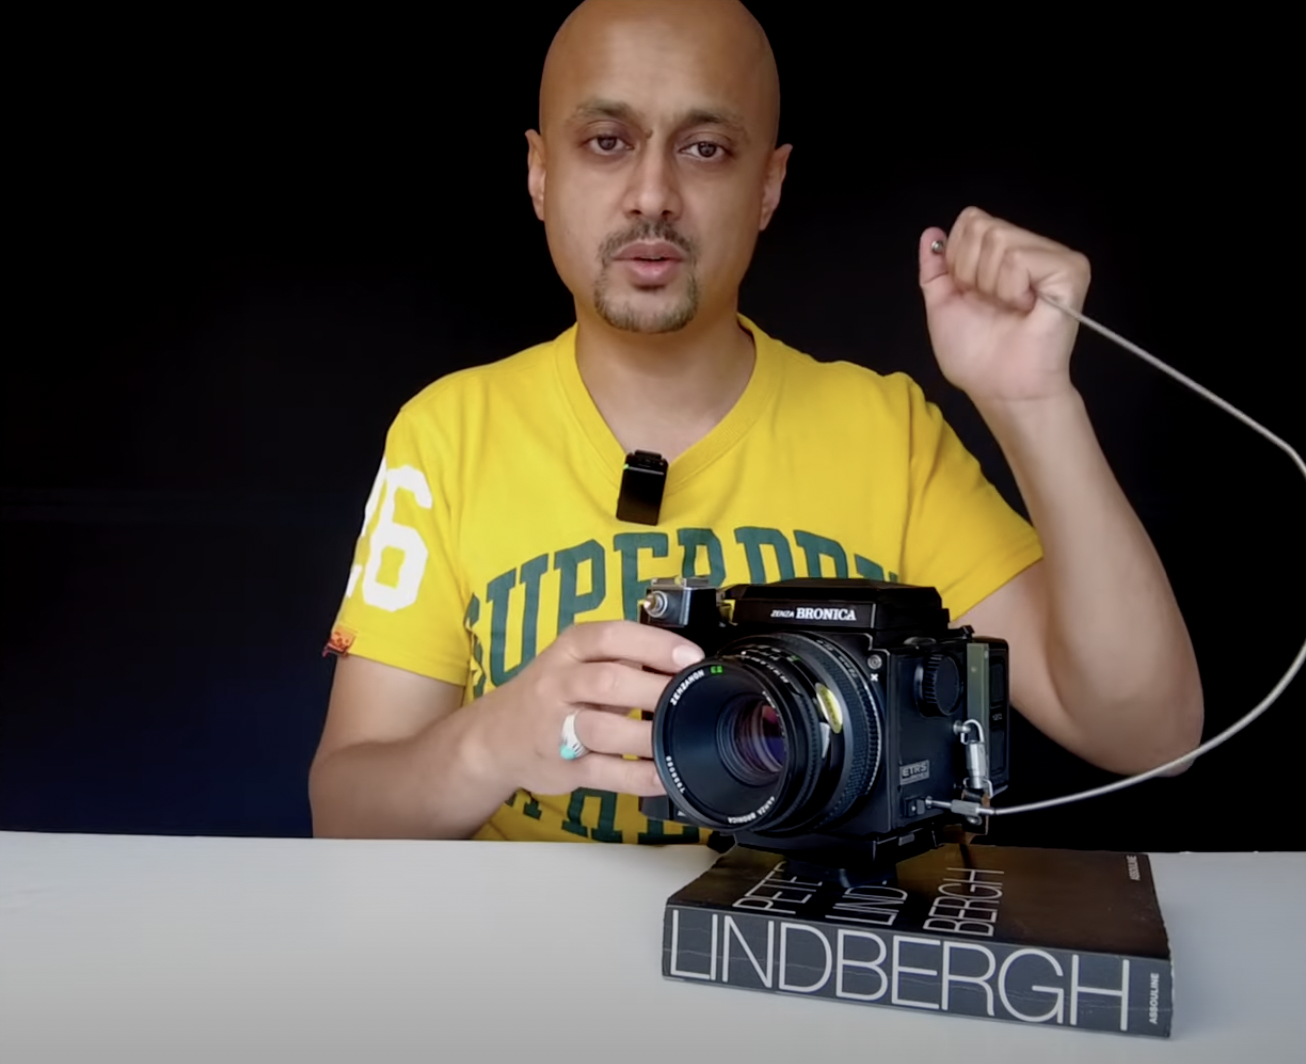
You might want to do a long exposure and for that you will need a cable release. The cable release mechanism is found on the right-hand side of the camera and you can see just this little nodule. If you don't have a cable release, then you might want to consider using the shutter lock function which can be found by rotating this dial.

How to do Multiple Exposures

Those of you who are a little bit more creative may want to do multiple exposures on this camera. It's a wonderful way to get creative and it's a simple way of doing this. All you have to do is on the right-hand side of the camera you have this lever and you just pull this lever down and then automatically now you can shoot as many frames on one frame as you wish.

In most cases you probably only want to do two shots. However, if you want to take it a bit further you can do 3, 4, 5, as many as you would like in this setting. Bear in mind that once you have taken the number of different exposures that you wish, just make sure that you pull this back up so that it goes back to signal mode again. That can be easily forgotten, therefore try to remember that next time you decide to go out and shoot multiple exposures.

The base unit alone doesn't come with a hot shoe, as such, if you're someone who enjoys to shoot with flash or shoots in a studio, then it would be highly recommended that you get a grip with a hot shoe on it.

Otherwise you're good to go and it could actually save you a lot in weight if that's something that matters to you. Holding it will be a lot easier. Also, if you're doing a lot of waist level photography then that might be a better option for you anyway. But if you do want a 35 mm sort of field because you're stepping up from 35 mm to medium format then this grip is actually a good one.

And it makes it very comfortable to hold a camera and also gives you straightaway the ability to shoot with ease. Changing to the next frame is also very easy too.

For this, you'd have to consider what kind of view-finder you use. For that there are a number of different options. If you want the full original analogue experience with medium format then stick with the waist level finder. However, some of us are a little bit stuck to our old ways and we want to shoot how we've shot before, maybe with the DSLR or even a 35 mm camera.

In which case you might want to consider getting a view-finder. These are available online at a modest cost and all you have to do is press this button here at the top, release this, the view-finder the waist level finder will come off.

Adding a Prism Finder

You can change your settings as you wish when shooting with this camera. For those of you who are reluctant to invest in a light metre, a dedicated light metre or perhaps you want everything to be available similar to a digital format feel then you can get additional view-finders which have those mechanisms in place.

The AE3 is also available if you remove your prism and is easily attachable. The AE3 prism comes with its exposure dials. You can change it to manual mode, aperture priority, shutter priority.

You can dial in the ISO rating on your film as well. It's the same process here. You just pop it on top and then it clicks in and then you're good to go. The only difference here is that everything is maintained within this metered prism.

If shooting with it, they can help you to make sure that you've got all your exposure dials correctly set. I have to say it comes with a caveat though. If you are a purist then you can avoid this option. The other more important downside is that at some point there could be some errors that happen within the prism itself or perhaps even stops working. They're very hard to find online. You may have to pay quite a lot to have it replaced. Therefore think about that option carefully.

You do have your other options such as the waist level finder, which I think is fabulous. This is simple. Doesn't cost a lot, simple to replace as well. Nothing technical involved in it.

If you want to have the 35 mm experience you can get just a view-finder you can look through it level on. The advantage of having either of these prism finders, one which is electronic, one which is analogue, is that you've got the full 35 mm experience. Therefore you can shoot landscapes or you can twist over and shoot portraits without any challenges. That's a lot more difficult to do with a waist level finder.

Should I Invest In the Bronica Zenza ETRS?

Bronica Zenza ETRS

Bronica Zenza ETRS with 75mm Zenzanon Lens

Think carefully about what kind of things you're going to be shooting because that could have an influence on which view-finder system that you choose to go for. Overall, this is a great system to have.

If you're thinking about moving from 35 mm to medium format, there are many other options available which are going to be a lot more costly for you. The Mamiya 645 is available. You've got the PENTAX 645 that you can also shoot with and those are fantastic cameras in their own rights.

The Bronica is one that is forgotten. I'm not sure why, but the lenses are fantastic. Often you'll find the bodies in good shape and good nick. Because it's a mechanical body, if you choose not to obviously get an electronic view-finder you're going to find this will last you a long time. And what are interchangeable backs, you can get the 35 mm or medium format backs.

You'll be good to go and you'll be saving a lot of money for this particular system. There are obviously newer systems available for Bronica which came out in the early 2000s, the SQ ranges. However, if you're looking for something which is going to cost you maybe a few hundred pounds, getting a system such as this will be one that saves you quite a lot of money.

That is quite an important thing to mention because film prices are not cheap these days for the foreseeable future anyway. And if you're keen and you want to get into medium format photography there shouldn't be anything that should stop you from it.

You can invest in this knowing that you're going to take some wonderful pictures on it. I stand by it. The framing, the way that this camera is set up, it's solid, it's light, easy to carry. It's got fantastic lenses which I've said so many times already.

This is going to be a fantastic entry point into medium format photography. Shoot with it, add things to it as you go along as I have and you'll pick up these things on eBay from time to time. Find something which is a fantastic deal and then something that you can add to your camera to give you a little bit more flexibility.

The only one downside I would say about the Bronica is that it doesn't have a 6x6 film back which is a little bit tricky, especially if you want to shoot in that wonderful square format. You can't shoot 6x7 on this either, as such, you are limited to 6x4.5 and 35 mm shots.

I hope this blog/video has helped you make a decision on which camera is ideal and best for you!
The Ultimate Medium Format Budget Camera

This video is a follow up on my previous one in which I showed you how to use this wonderful 6x6 medium format camera! Be sure to check that out after you see what you can capture with this wonderful little beast!
How practical is this camera as a handheld beauty? Let's analyze some photographs that I have taken with various film stocks to find out.

My first ever attempt shooting in the street as you can see gave some immediate feedback which for anyone new to this might be off putting.

Fear not, not all first attempts strike gold and with practice you will become a pro using this camera.

It is a leaf shutter but even the slightest movements by depressing the shutter will have an impact on the final image. You can see this shot taken in the street. You can get around this issue by not using the shutter release at the top of the camera and instead using the leaf shutter release from below the lens. The absolute best way to capture tack sharp images is to place it on a tripod. It will need 3/8" tripod threads, you can find these quite easily on ebay or a good photography store.

Nevertheless if you are going for a real vintage vibe with no strings attached you can absolutely shoot away like this and capture some classic and authentic looking images. If you’re shooting landscapes, no one will know when it was taken for sure.

5 reasons to shoot with the Zeiss Ikon Nettar

1. It is light and elegant camera which is highly portable. The silver frame is sturdy and will stand the test of time. If well looked after it should last you a lifetime.

2. The camera will force you to think carefully about what you are shooting so you become far more careful and meticulous about what you shoot. You will enjoy the process, through which you will learn how distance, shutter and apertures work in tandem with each other.

3. Compositionally, you will carefully frame all your shots which over time will result in highly personalized work and hone your creative style.

4. The large 6x6 Medium Format Negatives will give you high density detail. This is particularly important if you want to sell prints of your work. The negatives will last a lifetime depending on how well they are kept, and you can always scan and rescan to whatever size you wish.
5. It is probably the cheapest way to medium format. You can fetch one of these cameras online for about £30 and you’re set. At the cheaper end, you can grab a roll of film for about £3.50-£4.

The camera will help you capture some highly nostalgic shots in black and white. So if you’re looking for a classic look this will be a great camera to start with

If you enjoy analogue photography and want to try out Medium Format before leaping into it fully, this is a cost-effective way to do so. When searching for your own Zeiss Ikon Nettar, make sure you buy a camera with excellent bellows and a lens which has been well looked after.

These two things are the most important when investing in such a camera otherwise you may end up with disappointing results. Simply ask the person you are buying the camera from how it has been kept.

If possible, go and see the camera before purchasing it or alternatively go to a film photography store where you may be able to pick up a well serviced and looked-after one.

All in all, this is a fun and classic camera. If you can shoot with this camera, you can shoot with any camera.

Overall, this is a fantastic camera to work with. If you dream to work with a 6x6 Hasselblad or even a Rolleiflex which will cost you thousands of dollars, pounds or euros this is an incredible investment.

As the great Peter Lindberg once said ‘ Many photographers are fetishists. They're always talking about the camera and not the pictures. I have an old nikon. It's perfect. Don't worry. It's not about the camera.

You can pick up a roughed up Zeiss Ikon 6x6 for as little as £15 which personally I would avoid or as much as £50 for an overpriced one. You can find one which has been well kept somewhere in between those two figures.

If you have shot with Zeiss Ikon Nettar, thinking about it or have film photography gems to share then let me know in the comments below, punch the subscribe button.

Zeiss Ikon Nettar Simplified

No, these images were not taken on a Hasselblad or Rolleiflex but on the very humble 6x6 Ikon Zeiss Nettar Medium Format Camera.

Originally released in 1934, it went through several different iterations with the final Nettar II 518/16 being released in 1949 and ending production in 1957.

In this video we will look at the camera, its functions, how you can load film, take pictures with it and along the way I will show you what you can expect from taking images for the very first, how to avoid making the mistakes that I made and start taking beautiful images which will rival any 6x6 Medium Format camera.

Over the next few years expect to see a lot more digital Medium Format Cameras appearing on the market. Fuji has already made a flying start with its GFX range and you might be wondering what’s the point of shooting Medium Format? What is it and what can I use it for?

Historically speaking Medium Format Film Photography has been used by professionals who are creating work for clients that needed extra detail. Peter Lindberg put it best when he said the 35mm is for conversational photography and Medium Format is more for presentation style work.

This is a 6x6 Medium Format Camera and you will be able to capture 12 shots on this wonderfully simple camera. If you have an Instagram, you’ll be familiar with the square format which was originally started with 6x6 Medium Format cameras!

At first glance there is very little to the camera. It is a very light and highly portable camera. Its bellows open to reveal a fixed 75mm lens, aperture range from f5.6 through to f22. Its shutter speeds are 25, 75, 200/sec. You can put the shutter in between these fixed positions.

As there is no on board light meter, you will need to use the sunny 16 rule if you don't have one and if you do - use it!

How to operate the Ikon Zeiss Nettar

Let’s go through controls of the camera, the shutter release, cold shoe, bellows release and the film wind. If you are not sure about something, just hit pause or come back to it so you can master this at home yourself.

By pressing the bellows release the camera reveals itself. You will have to manually adjust all the settings including the distance between you and your subject, shutter speed and aperture. I would strongly recommend using a light meter which will calculate the correct settings when using this camera.

Be careful when you first open this camera, the bellows can pop out very quickly. Place your hand gently at the front of the camera and then press the bellows release. Let the bellows unfold out slowly.

The camera is in your hands, perhaps over 70 years old, treat it gently and perhaps someone else can benefit from using it 70 years from today!

There are main parts you need to focus your attention on when you open the Zeiss Ikon Nettar. The first dial you must adjust is the distance between you and your subject. It ranges from 4ft through to infinity.

4ft is about 1.2m so as a rule of thumb you can measure one large stride between you and your subject and you should be good to go. Maybe even work out what 1.2m looks like in your own stride or step. This is especially important when shooting a subject and when you are time pressed.

You don’t want to be carrying around a tape measure with you, alternatively if you have a tape measure app on your phone you could use that too!

If you are shooting landscapes, then stick it to infinity and you are good to go, simply easy.

The shutter speed goes from bulb mode through to 200/sec. Again, you will need to adjust this yourself and set it using the orange marker on the shutter speed dial.

Your aperture dials from f4.5 through to f22. Stick to one of the marked aperture points on the dial when you are starting off. Once you have a good command of these and you are happy with the results, then play a little more and see what you can create.

Once you have dialed in your distance, shutter speed and aperture you are ready to shoot. You will need to pull the shutter lever back to prime the camera. There are two ways in which you can release the shutter.

The first is with the 'leaf shutter release' at the base of the camera. Alternatively, you can use the shutter release on the right-hand side of the top of the camera. If you are shooting handheld, I would strongly advise using the leaf shutter where you can.

If shooting something where you need to have the shot come out for sure, such as a portrait of a friend or a client, then use a cable release like this one. They are very inexpensive and you can find many online for a few pounds or dollars.

The shutter release button at the top of the camera is where you can screw in the cable release. Once in you can control the length and duration of your shutter release by depressing the shutter here. This allows you to take multiple exposures as well as long exposures. Be sure to check getting your timings correct before you attempt this though!

How do you load the film on the Zeiss Ikon Nettar?

How do you load the film? Easy, close your camera bellows and turn it over. Pull down on the silver latch on the left side of the camera. The camera takes 120 medium format rolls which will give you a large 6x6 negative.

To put the roll into the camera, pull down on the springy silver bit located on the bottom right-hand side of the camera. That will allow you to slot in your roll, then gently release the springy bit back and the roll should be firmly put in place.

Pull the film across on to the empty spool on the left-hand side of the camera, wind and close the back lid firmly.

Now, roll the film by using the scroller dial on the top left-hand side of the camera until the first frame can be seen on the camera gate located in the middle of the back of the camera. In total you can capture 12 shots on each roll of medium format film.

Want the cheapest XPAN on the market?

Did you know you can also use 35mm film in your Zeiss Ikon Nettar? You will need some 35mm adapters such as these ones. This is easily found online or at a good vintage camera store.

Here’s how to get this setup. You will need any roll of 35mm, attach the adapters like so. With the adapters fitted you will need a spare film spool and some tape.

Take the film tongue and attach your tape like so. Now word of caution here if you are doing this in the open you will lose the first few frames on the film as it will be exposed when you pull it to stick it in.

You can get around this by investing in a dark bag. Once you have the film on your adapters and the tongue taped you can pop this into the dark bag and then mount the film blind into the camera. It looks hard but honestly it's really easy.

On a side note the dark bag has come in very handy. On occasions when film might get stuck in your camera, this can happen on any film camera, you can whip this out and salvage your film anywhere, anytime! I have saved several rolls in my time using this.

It is however, especially important for this camera because once you have finished the roll there is no way of rolling this back. So you will have to pop it into the dark bag and then manually wind the film up. You can do this by twisting this top bit clockwise.

Now I don’t have the tech to show you how to mount this in the dark bag but I can show you how to mount it in the daylight. Simply pop the film into the holder like so and then drag your film across and place the spool inside.

Before you close the back of the camera I would advise you to put some tape or piece of cardboard, you can take some from the box of film and tape it right over this red window. The reason is because this normally would allow you to see which frame number you would be on medium format film.

You can see that here on this medium format film strip. This paper protects the film from being exposed from the red window which is not present on 35mm film so you have to make one! If you don't you’ll end up getting a panoramic shot like this.

You might be thinking, but Ahsan, you have a window latch at the back of the camera! Yes, you do and you could tape that up or even just keep the camera inside a case if you have one. That way you know it should be fine.


There are lots of film stocks to choose from on 35mm and Medium Format. These include color negative films such as Kodak Portra, through to dedicated BW film stocks produced exclusively by Ilford and if you are feeling truly adventurous then stick in some slide film such as Ektachrome, Velvia or Provia.

Finding Inspiration For Vintage Shoot From John Cowan

Finding Inspiration For Vintage Shoot From John Cowan

This video gives a brief insight in to John Cowans Fashion Photography work during the 1960s. You will learn about his style and then move on to looking at a shoot I did in Bath, England in the summer. Each shot is carefully analysed to give the viewer an understanding of how to create well posed and lit portraits in the street in summer weather conditions.

Read More

3 Things I Have Learned So Far From Peter Lindbergh

3 Things I Have Learned So Far From Peter Lindbergh

There are 3 key things which Peter Lindbergh discusses in his book on fashion photography published by Taschen. Ahsan discusses the different medium format cameras available to shoot such as; Ikon Zeiss Nettar, Bronica Zenza ETRS, Mamiya 645, Pentax 67 and Hasselblad CM. Ultimately you should think carefully about what tool you use to create your photographic work.

Planning plays a very important role and you should take the time to think through what you will be shooting, with whom you will be shooting with and why you are shooting with them. The real creating happens in the camera and not after the shot has been taken.

Behind the scenes footage shows how to work with the Fuji GSWiii with Fuji Provia 100F slide film. This combined with the use of a Profoto A1 and Profoto Umbrella help to create wonderful light to create summer fashion images to keep. This video is useful for any beginner photographer looking to get in to analogue photography or improve their understanding of shooting with models or clients.

Read More

Provia 100F on Nikon FA

Back out on the water again testing Provia 100F which typically is recommended for portrait photography. I thought why not see how it looks for urbanscape photography?''

5 key features for this film stock

  1. it provides super-fine grain making life a breeze when enlarging prints.

  2. You will get highly accurate colour reproduction

  3. If you meter correctly you will get very accurate highlight to shadow linearity

  4. This could be a good choice for long exposure photography and multiple exposures

  5. Want to shoot in low light conditions then you can push process 1/2stop up to 2 stops with a small amount of variation in colour balance and degradation

Key Features

If you like the fine sharpness of digital photography and would like to return to film then this film could be a good choice. Shooting at ISO100 this colour reversal film will give you an extremely high level of sharpness, capturing the details with extreme clarity combined with wonderfully vibrant colours.

Film Speed

If this is your first time shooting slide film, shoot it at box speed whether it's on 35mm, medium format or large format. It’s the only way to truly find out what works best for you in the conditions you are shooting them in. After shooting a roll in different conditions, you can review them after processing to see which images resonate with you best. Now, you want to consider some push processing to see how the results will vary.

Exposure Guide

You should be good to go with the age old recommendation of shooting sunny 16. However bear in mind that these settings are determined for 2 hours after sunrise and 2 hours before sunset! Adjust accordingly using a light meter before and after these times so you can ensure the best results.

As you are watching these wonderful images scrolling, you might want to consider the following added things I have learned from shooting this film.

If you are out shooting casually in these conditions, perhaps on a beach, open water or even snow, anything with large reflective surfaces, then set your aperture to f/16 and you’re good to go. If you are standing in the middle of the street then, f/11 is sufficient, in extremely well lit conditions.

In hazy sunlight consider moving down to f/8 and if there is considerable cloud coverage, then, f5.6. If you’re in the shade or shadows and your camera allows it, then f/4.

Depending on your circumstances and experience with shooting slide films, you may want to adjust up or down ½ a stop during summer or winter.

If you are shooting indoors, perhaps, backlighting a subject then you may need to go up or down 1 stop in your aperture adjustments. Also, if you are shooting in extremely bright or dark conditions then you may want to adjust your lens plus or minus one stop.

All these numbers may sound confusing and complicated. You can save yourself a mind bend by using a dedicated light meter such as the Sekonic L-308X. The amount of times I have mentioned this brand you’d think I’m cutting a cut!

Best Filters

As you can see from my images, some of these have been exposed to extremely bright conditions.

If you are shooting in seaside locations, snowy landscapes in Alaska or distant bright views as you can see from these images, or even closeups or plants or portraits it is advisable to use a UV filter Number 2C.

For bright cloudy conditions, you can use a Wratten No.81A Filter and make an appropriate aperture adjustment plus 1 or 3 stops.

For early morning or twilight portraits use a Number 82A or Number 82C filter and adjust aperture stops again plus 1 or 3 stops.

Shooting with Electronic Flash

I have shot with Provia on Medium Format several times, the results have been very good when exposed correctly. However, I strongly suggest getting lots of practice with studio lights.

The advantage of working in a studio is you have a great degree of control over the lighting, so you don't want to flood your subject with too much or too little. Most modern studio lighting equipment is very very reliable and gives you a very consistent light.

If you are using fluorescent lamps you will have to adjust your exposure by one stop for white, daylight and cool white and 2 and 1/3 of a stop for warm white.

Use a Wratten Filter No.80A along with a 1 2/3 lens stop increase, when using 3200K tungsten lighting.

For household tungsten lighting such as room lamps which are the main source of lighting, you will need to use both a Wratten Filter No.80A and a Wratten filter No.82A, plus an aperture increase of 2 stops.

Storing your film

Serious analog photographers know the value of film and the value of their pockets. You can ofcourse store your film wherever you want but if you’re not sure when you might be using your film or even use it sparingly, then make sure you store it appropriately.

If you are going to be using it for up to 3 years then stick it in the fridge out of an abundance of precaution. Anything beyond that stores below 0C or 32F, i.e. in a freezer. If taking film out of a fridge, leave it in room temperature conditions for at least 2 hours before shooting with it. Obviously use your usual good sense when defrosting film from a freezer!

Multiple exposures

Great news for those of you doing long and multiple exposures. You don't need to exposure correct or colour balance within 1/4000 to 128 seconds shutter speed ranges. However beyond this you will need to expose correctly and colour balance as required.

Processing Film

You will need to use E6 chemicals when processing this film. If you enjoy experimenting then you can also cross-process colour negative films with E6 which will give you a colour positive image but likely with an orange base.

Retouching/editing your film

This is really down to you as an individual. However you may want to consider doing this if the highlights are too bright or you would like to lift a little bit more out of the shadows. Typically with film, it is very difficult to pull information out of the shadows so just be aware of this when metering for your subject or landscape.

Why Printing is your work is important

Regardless of what is happening around us, we are living in unique times. A time when we have access to our photos at any point on our phones! Yet, how many of us have our images where we can see them in our daily lives or even to feel in our hands. Take the time to pick out your best images and perhaps make an album or even a book out of them. They’ll bring you joy in a very different and tangible way.

Final reflections

Provia 100F is certainly one of my favourite slide film stocks. One of the main reasons why I love this film so much is because you can see the results of your work right there in front of you. Unlike film negatives you can relive those moments without having to scan your work [that is if you don't want to].

Photographers often associate this film stock with fashion or portraiture work but there’s absolutely no reason why you should use this film for other work from product to natural landscapes. In fact, I think with large positives available in medium format you could take some wonderful landscape images.

Subscribe to my YouTube Channel here for more tips on shooting with film

First Fashion Shoot with the Bronica Zenza ETRS A Throwback Story

A throwback to one of my first outings with my Bronica Zenza ETRS and Jacqueline. We chose to head over to the centre of brutalist architecture, the Barbican Estate. 

We shot two different looks around the estate. The first one was this red number. One of the most enjoyable things about film photography is the range of different ways you can shoot with different cameras. The waist level finder on the Bronica offers new ways of approaching your subject to shoot with. The key thing to when you are uncertain, is to focus on going fully head on with it. 

In these images you can see that I was shooting at first from very straightforward positions. Here’s one with Jacqueline standing in the middle of the road, as we use the dotted lines for framing the image. 

I then changed perspective at got as close as possible to Jacqueline shooting from above as she rested against this pillar. The theme continued with finding new ways of taking the image from angles which are often unlocked. 

Taking the shot from this position was a little tricky, climbing in to position. I made sure I was safely within my boundaries, If I stepped too far forward, it would be a hospital visit forsure. When shooting film, you don’t know how it will turn out so it forces you to compose the image in detail before you shoot away. 

Adrenaline running I thought of new positions to get in to which would be tricky. I walked an incredibly narrow strip of wall to capture this image, precariously balancing on the edge to capture this image of Jacquiline resting across the steps. Again, pleased with the outcomes with the relative risk involved. 

Finding unique bits of art to shoot with or on are tricky and hard to find sometimes. Jacquiline is a free spirit and was keen to create so without hesitation took off her heels and walked across to climb up this sculpture. Her long profile and top to toe works well, especially with the green and red contrast. Next time you are out shooting, think of different ways of capturing images and move your feet too. 

With a few minutes remain Jacquiline jumped in to this black and white look and we shot some fun stills to end the day and shoot! 

All film images were taken on the wonderful Bronica Zenza ETRS Medium Format Camera with 75mm lens.  

You can learn more about my wider photographic work by subscribing to my YouTube Channel. See you there!

Every Street Fashion Shoot I Am Improving With My Rangefinder

After a first set of good results with my Fuji GSWiii, from the shoot with Anna, I organised a group shoot with Luise back in Central London.

I hadn’t seen these togs for quite some time so it was a great opportunity to catch up and enjoy some photography together.

I chose to shoot some Ektachrome and Kodak Gold in today's outing and we started off outside Bank.

When I turned up, I found a commercial shoot going on which looked pretty intense and another tog with her makeup artist taking shots on the steps.

Luckily the commercial group were wrapping up and they were on their way out. Perfect time for us to swoop in and start taking shots!

With only 8 frames to each roll of film, the 6 by 9 film size is incredible to view, especially on colour positive film.

I was confident that Ektachrome would perform well today given the lighting conditions. There would not be a need for off camera flash today.

How to Shoot with Rangefinders in Bright Sunny Conditions

First shot, super overexposed, unfortunately something to carefully consider for next time. In the broad strong sunlight perhaps underexposing by a stop or two may help to resolve this issue.

The second shot performed better although there appears to be a blue tinny cast to the image. I’m not exactly sure why this is. If you know or have a hypothesis I would love to hear it in the comments below.

The sunlight was exceptionally strong today and at times difficult to keep your eyes open without some sunnies on.

In this shot, I asked Luise to close her eyes and imagine something longingly while resting on the stairs.

The whites have come out brilliantly white and probably has been compounded by the whitish reflection off the stairs too.

Key takeaway here is to avoid bright white clothing in bright sunny daylight conditions!

A momentary shade and this image was captured spot on. I like the way Luise is looking down the barrel of the camera but also how arms and legs are creating triangular shapes which adds to the compositional balance of this image!

It’s also good to see the highlights not being blown out and the colours in this frame have come out remarkably accurately!

How to Posing Tall Subjects and why your positioning and lens choice matters

A quick side note here, be careful when posing tall subjects. Shooting from a low angle will accentuate the profile of your subject whereas shooting from a higher angle will exaggerate the torso and shorten the legs.

If your focus is on the head and chest of the subject then shooting from above would be recommended but for full length shots this should be avoided. This is mainly because your shot will compress the subject’s profile creating unflattering results.

To get the best results, use an appropriate lens which flatters the subject. In my case, I was working with a fixed 65mm lens, which is equivalent to a 28mm lens on a 35mm camera.

That is a relatively wide angle lens. Perfect for street photography but one to carefully use if shooting portraits.

Ultimately, a great pose is captured in camera with the combination of the right camera angle, body position, and focal length!

Got Luise to lay back for the next shot and you can see immediately the sun was back out in full force. Slide film scanning is proving to be quite a challenge, but with practice this will improve further.

We finished off at the steps with this shot. A reflector or an translucent umbrella would have helped reduce the amount of light falling on Luise but I like the pose again as is, the use of triangles but also the columns in the background accentuating the height or sense of scale in the image.

We decided to move away from the stairs and took some on this bench. This image has come out almost tack sharp and the image looks fantastic on this slide.

Working with large rangefinders can be tricky, however, you may have noticed the image has been a bit cropped off at the bottom.

To avoid such errors with these cameras give yourself a little bit more space within the frame in your visor. The more you shoot with this camera or similar ones, the more skilled you will become. It’s all about continually mastering your craft!

A follow up shot with Luise sat down looking into the distance. Again the colour reproduction here is absolutely spot on with the general tones of the outfit and setting creating a fitting vibe.

We changed it up a little again trying to get some more shade going down into the underground however, it was a little tricky here and whilst the colour reproduction was good I was working on f5.6 with shutter speed of 1/30sec which has added a little motion blur to the image.

The final shot was taken with Luise resting her arm on the railing, a slight miscalculation of the distance has given this image a bit of a defocused look.

I found Kodak Gold 120 to be very reliable

I switched up to shoot some Kodak Gold, colour negative film, which tends to be a little more forgiving. Be sure to check out my previous videos on Kodak Gold.

I have found it to be very reliable and brought some along as a substitute just in case I had completely blown the first set on Ektachrome

Luise was a superstar and switched up her outfits in no time. We got to shoot with her in this bold yellow outfit which was spot on!

I really like this image of Luise standing in the middle of the road. Don’t be deceived by the white lines, that is the bike lane in this extremely narrow road.

It was a case of darting in and out to shoot here but we got the shot! Don’t do this unless you have someone watching your back! Thank you Marcus!

Next time, I would move in much closer because the focus of the image is Luise and not the surroundings.

Moved back to the tiny sidewalk and took this full body portrait. Kodak Gold does have a tendency to leave this warmer tone, which in this case added to a late afternoon feel.

With time pressing, I took these two quick shots again focusing on full body composition and then moving in for a closer shot before finishing off with a relaxed pose on the wall.

How to setup your rangefinder to get the best images every time

Overall, this was the second time out shooting fashion with my Fuji GSWiii. Biggest learning from this shoot was that I needed to carefully consider the settings in strong sunlight.

Even with light metering you will need to carefully consider the type of film you are shooting with. Moving into a little more shaded location would perhaps have resulted in more reliable outcomes on this slide film.

I am sure you have lots of your own photos, how often do you spend reviewing them? You have seen that I make lots of mistakes too but the key here is to go back and reflect on your work.

By doing this, you will be able to make those incremental improvements.

With time, your images will become even better, so when you come back to look at your first photographic work, you’ll look back to see how far you have come!

If you are new to shooting with the Fuji GSWiii or similar cameras then it takes some practice to get your distances spot on too. It can be a little tricky using the rangefinder to focus accurately.

Try not to put too much pressure on yourself with time limitations. This is so you can be more considerate with your actual distances between you and your subject. Therefore making sure you get the sharpest image possible every time.

This particular Fuji comes with a fixed 65mm lens and if you enjoy shooting street photography it could be a fun companion with its 28mm, 35mm camera equivalent lens. I’m curious how an actual Leica would feel like shooting with, perhaps one day!

Although primarily known for landscape photography, the Fuji GSWiii has the potential to give photographers new creative opportunities in portrait photography.

I think in future shoots I’m going to try and get in more closer shots to see how the image reproduces.

Overall, once again I feel the closer I was shooting to Luise, the richer the details in each of the frames. Next time, avoid bare sunlight too!

With more shoots I will slowly find my preference, Let’s see where this takes me next!

Want to stay in the loop with what I am up to and my work? Keep coming back to ahsanabbas.com/journal

For more videos subscribe and turn on the notifications for your weekly video drop!

Street Fashion Shoot With My Fuji GSWiii

I have just had my Fuji GSWiii sit at home waiting for that perfect chance to shoot some landscape images on film. Knowing myself, I figured I would have to create an opportunity! 

With only 8 frames to each roll of film, the 6 by 9 film size is incredible to view, especially on colour positive film.  I parked my trusted Bronica Zenza ETRS and decided to get out and use this camera more this summer. 

This particular GSWiii comes with a 65mm lens which I believe is equivalent to a 28mm lens on a 35mm camera. 

First shoot opportunity came from a shoot setup with Anna. She was in the country and we set up a shoot in Central London late one afternoon. 

I threw in a whole bunch of medium format rolls into my bag and over the next few hours we shot natural light as well as with my wonderful profoto umbrella and profoto A1. 

Shooting Fuji Provia 100F in Natural Light

We started off by shooting on the colour positive film Provia 100F. It was a late afternoon shoot, hence why I brought along my off camera flash. These images were all taken using natural light. 

I really like this image of Anna in her chequered jacket and blue jeans looking over in the distance. 

The colours came out natural to the eye which I was really surprised to see considering the relatively low level light available at the time. 

The details are captured in this frame with Anna resting one leg down while resting her head gently against her left hand. 

The details in the jeans combined with the reds and yellows in the fore and background add more energy to the image. 

The highlights are perhaps a little overexposed but something that can be managed in a future shoot in camera or in post production! 

Going in a bit closer, once again the colour and detail of the 6 by 9 negative has really come out super well. 

This image of her holding the rose, combined with the red seat and red lipstick draw in the line of sight making it a compositionally attractive image to view. 

This combined with how her arms make an almost symmetrical look on either side in reflection to the legs.

I took another image of her standing up with the rose and framed this one up. I think these more close up portrait shots could be the way to go! 

Ending this set I took this shot which is a little out of focus but I really like the effect and emotion coming through the image and this is definitely one of my favourite shots from the Provia batch! 

Kodak Ektachrome in Natural Light

Well, If I was going to shoot some Provia, I was going to have to shoot some Ektachrome to see the differences in colour. 

Unlike the Bronica unfortunately you don't have the luxury of swapping film backs to capture identical images but I tried my best to keep the frames similar in nature throughout. 

Starting off with this shot, the colours are a bit more subdued but nevertheless deliver outstanding colour rendition. 

Part of the ability to shoot well with subjects comes down to how well you both come prepared to shoot. Certainly Anna, turned up with the perfect outfits for a befitting urban location shoot.

As before I took a combination of closer shots combined with wider shots to see the differences between the images. The consistent theme throughout is the more subdued colour rendition. 

I think, in part, maybe there were clouds passing through in comparison to the stronger light experienced when shooting the Provia roll. 

Nevertheless, you can see the film doesn’t perform as strongly in the shadows. Overall, pleased with this batch of images and my personal favourite was this shot of Anna with her arms crossed holding her jacket. 

Shooting Kodak Gold 200

Kodak Gold has made a comeback to medium format and it has been great to see so many photographers getting out and shooting this film. 

Carrying on with the same outfit and vibe, I decided to shoot some in a different location to catch a bit more of the afternoon sunset. 

This time a combination of natural light which has come out with much warmer tones and then brought in the umbrella and profoto to capture these shots with a little bit more controlled light. 

The colour is better balanced particularly with the wonderful warm sunset light radiating off the back of the Victorian buildings. Bit of a New York vibe, no?

Shooting Kodak Portra 800 with Flash

It was twilight and having these tall buildings surrounding us didnt help too much with the light either. It is somewhat fitting that for a camera that I have not shot much with I was reminded to take out some of that Portra 800 that had been knocking about in my film stash from quite a way back. 

I wasn’t going to waste this roll on the hope the images would come out by shooting this pushed 1 stop, let alone 3 stops. All these images were taken having metered using my Sekonic L-308X with the umbrella and profoto a1. 

Shot with this brick backdrop first, trying to capture some variation in styles from Anna. I like the one with Anna sat on the curb out of this mini set. We moved on to take a few with this black backdrop which I think has colourwise come out much stronger. 

When I first saw this on the film strip it looked as if the image had been taken with a greenscreen backdrop applied. 

In hindsight, I was beginning to think how different these images would look had they been shot on Portra 160 or Portra 400. Personally, I don't think it would be very different. What do you think? 

Important Considerations Shooting with Fuji GSWiii

If you are looking to shoot with this wonderful rangefinder camera here are my thoughts on some things you should consider before shooting away. 

First, if you are shooting portraits you have got to make sure you measure the distances between yourself and the subject accurately. 

If you have wonderful 20:20 vision then you might be thinking, wait why can't you just use the rangefinder optics? 

This can be a bit tricky for me and I suspect probably for many others that may have particular eye conditions. 

Easiest way to get around this is to measure the distances. Honestly this will save you a lot of lost frames. 

This particular Fuji comes with a fixed 65mm and if you enjoy shooting street photography could be a fun companion with its 28mm 35mm camera equivalent lens. 

Although primarily known for landscape photography, the  Fuji GSWiii has the potential to give photographers new creative opportunities in portrait photography.  

It got me thinking, are modern digital cameras up to the level of old school medium format cameras? 

I’m not sure, but it could be a fun experiment! Do you have experience with this? Let me know in the comments below. 

Overall, I feel the closer I was shooting to Anna, the richer the details in each of the frames. Images with natural light use of off camera flash came out super well. 

With more shoots I will slowly find my preference, Let’s see where this takes me next! 

Want to stay in the loop with what I am up to and my work? Then keep checking up on my journal here so you’ll never miss a moment!

Shoot It Right With Ilford FP4 Plus

Ilford FP4 is an ISO 125 film which was released originally in 1968, almost 10 years before Kodak Tri-X first hit the shelves. On their website, Ilford FP4 Plus is shown to be a medium speed, all purpose black and white film with very fine grain, and outstanding sharpness. Ilford would go on to say that it has superb exposure latitude, and below its 125 ISO. This makes it very capable for photographing most subjects in areas, and varied lighting conditions.

Can you shoot Ilford FP4 at box speed? 

You definitely can shoot this film at box speed. When you first use it for a shoot, you'll find the film will give you really pleasing results, particularly in its grain, and especially if you are using strong lighting conditions. 

What are some reasons for shooting with this film? 

You can shoot with it in any situation. That's one of the greatest things about this film. You could use it indoors, outdoors. You could shoot portraits, landscapes. You could shoot architecture, you could shoot macro. Whatever it is that you want to shoot, you can get out and shoot with this film. So, it's a great film to have nipped in your bag somewhere. You can whip it out, and use it in any situation. Wherever you might be.

Picture this. You're at a friend's party or perhaps even at a wedding reception, and definitely have a role of this in your back pocket or in your bag. Its wide latitude of exposure will allow you to shoot in variable lighting conditions. Just don't forget to process it accordingly, or get your favourite film processor to do it for you.

It is a significantly cheaper alternative to using Neopan Acros to, or even using Kodak black and white film. It's a little bit more basic, but actually the results that you're going to get from it are going to be very, very similar to what you would get with Neopan Acros or with Kodak T-MAX or Tri-X, for example. So, if that's an important factor for you, then you should definitely shoot with this film.

It's fantastic in strong light, particularly harsh sunlight. So, if you're going to be somewhere where it's going to be like that, then make sure that you've got a role in this. It also has a really good tolerance to bad exposure. So if you don't have a light metre with you or you don't have one, you're guessing, you'll probably get some good results regardless of how you end up shooting with it. Obviously within its parameters.

You're on a budget. We've already talked about the fact that it's cheaper than using Neopan Acros or Kodak. But also, you can buy this in bulk, and that will significantly reduce the costs of shooting with this film. So, if you are planning on shooting black and white, and you want something which is consistent and gives you a great result, then buy in bulk. Roll up your own film at home, and that will save you a lot of money too.

There's probably two main reasons why you probably don't want to shoot with Ilford FP4. First one is that it's contrast is a little bit of a disappointment. So, if you like having that in your images, then you probably don't want to shoot with this film. The grain structure is good, but the contrast is a little bit off. Secondly, if you are based outside the UK, North America, Australasia, wherever it might be, then it might be more expensive for you to get a hold of this film. And so, cost effectively, it may not be the best option for you. But at the end of the day, you should know your own style, and if this is the right one for you, you should definitely check it out.

What can you take away?

It's definitely worth you getting a role and checking it out. Its medium speed will allow you to shoot in a large variety of situations. Whether that's in the studio, whether that's outside on the street, or even shooting landscapes, you're going to get some fabulous results due to its wide exposure latitude. With that in mind, definitely take the time to work with this film, especially if you like the grain on it, and you like images with a little bit more controlled contrast in it. Certainly, definitely worth trying in lots of different scenarios. Take it for a walk wherever you might be, and see what you get.

I absolutely loved shooting this film and would love to hear your thoughts on Ilford FP4. Have you shot with it? What kind of results did you get with it? Let me know in the comments below? 

Do go ahead and subscribe and turn on the bell icon so you'll know exactly when the next video of this series of videos is gonna drop and I look forward to seeing you in a workshop with me very, very soon.

Start Shooting with Ilford FP4 here

Ilford Ortho 80 on Zeiss Ikon Nettar

A little unknown gem by the masters of Black and White film, Ilford Ortho is an orthochromatic, black and white film, which offers fine grain and sharpness. Pre 2019, was only available in four by five large format, however, with the resurrection of medium format and 35 millimetre shooters, Ilford released this in these formats as well. Ilford, you legends! Ilford recommends using it in landscapes, so naturally I started with shooting it in the urban jungle. 

What is orthochromatic film? [I hear you cry!] 

This film is made with silver halide crystals, which are naturally blue sensitive. They first came out back in 1873 and were used in 30 films and movies. This is the reason why skies in the early photographs are almost white being blue, as it overexposed quite easily. The orthochromatic film cannot see red lights as well, so anything red will turn black. This also means that if you process the film at home, it can be handled with deep red safelight. 

As it is a low grain, a high detail film, it needs a lot of light. Ideally suited for landscape photography as Ilford had recommended himself. It's well-worth shooting portraits with this as well I think. If you enjoy developing at home or in your own lab, the blue and green sensitivity of this emulsion enables the film to be handled in deep red, safelight conditions as I mentioned earlier. This will naturally make the processing of this film a lot easier. 

Can you shoot Ilford Ortho 80 at box speed? 

Absolutely, Ilford Ortho 80 is DX coded for ISO 80 for daylight / natural light shooting. I do love working with Black and white film and you will find working this film very satisfying too. It can produce very sharp, detailed images with almost no grain in sight.

You can use this film for portraits or landscapes, take your pick! I was shooting this film in some overcast conditions which gave a wonderful natural soft box. Ideally however I would have preferred a little bit stronger light as I did struggle with the very low light conditions in some images. 

Five reasons you should shoot with this film. 

  1. You enjoy shooting sharp images with no grain. 

  2. You're creative, and love shooting black and white. In particular, you want your reds and oranges in frame to come out, pitch black. Think of all the oranges and reds that could come out black in your style of photography. 

  3. You love working with shadows and contrast, particularly with skies. 

  4. You love or travel somewhere, you have wonderful light and colours available to you in your local environment. 

  5. You're creative and you just want to keep exploring and deepening your own photographic journey. 

Why you should not shoot with Ilford Ortho 80? 

It is an ISO 80 film, which makes it one of the slowest films available on a very limited film market in the first place. If you live somewhere like the Mediterranean then this should not be a problem for you. But for those of you who live in the Northern or Southern Hemisphere, it won't give you the flexibility you may achieve with a ISO 200 or 400 film in your varied climatic and weather conditions. 

You also need to take into account that your oranges or reds are going to come out very black too. As an orthochromatic black and white film, it is less sensitive to red than to green and blue. And as such, you need to be aware that probably this is not going to be ideal for portraits, but it will likely give you some unique looks for landscapes and flowers. 

What can you take away about Ilford Ortho 8O? 

I shot this film in the street down the East End and would be intrigued to see how this would perform in autumnal conditions. To see how the colours of the leaves would be rendered in black and white, as well as shooting it in a studio portrait shoot, to see how it fairs with skin tones.

Shooting very blue walls, in some of these images you've seen the whites came out absolutely electric. It'll be interesting to see whether this could add a new element to work with. Furthermore, how would fair with the bright blue sky? With that in mind I wonder how a sunset would also come out too? The oranges would certainly come out quite black. So theoretically it could create some very dramatic images. Shooting in tungsten light, now that would be something else. 

Overall, this film pushes you as a photographer to think about details, which is excellent. The more you're pushing yourself to create using different techniques and mediums will develop not only your portfolio, but also your understanding of working in different conditions and with different materials. Who knows? You may capture an image which may take you down a new path of creativity. So just get out and explore.

Try Ilford Ortho 80 out on 35mm

Try Ilford Ortho 80 out on Medium Format

How to use Holga 120WPC Pinhole Camera

In this video I will be unboxing the Holga 120 WPC Pinhole Camera and running a roll of Ilford Delta 100 through it. You’ll learn what you get in the box and how to start shooting with this incredibly simple to use pinhole camera in very little time.

What is a Holga 120 WPC Pinhole Camera?

The instructions manual is about 6 pages long. If you are confident with your analogue film photography skills you can skip this, however it will only take a few minutes to read and may save you from making any little mistakes!

The Holga 120 WPC comes with a 6x12 mask and a 6x9 mask. The 6x12 mask will allow 6 full sized medium format images to be taken and on the 6x9 in total 8.

Gently remove the silver hooks to open up the back of the camera. On the back of the camera, you've got a few instructions, the exposure guide. It outlines your exposure settings working with 100 ISO film. For fine weather, hold the shutter down for seven to nine seconds, overcast 10 to 12 seconds, and then for morning and dusk settings, up to 13 seconds.

I strongly recommend that you go and get the light meter, you can download it onto your phone and then adjust it using that. But I also believe that there must be some instructions on here about setting exposure times. Nope, there's only the exposure table, which is here, which is the same as what you get on the back here.

How to take your first shot with the Holga 120 WPC

Once you have loaded your film into the camera and firmly closed it shut. Mount your camera to a tripod and take off the plastic pinhole cover.

The shutter release button is located next to the pinhole. To release the shutter simply push the/depress the shutter and light will pour on to your film. Once the shutter button is depressed just hold it down for however long you want to expose the shot for.

I strongly recommend using a cable release for this as manually depressing the shutter will lead to camera shake and may affect the quality of your final image. Essentially screw the cable release in the shutter release button and then you can just hold the cable release down for however long you want and then let go.

In this video I use Ilford Delta 100 professional film, so this should give us a good range of images. If you expose it correctly. Place the film in to the left hand side of the camera and pull the paper across to the right. Carefully make sure the film is secured on to the right spool by rotating the dial at the top right hand side of the camera. Once done close the gates on either side. Make sure these are securely locked. Once done rotate the dial on the top right hand side of the camera. As the film moves along you get some arrows first, some star, sun signs, and then there you go until you get number ‘1’ in the red gate at the back of the camera. Be careful not to overshoot this!

Shooting the first frame

Before you start shooting, make sure that you light meter for the space that you're gonna be shooting. The Holga camera comes with its own set of parameters, it recommends that in fine weather, you want to be holding it for seven to nine seconds. On this F135 aperture,double check and see what settings the light meter suggests. Better to use the most accurate measurements if you have the ability to do so.

In the first frame the white building gave a reading of one second. The blue building in the background, for about two seconds, so a two-second exposure for this to probably have, maybe to be on the safe side, maybe three seconds perhaps.

Once you have your light meter readings get your camera aligned for your shot. At the top of there are three points, which helps you to frame your shot carefully.

The camera also has a useful level bubble to make sure you have the camera aligned completely level. Once you have framed your shot and levelled, take the lens cap off and take your shot!

In the video you will be able to see how I frame up each shot and shoot with the corresponding results.

Conclusion

When shooting with any pinhole film camera there are a number of fundamental things you must use to capture the right shot each time.

  • Tripod

  • A light meter

  • Appropriate film for the day

  • A cable release

When shooting with the camera, remember to skip the frames. Start with Frame 1 and then skip to 3 for your second frame and then 5 for the third frame and so forth in odd numbers. This applies to both 6x9 and 6x12 formats on the Holga 120 WPC. Failure to pay attention to this fine detail will result in multiple overlapping exposures leaving behind half of your negative in post processing blank!

Kodak Portra 400 Fashion & Portraits EP2

Kodak Portra 400 with Bronica Zenza ETRS fashion and portraits second video out of a series of videos that I'm posting on this particular shoot that we did on a summer's day. In this video, we're going to look at how Kodak Portra 400 performs mid morning through to lunch, in the different locations we shot in.

My recommendation to all of you; if you're doing portrait shoots, going out and shooting... make sure that you keep changing where you are! Keep changing your position, your angles, find new spots, and use the environment to your best ability. Using the all tools that you have at your disposal.

I wanted to see how this film would do in broad daylight, but also how it manages in strong sunlight and shadows. You'll see from the images, the different styles, how this emulsion works, and how best to push it if you're gonna use this film.

Go ahead, watch the video, see the images, tell me which images that you like! Which one stood out for you? Let me know in the comments!

Go ahead and subscribe too! Turn the bell icon, so you get the next video drop, which we're coming very, very soon. Enjoy the video everyone!

Fuji GSWiii Simplified with Fuji Pro 400H

I will be using my Fuji GSW690iii 6x9 medium format camera in this video. 

This camera is also known Texas Leica. It is big camera, you will see as I walk along this beautiful riverside on this overcast this afternoon. 

On occasions there is a break in the cloud as the blue sky seeps through. I wonder if this would have an affect on the Fuji Pro400H. 

This colour film stock which has sadly been discontinued will give l about eight shots on a 6x9 frame.

The first few shots were take of these lovely swans down, and then I swung around, and took another shot looking in the opposite direction.  

I ran out of shot pretty quickly so I rolled up another roll of Fuji Pro 400H into this camera, looking forward to seeing what else I would capture next. 

Fuji medium format film comes with a little sticker, so you just lift this part up, and then just swing it around the other side you’ll be able to quickly seal your film once exposed. I think they use a little bit less glue than the other film-producing companies and works a treat without you have to lick it seal the film. 

With the film safe keeping for later, I loaded up  the second roll. You’ll see the direction in which film needs to be rolled on the Fuji GSW690iii. Release the pins on either side and then load up your film. Carefully drag the film across until the arrow and close the film back. Always take your rubbish home with you wherever you are.

I hope you have enjoyed watching the video and seeing the images you can create even in less than perfect situations. 

The more you shoot, the better you'll get over time. I encourage you to get yourself a film camera if you don't already have one. 

If you're still on the ropes about getting one of these Fuji GSW3s, I strongly recommend it. The negative size, it's absolutely enormous. And you'll get a lot, a lot of fun out of it as well.

Nikon FA with Ilford HP5+ Photo Walk

Nikon FA was my first ever 35mm film camera. I had been on the fence for quite sometime so when an opportunity presented itself I jumped on board.

It had been quite some time due to our rolling lockdowns since I had an opportunity to get out and shoot with Lucas. We were both chomping at the bit for some time so at our first opportunity we headed out to East London for some film fun!

We started off outside the ExCel Centre with the aim of heading eastward before turning back here. The walk took us through parts decaying through to the ultra modern (and of course, deserted). Nikon FA was my first ever 35mm film camera. I had been on the fence for quite some time so when an opportunity presented itself I jumped on board.

It had been quite some time due to our rolling lockdowns since I had an opportunity to get out and shoot with Lucas. We were both chomping at the bit for some time so at our first opportunity we headed out to East London for some film fun!

We started off outside the ExCel Centre with the aim of heading eastward before turning back here. The walk took us through parts decaying through to the ultra modern (and of course, deserted).The weather was extremely cold, you could feel the windchill working its way through if I stood around or decided to take a break for too long. The overcast weather also helped the film choice. Ilford HP5+ has a wide latitude so you could easily shoot it at any range from 200-800 ISO without much problem. A good idea is to figure out how much grain you want in your image before you get going.

The first few images of an abandoned building which was bought by Newham Council back in 2015. It sits on prime land, opposite the huge ExCel International Exhibition Centre directly across the River Thames. To its east lies London City Airport and to the West the Financial Capital of the World, Canary Wharf. Unsurprisingly, no decision has been made with regards to those abandoned buildings. Although, how long are they going to ponder on it?

The sky is clear, the sun is out as we continue our walk along the River Thames. Just behind the conference centre is plonked a ‘mobile mini’ which makes no sense either. Anyway, a good snap! As we were coming out of lockdown I could help but think why flights were still going out of London City Airport?

A little further along and more abandoned buildings, brand new ones this time. Empty offices with residential complex above. We arrived just at the right time, the light and shadows with the buildings seemingly converging at the end. One of my favourite shots was the reflection of Canary Wharf behind us in the distance, the clouds and the sun at its full brightness.

We took a break for a bit and started to plot out the rest of the walk. A few clouds rolled in and I remember looking up the flight schedule so Lucas could grab a shot on his Canon 35mm. Luck would have it that as we had walked further along we saw a plane taxiing in the distance (not on the rosta!) and he was able to grab a few shots!

We reached the end of the line to find a water pumping station. We hadn’t been walking along the Thames afterall! It was the end of the Gallions Point Marina. The sun was getting lower at this point and we decided to hustle a bit to a spot Lucas had found on the River Thames. The decaying boat would make a perfect subject for a long exposure shot. Which Lucas had prepared very well for with his 10 stop Lee Filter! We worked our way around to North Woolwich through the Royal Victoria Garden, in much more of a hurry due to light starting to go.

We found our way out to a bridge directly underneath the flight path of City Airport after walking along a dead-end footpath. Perfect opportunity to capture the East London Skyline but this time with Lucas’s ND filter. Unfortunately, I didn’t have the right thread to hook it up so decided to take a risk and take the shot with the ND Filter handheld. The first shot needed better focus as you can see in the video, however, the second attempt was far better. I really like that shot, definitely will need to find some time to have a play with these filters in the future!

Scurrying our way past the Tate & Lyle factory as pedestrians stopped and asked us for directions to the nearest tube station. We made our final stop at the Thames Barrier which has been in operation for over 40 years now. Little is known about how crucial this system is in preventing wide scale flooding in London. The question remains whether it can withstand the future rising challenges the Thames will pose.

The light was almost lost now as I burned off my final few shots checking how well the HP5+ can handle these conditions. A tripod would probably have been useful at this point but otherwise a very fruitful and productive day out shooting film!

Massive thanks to IG @analog_square who is always a dream to work with on any shoot for all the little videos along the way.

Support my work here and get your hands on my prints: https://www.patreon.com/ahsanabbas